September 13, 2020 May 21, 2023
Housing Gauntlets in Wizard101
Housing Gauntlets are free-to-play dungeons found in players’ castles. They are a great source of experience, drops, and a good way to spend some time. This guide will detail all of the housing gauntlets currently available in Wizard101. There are four different types of gauntlets. First, you have the repeatable gauntlets. These generally come from bundles, and can be done an unlimited amount of times. They often have some pretty neat drops.
The second type isn’t necessarily a gauntlet, it’s known as an Ultra duel. These are bought in the Crown Shop or dropped by certain bosses. Ultra duels are a rematch against bosses from the game, with a significant power boost, who drop some powerful gear. Keep in mind that they can only be used once each.
The third type is known as a One-Shot Gauntlet. These unique dungeons are Crown Shop exclusive, and can only be done once, like the ultra duels. However, these drop permanent mounts, as well as some interesting gear (think of it like a pack in gauntlet form).
The last type is Boss Rematches. Similar to Ultra Duels, these involve a rematch against a boss from the Spiral, and they can only be done once. Unlike Ultra Dungeons, each Rematch has several tiers of difficulty and can be crafted.
Housing Gauntlets
Ultra Dungeons
One Shot Gauntles
Boss Rematches
Repeatable Housing Gauntlets
All Repeatable Housing Gauntlets have a difficulty level that is set depending on the lowest leveled participant. Gear tiers are dependent upon this. For example, a level 80 hat will not drop from the level 10 Instance. It’s no longer possible to enter Gauntlets through Castle Tours; you must first be friends with the owner.
Midnight Sun Pagoda
This is available from the Pagoda Gauntlet Bundle, and is sometimes in the Crown Shop during Throwback Thursday. This instance contains 8 floors. This was also one of the first Housing Gauntlets to be released!
- Health & Mana wisps
- 4x Mob
- 4x Mob
- Boss fight with 3 Minions
- 4x Mob
- Puzzle Floor – If the puzzle is incorrectly completed, 4x Mob
- 4x Boss
- 3x Cheating Boss, 1 Minion
Midnight Sun Pagoda Noteworthy Drops
The drops from this instance are mainly from the Kirin’s Hoard Pack. Notable drops include:
- Kozane Set
- Rokugo Set
- Four Bells Ringing Wand
- Chiming Blade Wand
- Onyx Shenlong Dragon Pet
- Ruby Shenlong Dragon Pet
- Fiendish Foo Dog Pet
- Mega Snacks
- Mooshu themed Bobbleheads
- Koto, Tamauji, Kakeda Painbringer, and Ninja Pigs Treasure Cards
Winterbane Hall
This is available from the Winterbane Bundle, and sometimes in the Crown Shop during Throwback Thursday as well. Castle Tours often feature this impressive housing item. You will face 7 challenging floors in this instance.
- 4x Mob
- 4x Mob – wisps spawn after defeating them
- Cheating Boss and 3x Mob
- Puzzle Floor – If the puzzle is incorrectly done, then Double Boss Battle
- One Mob and a Cheating Boss
- Cheating Boss and two Mobs
- Boss with Cheats and three Mobs
Winterbane Hall Noteworthy Drops
The drops from this gauntlet are from the Raven’s Hoard Pack, some of which include:
- Steel Raven Helmet
- Boots Of Steel Wings
- Everwinter Plate
- Unkind Axe of Winter Wand
- Nevermore Talon Wand
- Trickster’s Lying Bow Wand
- Coldfire Dragon Pet
- Grizzleheim themed Runestones
- Mega Snacks
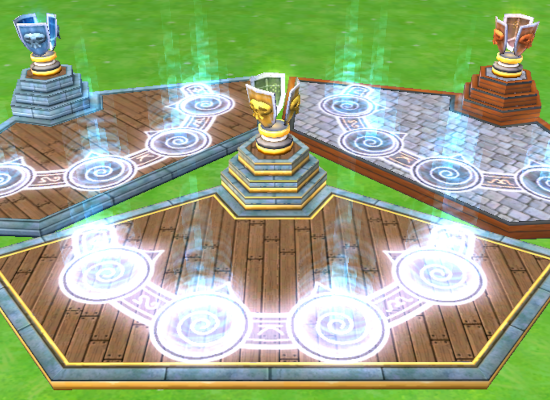
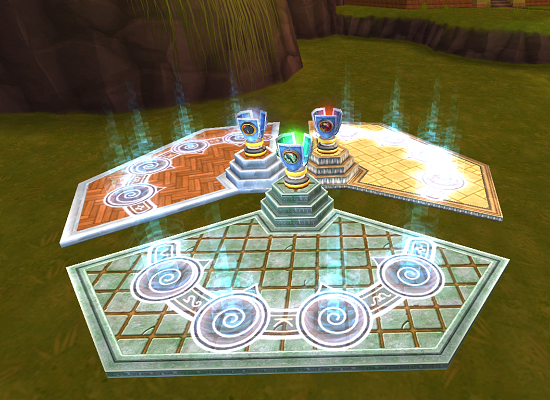
Spiral Cup Gauntlet
The Spiral Cup Gauntlet is available from its respective bundle, and is sometimes brought back into the Crown Shop. It contains 6 levels.
- 4x Mob
- Another 4x Mob
- 4x more Mob
- Cheating Boss with 2 minions
- 4x Mob
- Cheating Boss with 3 minions
Spiral Cup Noteworthy Drops
There aren’t too many noteworthy drops in this instance. However, some of the best energy gear in the game can drop here. Many of the drops are from the Wyvern’s Hoard Pack.
- Greenwarden’s Energetic Set
- Greenwarden’s Peaceful Set
- Spiral Cup Set & Variations – cosmetic only
- Starfish Pet
- Wildclaw Pets
See a detailed overview of the drops from the Spiral Cup Gauntlet here.
Grand Tourney Arena
The Grand Tourney is exclusive to the Grand Tourney Bundle, which is currently retired. There are five levels to this instance. Completion of the associated instance will reward you with a housing item known as the Lady’s Favor.
- 4x Mob
- 4x Mob
- 2x Mob
- Cheating Boss with 3 minions
- Cheating Boss with a Cheating Minion
Grand Tourney Arena Noteworthy Drops
The drops from this Gauntlet are from the Hoard of the Hydra Pack, which is currently retired. Notable drops include:
- Fairie Court Set
- Pixie’s Encanta Set
- World’s Fool Set
- Mandolin Weapons
- Mega Snacks
- Crabling Pet
- Desert Beast Pet
The Great Clock Gauntlet
The Cuckoo Clock Housing Gauntlet is exclusively from the Cuckoo Clock Bundle, and is based off of Valencia from Pirate101. There are four battles in this gauntlet.
- 2x Mob
- 2x Mob
- Cheating Boss and one minion
- Cheating Boss and one minion
The Great Clock Noteworthy Drops
The drops from this gauntlet are from the Phoenix Hoard Pack. In addition to gear, this instance also drops some treasure cards that are very handy for PVP. Some of these drops include the following:
- Chimenea Treasure Card
- Clockwork Spider Treasure Card
- Coldiron Treasure Card
- Firegut Treasure Card
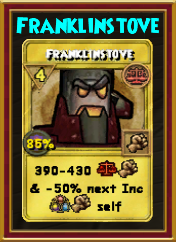
- Franklinstove Treasure Card
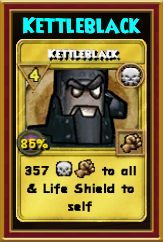
- Kettleblack Treasure Card
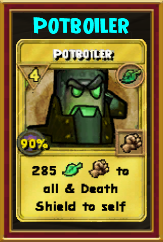
- Potboiler Treasure Card
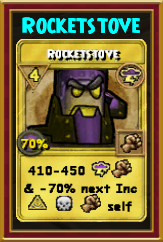
- Rocketstove Treasure Card
- Avenging Helm of Glory
- Boots of Walking Retribution
- Glinting Dragon Lance
- Bronze Golem Pet
- Clockwork Paladin Pet
- Spider Golem
Fantastic Voyage Expedition
The Fantastic Voyage Housing Gauntlet is exclusively obtained in the Fantastic Voyage Bundle. The gauntlet has four levels, and is one of the easier instances.
- 2x Mob Battle
- 4x Mob Battle
- 2x Mob Battle
- Cheating Boss with 3 Mobs

Fantastic Voyage Expedition Noteworthy Drops
The drops for this instance aren’t as remarkable as you’d hope. They feature items from the Islander’s Hoard Pack.
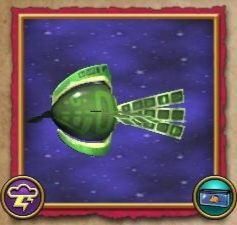
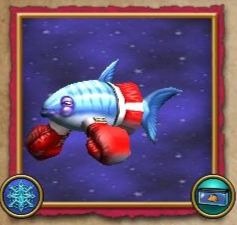
- Frosty Fish Pet
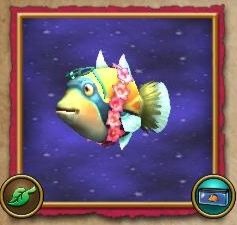
- Tiki Kahuna Pet
- Cephalopod Obelisk Housing item – used for crafting Wyrd House
- Mega Snacks
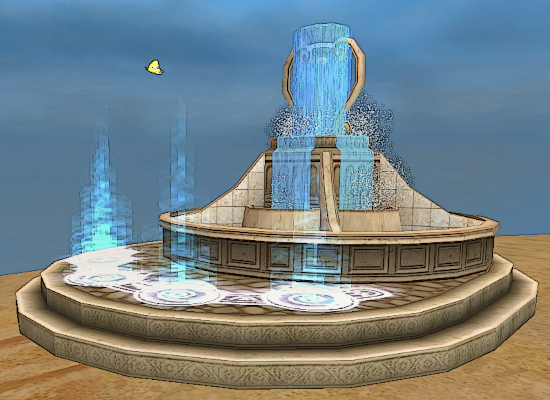
For the fishers in the Spiral, this is one of the best places for you! After defeating the final boss, you are rewarded with Coosto’s Fishing Luck Elixir, giving you 33% Fishing Luck! You are also granted access to a private fishing area, which includes a variety of fish. Some of these are:
Micro Fish
Shiner
Humunukapua
False Catshark
Once you have completed the instance once, you can enter the instance and interact with the fishing rod on the left and be sent to the fishing retreat without needing to go through the entire dungeon again.
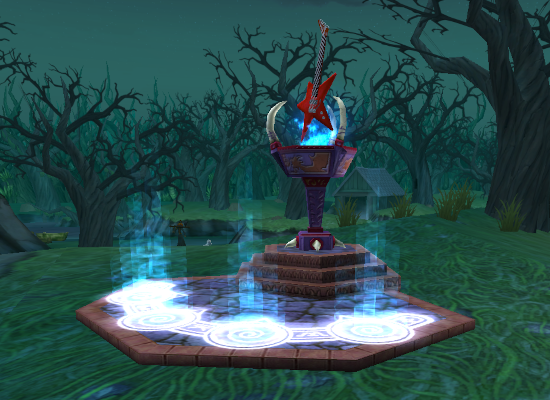
Accursed Play Gauntlet
The Accursed Play Gauntlet is exclusive to the Accursed Play Bundle, and is a highly sought after gauntlet since its drops include the renowned pigsie treasure card. It is the shortest instance, and also the quickest one.
- 2x Mob
- 2x or 4x Mob – 2 Additional will spawn if there are more than two wizards participating
- Cheating Boss with 3 minions
Accursed Play Noteworthy Drops
The drops in this instance originate from the Dragon’s Hoard Pack, which is a pack that was retired in 2013. There are a few other amazing drops too, some of which include:
- Dragonrider’s Assailing Set
- Dragonrider’s Utility Set
- Crimson Spectre Pet
- Skeletal Gladiator Pet
- Utility Dragon Pet
- Dragon Wings Permanent Mount
- Pigsie Treasure Card – extremely sought after, needed to craft Pigsie spell
- Outgoing and Stun Resist jewels
Sinbad & the Iron Sultan
The Sinbad Gauntlet is also known as the Metallos Instance. This can be obtained by crafting the gauntlet using reagents found the Sinbad’s Hoard Pack, or bought off the Wizard101 website. There are four battles in this instance along with an optional side boss.
- 2x Mob
- 3x Mob
- 3x Mob
- 2x Cheating Boss with 1 Mob
- Optional Fight – random between single monster and cheating boss (Leadite or Metallossus)

Sinbad & the Iron Sultan Noteworthy Drops
The drops from this Housing Gauntlet are without a doubt, the most generous in the game. These include items from the Sinbad’s Hoard Pack, which include the current best wands in the game at level 130. Some notable items are:
- Sinbad’s Set – cosmetic
- Fleet Kapudan’s Set
- Grand Admiral’s Set
- Sky Captain’s Set
- Admiral’s Boarding Hook Wand
- Kapudan’s Boarding Hook Wand
- Sky Captain’s Boarding Hook Wand
- Plucky Gryphon Pet
- Snappy Gryphon Pet
- Scrappy Gryphon Pet
- Roc Mount – Permanent with 3% Power Pip stats
Doomsday Krok Gauntlet
The Doomsday Krok Gauntlet can either be crafted using Time Lime reagents found in the Doomsday Krok Hoard Pack or bought directly from the bundle on Wizard101’s website. Featuring some revamped Krokotopian models, this alternate reality is nothing short of stunning. This instance features 5 fights, along with a secret boss.
- 3-4x Mob
- Elite Monster with 2 or 3 Minions
- Boss
- 4x Elite Mobs
- Chest Boss with 3 minions
- Bonus fight of 3-4 bosses
Doomsday Krok Noteworthy Drops
The drops for this dungeon feature a lot of items from the Doomsday Krok Hoard Pack. Mounts drop from the secret Cybermander bosses. Gear drops from Krokhotep and the Time Butterfly bosses. Drops include:
- Krokosphinx Mounts
- Sokar’s Set
- Setesh’s Set
- Apophis’ Set
- Elemental Retriever Talent Token
- Smoke Screen Talent Token
The Great Sky Train Robbery Gauntlet
The Great Sky Train Robbery Gauntlet can either be crafted using Ticket reagents found in the Great Sky Train Robbery Pack or bought directly from the bundle on Wizard101’s website. This instance features 5 fights and a thrilling Cool-Ranch-themed story!
- 3-4x Mob
- 3-4x Mob
- 3-4x Elite Mob
- 3-4x Mob
- 4x Cheating Bosses

Great Sky Train Robbery Noteworthy Drops
The drops for this dungeon feature a lot of items from the Great Sky Train Robbery Pack. Housing items drop from every fight, and gear drops from the final boss fight. Mounts and pets also drop here, although there is also a chance to get them from the secret Play-As-Your-Pet Daily Reward at the end. Drops include:
- Armadillo Mounts
- Cool Rancher’s Set
- Desert Wrangler’s Set
- Prairie Rambler’s Set
- Roadrunner Pets
- Housing Items such as Ranch Fence, Red Brick Fireplace and Cloth Covered Country Table
Unforgiven Dead Gauntlet
The Unforgiven Dead Gauntlet can either be crafted using Peat reagents found in the Unforgiven Dead Pack or bought directly from the bundle on Wizard101’s website. This instance features 5 fights, along with a secret boss.
- 3-4x Mob
- 3-4x Mob
- 3-4x Mob
- 3-4x Mob
- Cheating Boss with 3 Minions
- Bonus fight with Secret Boss
Night Mire Gauntlet
The Night Mire Gauntlet can either be crafted using Moss reagents found in the Night Mire Pack or bought directly from the bundle on Wizard101’s website. This instance features 5 fights, along with a secret boss.
- 3-4x Mobs
- Elite Monster with 2 or 3 Minions
- Cheating Boss with 2 or 3 Minions
- 2x Elite Monsters with 1-2x Mobs
- Cheating Boss with 2 Minions
- Bonus fight with 3x Cheating Bosses
Ultra Duel Housing Gauntlets
Ultra duels are a rematch against bosses from the game, with a significant power boost than their original versions, who drop some powerful items. Keep in mind that these Housing Gauntelts can only be used once each. These are bought in the Crown Shop or dropped by certain bosses. Bosses that drop them generally are end world bosses like Krokopatra, Meowiarty, Jade Oni and so on. On top of that, they can also drop from other battles like Zeus in Mount Olympus, Rattlebones in Unicorn Way, and Mirror Lake as well.
Rattlebones Master Duel
The Rattlebones Master Duel is dropped by many different bosses throughout the spiral, and available in the Crown Shop. This single duel will feature a Rank 7 Rattlebones and a Rank 7 Fairy Queen. The queen regularly spawns minion fairies as well. Since this dungeon is meant for Master level wizards, the drops are catered towards level 40 wizards. Notable Drops include:
- Bonebreaker Set – for each school, the robes are the best part of the gear (School Exclusive)
- Bonebreaker Wands (School Exclusive)
- Manticore Hairstyle
- 2 Pip Bad Juju Treasure Card
- Mote of Transport
- All Ultra Plants
- Death Whirlwind Permanent Mount
- Life Whirlwind Permanent Mount
Rattlebones Exalted Duel
The Rattlebones Exalted Duel is much much harder than the Rattlebones Master Duel, and is dropped or purchased from the same places that it is too. Unlike the Master Duel, you will face a Rank 14 Rattlebones and Fairy Queen, along with their minions. For a guide on how to deal with this challenging duel, check this out!
The drops from this duel are for Exalted Wizards, and feature robes that are better than some schools’ Darkmoor Gear. This article goes into depth about what your drops would give you. Drops include:
- Bonesmasher Set (School Exclusive)
- Bonesmasher Wands (School Exclusive)
- Shift Rattlebones Opal
- All Ultra Plants
- Rattlebone’s Sprite Pet
- Death Whirlwind Mount
- Life Whirlwind Permanent Mount
- Mote of Transport

Meowiarty Archmage Duel
The title for this Duel is a little misleading, since it’s geared towards level 70 Wizards, or Transcendent wizards. You can buy this from the Crown Shop or farm major bosses around the Spiral for this gear. You will face Meowiarty, two other random Marleybone Bosses, and a minion. The drops from this include:
- Knave’s Set (School Exclusive)
- Knave’s Wands (School Exclusive)
- Yaxche Hairstyle
- Meowiarty’s Ghoul Pet
- Meowiarty’s Krok Pet
- All Ultra Plants
- Mote of Transport
- Balance Whirlwind Permanent Mount
- Ice Whirlwind Permanent Mount
Meowiarty Exalted Duel
You can get this duel from the Crown Shop as well as from major bosses around the Spiral. Like the Archmage Duel, you will encounter Meowiarty, two other random Marleybone bosses, and a minion, except once again, all Rank 14. The drops aren’t too notable, but the boots used to be considered top tier until more critical boots were created. Some notable drops include:
- Rogue’s Sets (School Exclusive)
- Rogue’s Wands (School Exclusive)
- Shift Meowiarty Opal
- All Ultra Plants
- Balance Whirlwind Permanent Mount
- Ice Whirlwind Permanent Mount
Krokopatra Master Duel
This duel is also available in the Crown Shop and dropped from Major Bosses, like the other Ultra Duels. You’ll face off against a Rank 8 Krokopatra with 3 cheating minions. The drops are pretty nice for a level 40 wizard though, including but not limited to the following:
- Krokomaic Sets (School Exclusive)
- Krokomaic Wands (School Exclusive)
- Krokopatra’s Troll
- Ultra Plants
- Fire Whirlwind Permanent Mount
- Myth Whirlwind Permanent Mount
Krokopatra Exalted Duel
The Krokopatra Exalted duel is acquired from the Crown Shop as well as dropped from major bosses in the spiral. You’ll fight a more challenging Rank 14 Krokopatra with 3 Minions. The drops are fairly average, except for the hats. For certain schools, these hats are better than Darkmoor Gear. The Stats of these hats can be found here. Some of these drops include:
- The Mists DunDara Hairstyle
- Krokopatra Sets (School Exclusive)
- Krokopatra Wands (School Exclusive)
- Shift Krokopatra Opal
- Ultra Plants
- Fire Whirlwind Permanent Mount
- Myth Whirlwind Permanent Mount

Zeus Exalted Duel
The Final Exalted Duel is very Aquila themed. There is only an exalted version of this instance, and it can be found in the Crown Shop as well as from many Bosses. You’ll be dealing with a Rank 14 Zeus Sky Father, as well as Cronus, and two other random Aquila Bosses. The drops from this duel aren’t very good, but there are some very unique drops. Some of these are:
- Immortal’s Sets (School Exclusive)
- Immortal’s Wands (School Exclusive)
- Mega Snacks
- Fire Whirlwind Permanent Mount
- Life Whirlwind Permanent Mount
- Storm Whirlwind Permanent Mount
- Ultra Plants
- Several Jewels giving spells that use the Aquilan Bosses’ Natural Attacks
- Zeus’ Harpy
One-Shot Housing Gauntlets
You can only use these housing gauntlets once each. To repeat them, you need to repurchase them from the Crown Shop. Think of it like a pack that requires you to defeat the creatures within a dungeon in order to get the loot. However, you can also share it with your friends rather than just you getting the rewards. The owner of the gauntlet must set the difficulty of the instance before entering the dungeon as it doesn’t work like other gauntlets where the level is set to the lowest wizards’.
Tanglewood Terror
The Tanglewood Terror can only be bought in the Crown Shop. In this Wysteria Themed instance, you deal with 4 Battles:
- 4x Mob
- 4x Mob
- Once again, 4x Mob
- Cheating Boss with 3 Minions
For more information about the battles, check out this article!
Tanglewood Terror Noteworthy Drops
The drops from this dungeon are unique, and are exclusive to this instance. Some of these drops include:
- Plant Punisher Set
- Tanglewood Hero Set
- Tanglewood Terror Set
- Plant Punisher’s Spike Wand
- Tanglewood Hero’s Nettle Wand
- Stained Glass Roller Pet
- Tanglewood Stalker Permanent Mount
Baddle of the Bands
We get to help Crab Alley’s very own King Thermidor in this instance! His former bandmate is challenging his reign, and you’re the only one who can help. With some hilarious dialogue and some amazing music, this is my personal favorite gauntlet. You’ll be dealing with 4 battles in this instance.
- 4x Mob
- Boss and three minions
- Boss and three minions
- Final Boss and three minions
For more information about this Gauntlet, check out this article!
Baddle of the Bands Noteworthy Drops
The drops from this instance are pretty cool looking, but the stats aren’t too remarkable. The best drop from this by far though, is the “Rockstar Kicks.” These boots give the most universal resist in the game, and are a must have for universal immunity.
- Headbanger’s Set
- Rocker’s Set
- Rockstar Set
- Headbanger Wand
- Rocker’s Wand
- Rockstar Wand
- Playable Instrument Housing Items
- Metalops, Punklops, and Rocklops Jewels
- Rockin’ Roller Pet
- White Striped Ziger Permanent Mount
Boss Rematches
Boss Rematches are very similar to Ultra Duels. Introduced in Spring 2022, these one-shot housing gauntlets give us a chance to fight old enemies from the Spiral once more. Boss Rematches are craftable, with subsequent craftings costing less than the original. See our dedicated guide to Boss Rematches for all the crafting recipes. These Rematches were specifically designed as sources for spellements and Azoth, rather than powerful gear. Currently, each Rematch has three tiers of difficulty: levels 1-50, levels 51-100, and levels 101+. They will scale to the lowest level wizard in your team, but if your wizard is a higher level than that tier, you won’t receive any drops.
Lord Nightshade Rematch
In this Rematch, Lord Nightshade is a Rank 20 Death Boss, with his fair share of cheats. See our dedicated guide here. Rank 1-2 spellements can be dropped here, including:
- Balance: Scarab, Scorpion
- Death: Dark Sprite, Ghoul
- Fire: Fire Cat, Fire Elf
- Ice: Frost Beetle, Snow Serpent
- Life: Imp, Leprechaun
- Myth: Blood Bat, Troll
- Storm: Thunder Snake, Lightning Bats
Krokopatra Rematch
In this Rematch, Krokopatra is a Rank 20 Storm Boss, with her fair share of cheats. See our dedicated guide here. Rank 3 spellements can be dropped here, including:
- Balance: Locust Swarm
- Death: Banshee
- Fire: Sunbird
- Ice: Evil Snowman
- Life: Nature’s Wrath
- Myth: Cyclops
- Storm: Storm Shark
Meowiarty Rematch
In this Rematch, Meowiarty is a Rank 20 Myth Boss, with three Fire minions and his fair share of cheats. See our dedicated guide here. Rank 4 spellements can be dropped here, including:
- Balance: Gearhead Destroyer
- Death: Vampire
- Fire: Immolate
- Ice: Ice Wyvern
- Life: Seraph
- Myth: Cyclops Minion
- Storm: Kraken
Jade Oni Rematch
In this Rematch, Jade Oni is a Rank 20 Life Boss, joined by Death Oni, Plague Oni, and War Oni, all with their own cheats. See our dedicated guide here. Rank 5 spellements can be dropped here, including:
- Balance: Spectral Blast
- Death: Skeletal Pirate
- Fire: Phoenix
- Ice: Blight Hound
- Life: Earth Walker
- Myth: Minotaur
- Storm: Stormzilla
Malistaire Rematch
In this Rematch, Malistaire is a Rank 20 Death/Fire Boss, joined by his wife Sylvia Drake, each with their own cheats. See our dedicated guide here. Rank 6 spellements can be dropped here, including:
- Balance: Hydra
- Death: Wraith
- Fire: Helephant
- Ice: Colossus
- Life: Centaur
- Myth: Stone Colossus
- Storm: Triton