October 5, 2022 May 20, 2023
Wizard101 Daily Rewards
Everyone loves to get something for free, and Wizard101 is no different. We already know about Daily Assignments from Aegon Statz, and Daily PvP Assignments from the Arena. But did you know that you can get Daily Rewards from your Houses, too?
There are currently 21 Houses granting Daily Rewards, as well as 6 Housing Items. They can offer some fun rewards, including gold, treasure cards, pets, housing items, seeds, reagents, or pet snacks. Some of these rewards are definitely better than others, but at least they are free! You can access most of these rewards from Castle Tours (so you don’t need membership), and as the name suggests, can visit every day for a different reward.
Daily Rewards from Houses
Aero Village – Wind Turbine

- Aero Plains Bundle Gift Card
The Wind Turbine overlooks the Aero Village, but the way to access it is actually very well hidden. When you appear at the Spiral Door, follow the path on the left to the top of the hill. Do not enter the tower, but go behind it, to find a secret passage in the rock wall. In the tunnel, turn immediately left and there is another secret passage in the rock. Go up the steps, where you will find the Wind Turbine.
The Wind Turbine can drop gold, pet snacks, reagents (including Aethyr Ore and Stone Block), treasure cards (mostly mutate spells), housing items (including farm-related items), seeds (including Ultra Snap Dragon and Moon Flower), and various pets. The dropped pets include Armordillo, Bumble Bee, Firecat, Firestorm Quetzal, Mustard Troll, Myth Imp, Purple Globulin, Resolute Bloodbat, Scarab, Scorpion, Skink, and Sun Bird.
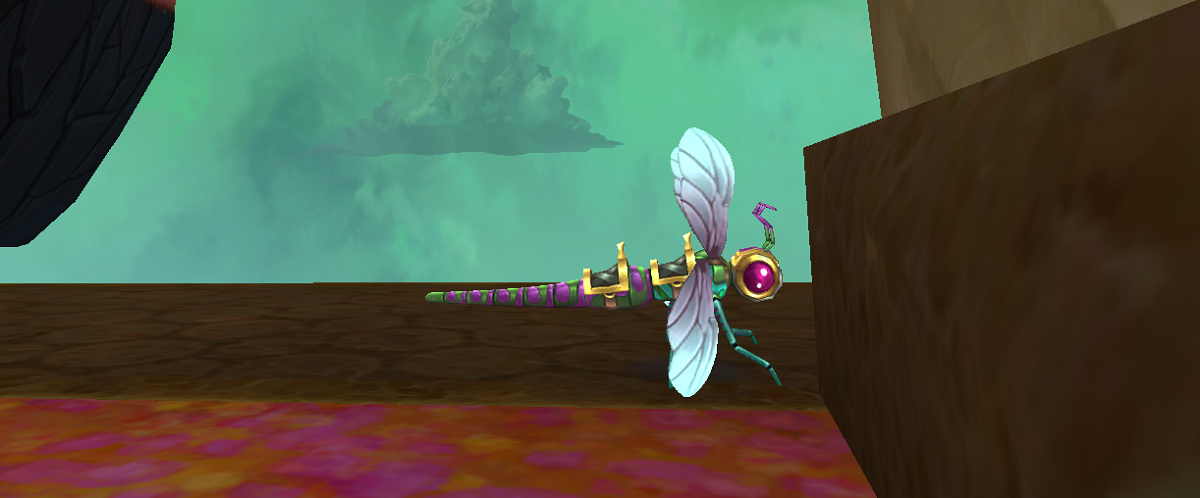
Amber Estate – Dragonfly Ride
- Hive Bundle Gift Card
This is the longest and most unique of the Daily Rewards to date. When you appear at the Spiral Door, take the right-hand side path, and follow it under the land bridge. You will find your Dragonfly Ride there, waiting to take you for a quick spin around the Estate!
The Dragonfly Ride can drop gold, pet snacks, reagents (including Acorn, Fossil, Nightshade and Water Lily), and treasure cards (including some gardening spells).
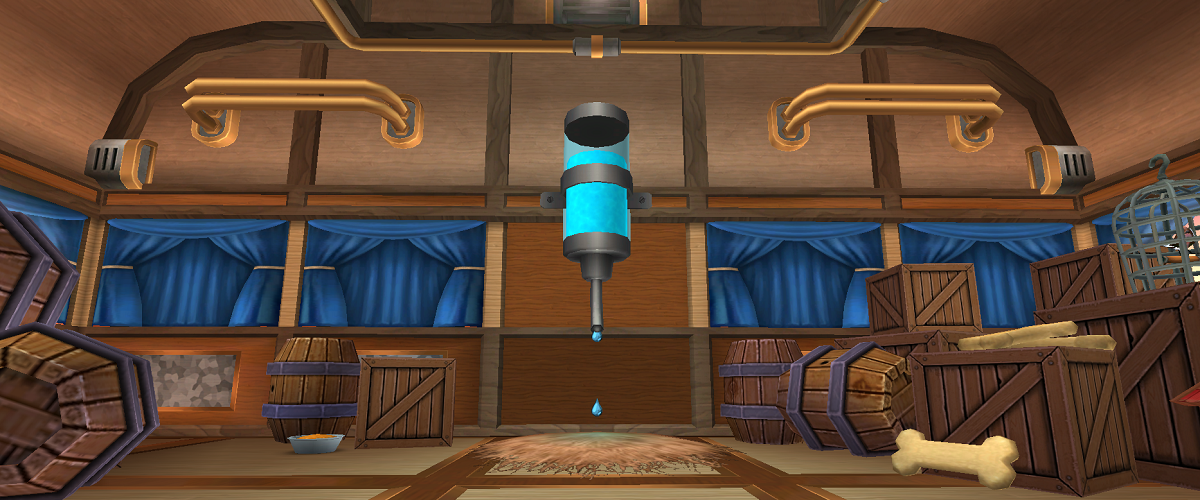
Battlemage Keep – Cauldron

- Battlemage Keep Bundle Gift Card
The Cauldron is not easy to find. Once you enter the castle (you can use the teleporter to get there faster from the Spiral Door), go through the second (middle) archway on the right-hand side, and then immediately turn right to go down the stairs to the basement. Once there, find the back wall (turn around so that the entrance to the stairs is facing away from you), and locate the second wall panel from the right. You can walk through the wall here, into the room where the Cauldron is located.
The Cauldron can drop gold, pet snacks, reagents (including Kelp, Stone Block and Scrap Iron), treasure cards (primarily shields, traps and prisms), housing items (including Ravenwood-related items), seeds (including Ultra Snap Dragon), and several pets. The dropped pets include Arctic Serpent, Beastmaster’s Eagle, Dark Sprite, Fang Bat, Frog, Frosty Krokomummy, Furious Krokomummy, Grizzley Boar, Ice Salamander, Life Troll, Mander, Silver Colossus, Storm Salamander, Winged Catastrophe.
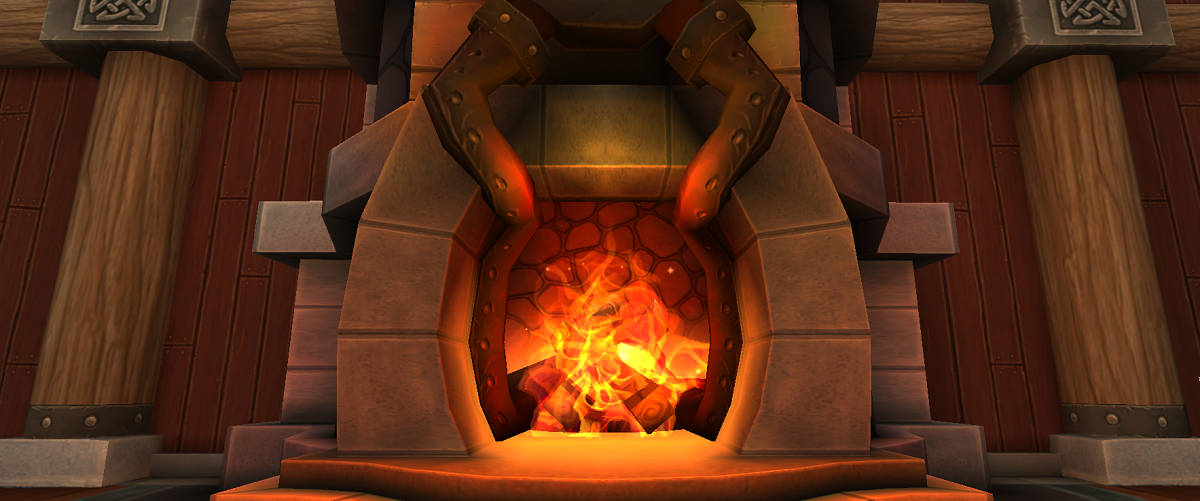
Blacksmith’s Fjord – Forge
- Blacksmith’s Fjord Bundle Gift Card
This is possibly the most well-known of the Daily Rewards. To find the Forge, simply enter the Fjord house, go through the right-hand side archway, and then turn right again.
The Forge can drop gold and reagents (including Amber and Star Iron). This house is popular for its chance at dropping Amber, and can drop up to 5 Amber at once (or more during the Double Reagents member benefit!)
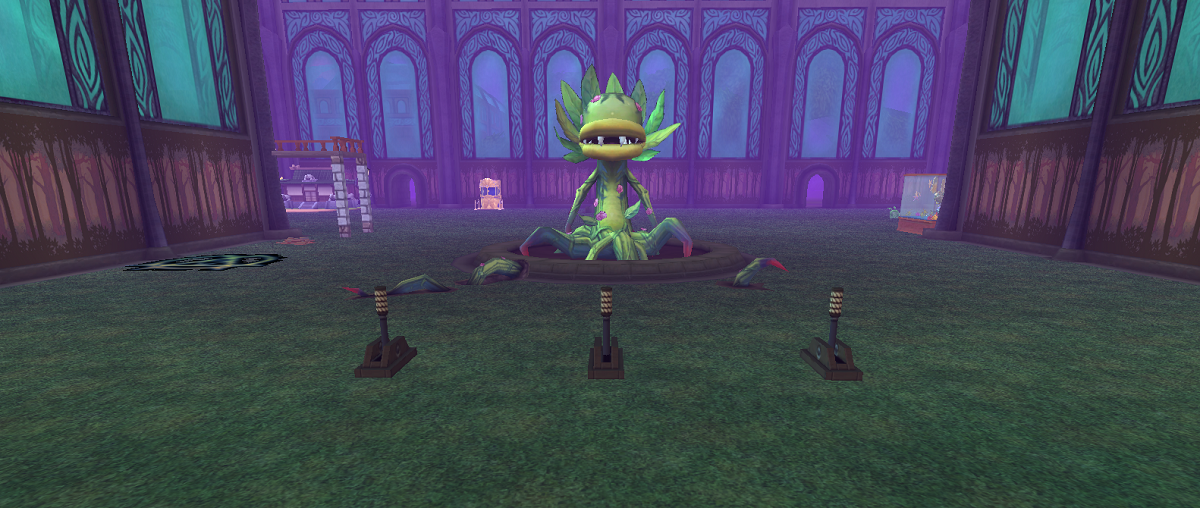
Botanical Gardens – Aberrant Carnivorous Plant
- Evergreen Bundle Gift Card
The Abberrant Carnivorous Plant is easy to find: simply enter the house and you will see it. There are three options to chose from: Pollenate, Rain, or Sunshine. The option you chose will determine which type of treasure card you receive, for example, if you choose Sunshine, you may receive Brilliant Beams or Streaming Sunlight.
The Aberrant Carnivorous Plant can drop gold, pet snacks, reagents (including Water Lily, Nightshade and Grendelweed), treasure cards (including gardening spells, depending on which option you choose), housing items (including plant pots and gardening-related items), and seeds (including Prickly Bear Cactus and Boom Shroom).
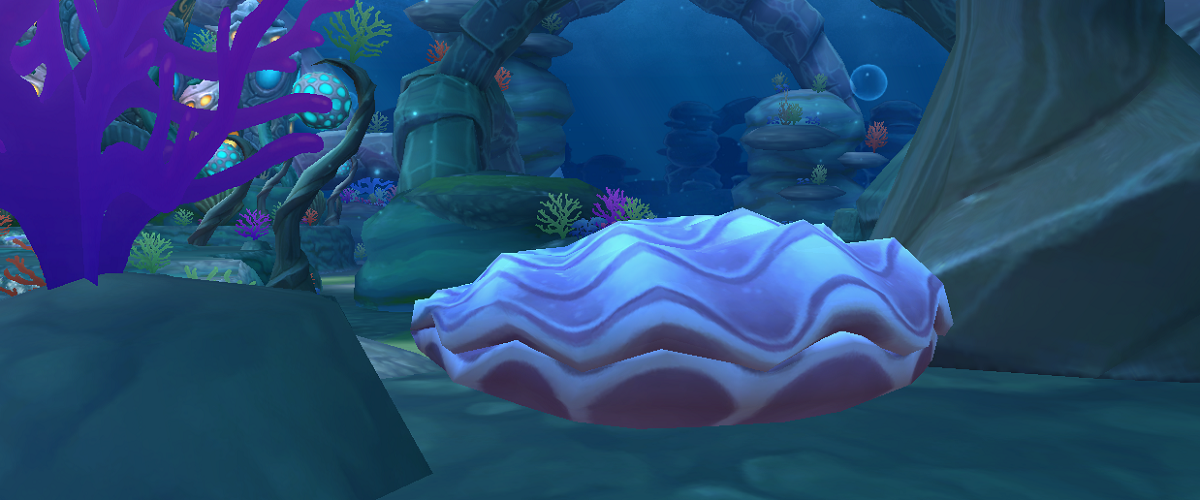
Briny Deep Retreat – Pearl Clam
- Undersea Enchantment Bundle Gift Card
Of all the Daily Rewards, the Pearl Clam is possibly the easiest to find. When you appear at the Spiral Door, it is just in front of you (slightly to the right).
The Pearl Clam can drop gold, pet snacks, reagents (including Aethyr Ore and Antiques), treasure cards, housing items (mostly ocean-related items), seeds (including Ultra Snap Dragon and Moon Flower), and the Frog, Helephant, Scarab and Wraith pets.
Candied Isles Village – Chocolate Fountain

- Candied Isles Bundle Gift Card
The Chocolate Fountain is located in the centre of the group of buildings, just in front of you as you appear at the Spiral Door. If only we could get a taste of it!
The Chocolate Fountain can drop gold, pet snacks, reagents (including Stone Block and Cat Tail), treasure cards, and the Fire Salamander, Pink Jellyfish and Stone Colossus pets.
Castaway’s Bungalow – Lost & Found
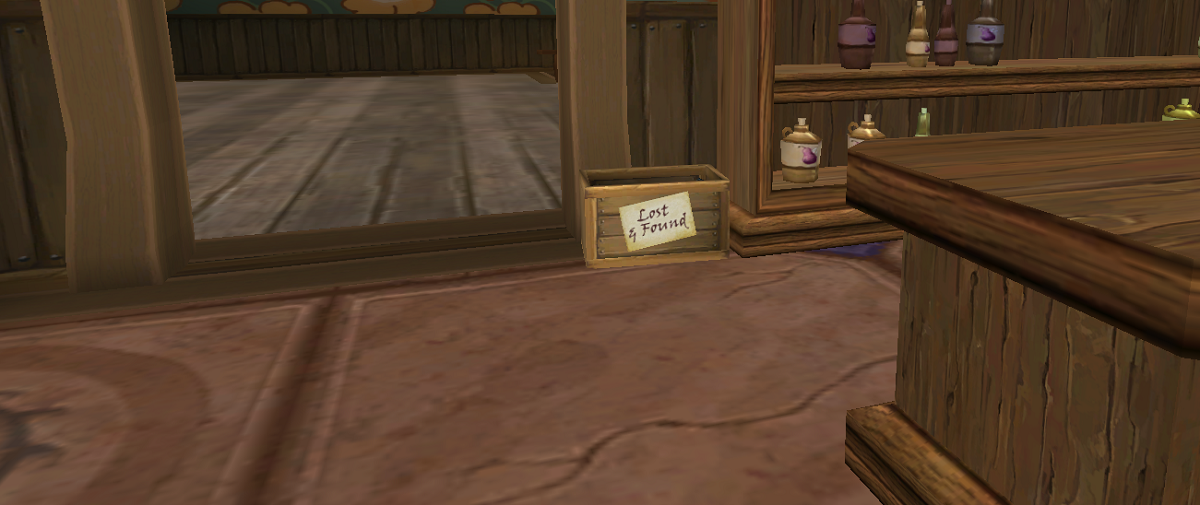
- Empyrean Castaway Bundle Gift Card
You never know what you might find in the Lost & Found. To have a rummage through it, simply enter the Bungalow house and go behind the bar, behind the NPC Lautrec.
The Lost & Found can drop gold, pet snacks, reagents (including Amber, Fossil and Sunstone), treasure cards (mostly mutate and astral spells), housing items (mostly small decorations from various worlds), seeds (including Sunion and Sugar Khrystal), and over 20 different pets. The dropped pets include Dill Piggle, Fate Sealer, Gargoyle, Golden Goose, Magma Colossus, Pixie Queen, Snake in a Basket, Spirit of Nature, Toaddle.
Catmandu Sanctuary – Sacred Yarn Acolyte

- Catmandu Sanctuary Gift Card
Looking for a little wisdom? The Sacred Yarn Acolyte can provide! He is located outside the temple on top of the mountain. To get there, follow the path up the hill on the left of the house entrance. Then, head towards the archway in the mountainside. You will magically appear before him!
The Sacred Yarn Acolyte can drop gold, pet snacks, reagents, and fall-related housing items.
Darkmoor Manor – Sarcophagus
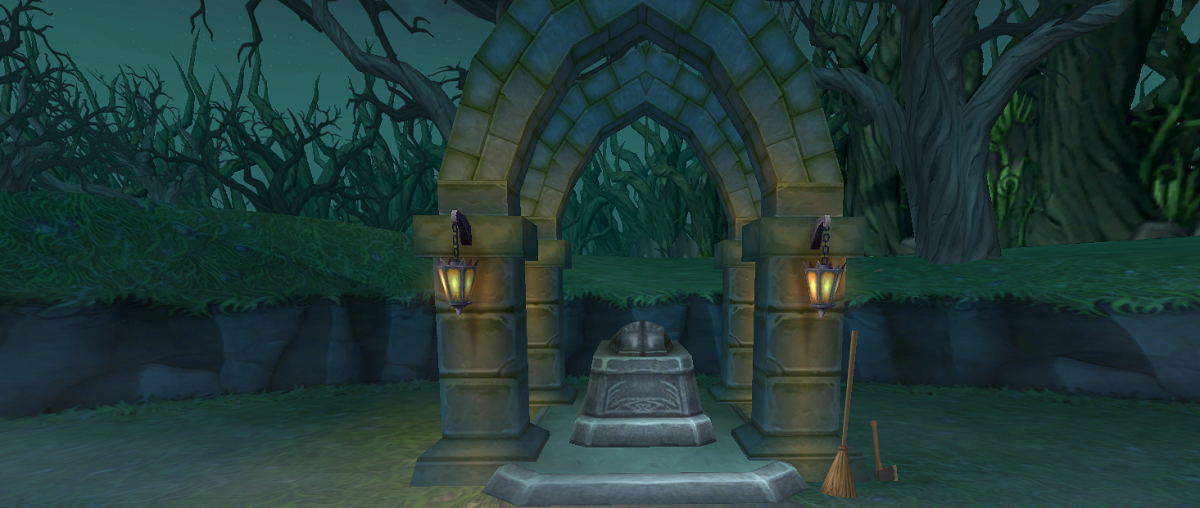
- Witch Hunter’s Bundle Gift Card
This is the spookiest of all the Daily Rewards. To find it, walk forward through the bridge and take the first left (ignoring the creepy statue). Through the gates you will find the PvP duelling circle, with the Sarcophagus on the left. Personally, I’ve received lots of stitchable gear from here.
The Sarcophagus can drop pet snacks, housing items, seeds (including Dead Beets and Sword Fern), or stitchable gear (including Archangel’s, Jester’s, Dandy’s, Sphinx, and Wolf gear). The drop you receive will depend on which NPC is roaming the Darkmoor Manor that day. You when recieve a pet snack when Elizabeth Pawtrey is present, a piece of gear when Francis Pawtrey is present, a housing item when Andrew Pawtrey is present, or a seed when Lady Delores Pawrey is present.
Everafter Village – Wishing Well
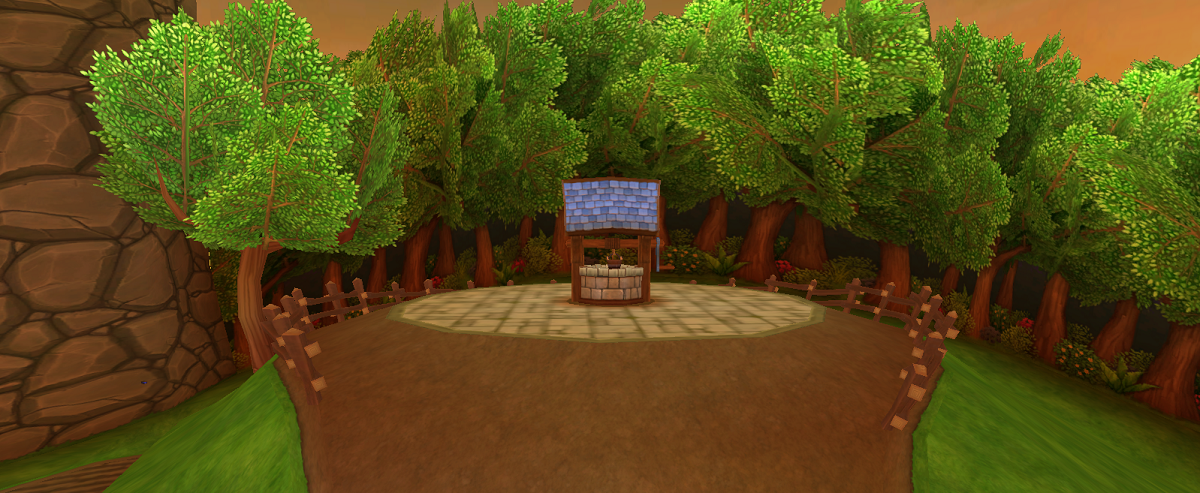
- Fantastic Fairytale Bundle Gift Card
The Wishing Well is easy to find. Simply follow the path over the bridge, around the fields, between the two main buildings, and over another bridge. The Well is located at the top of the hill. Personally, I’ve received many pets from here.
The Wishing Well can drop gold, pet snacks, reagents (including Amber), treasure cards (including all school versions of Potboiler), housing items (including Avalon-related items), seeds (including Sunion and Sword Fern), and various pets including Beastmaster’s Eagle, Black Spider, Fang Bat, Fennec Fox, Firewing, First Mate Otter, Flying Squirrel, Lightningbat, Red Cap, Scarab, Sea Turtle, Toucan’t.
Guild House – Daily Rewards

There are 4 different Daily Rewards in the Guild House. Each one gives one Azoth Treasure Card per day. Each location and daily reward will need to be unlocked by your Guild using Azoth reagents.
- Beta Daily Reward – located near to the entrance.
- Flip Daily Reward – located next to the Small Guild House.
- Sparr Daily Reward – located on Arena Island.
- Theena Daily Reward – located on Battle Island.
The Guild House is not accessible through Castle Tours. You need to be part of a Guild to get there. To learn about Guilds and how to access the Guild House, see our guide.
Heavenly Palace – Sky Castle Shrine

- Heavenly Palace Bundle Gift Card
To find the Sky Castle Shrine, enter the Palace, go straight across, and through the door to the other side of the house. Cross over the bridge of clouds towards the PvP duelling circle, where the Shrine is waiting next to it.
The Sky Castle Shrine can drop gold, pet snacks, reagents (including Aethyr Ore and Antiques), treasure cards (mostly mutate spells), housing items (mostly Mooshu-themed items), seeds (including Ultra Snap Dragon and Ivy League), and various pets including Brown Spider, Courageous Bull, Death Ninja, Dragonfly, Grimzilla, Origami Crane, Plague Oni, Red Panda, Shaolin Monkey, Striped Boar.
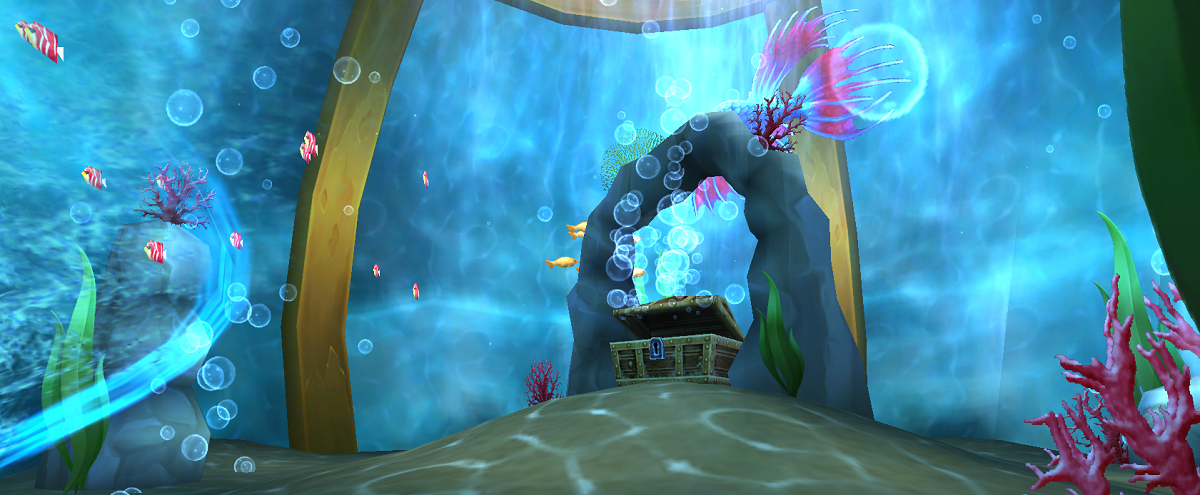
Lightkeeper’s Estate – Treasure Chest

- Lightkeeper’s Bundle Gift Card
To find the Treasure Chest, follow the path immediately to the right of the Spiral Door, down through a tunnel cave, and towards the Shipwreck and fishing pond. Enter the Shipwreck to an underwater area, and turn to your right to see the daily reward.
So far, the Treasure Chest is known to drop gold, pet snacks, reagents (including Fossil and Scrap Iron), and various pets including the Arctic Serpent.
Nomad’s Camp – Dromel Merchant
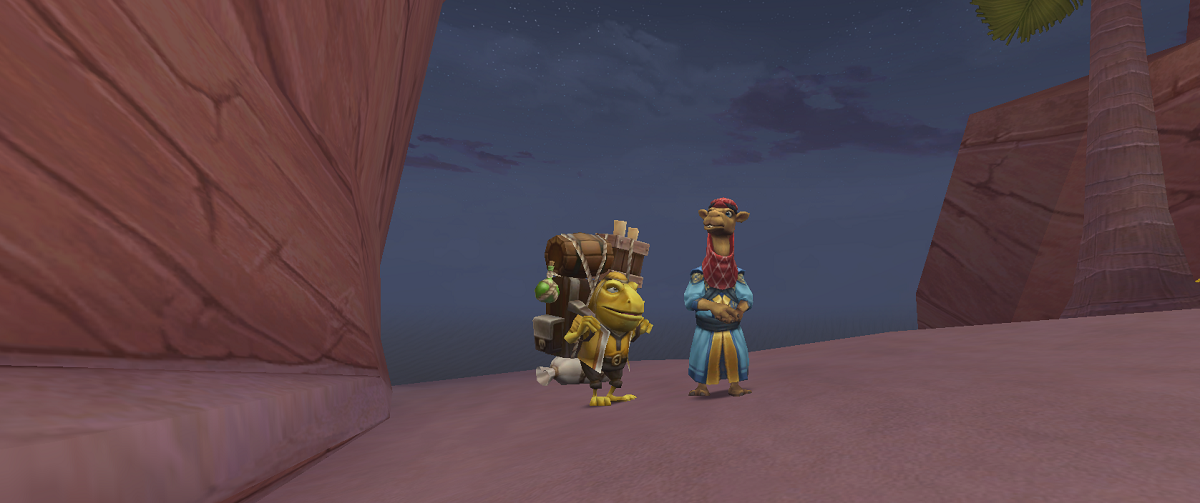
- Mirage Raider’s Bundle Gift Card
To find the Dromel Merchant, you don’t need to look far at all. He is located just to the right of the Spiral Door. I love how he floats away after speaking to you.
The Dromel Merchant can drop gold, pet snacks, reagents (including Amber), treasure cards (mostly Mutate spells), various housing items (including tents, plants, Cool Ranch music scrolls, and wallpapers), seeds (including Ultra Snap Dragon and Ninja Fig), and over 25 different pets. Notable pets include Evil Sandman, Frilled Lizard, Leaf Foot, Mummy Cat, Royal Ibis, Snake in a Basket, Toy Golem, Velociraptor.
Outlaw’s Refuge – Pioneer Dragon
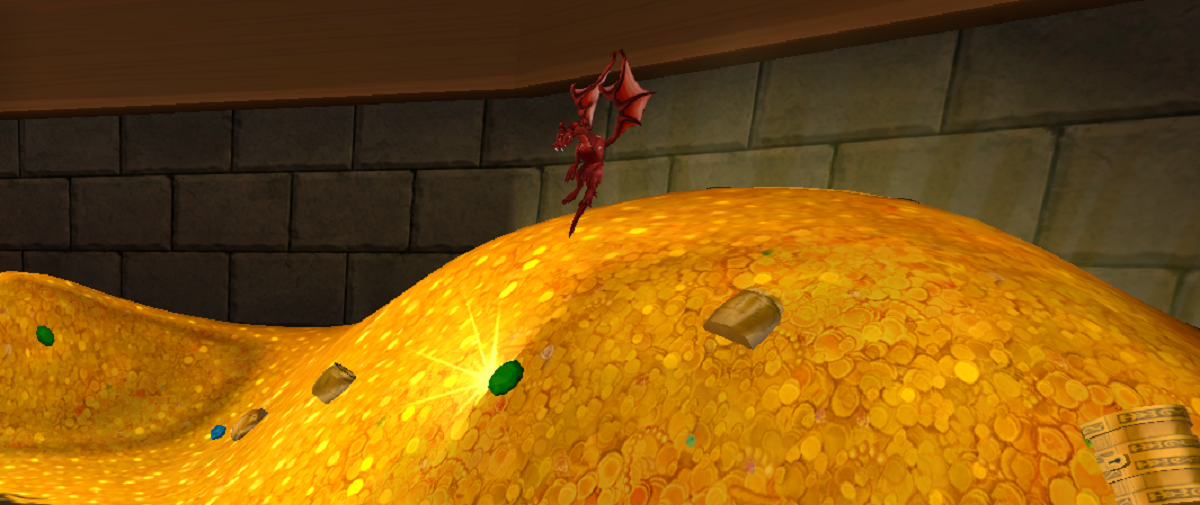
- Avalon Outlaw’s Bundle Gift Card
The Outlaw’s Refuge is quite the maze if you don’t know it well. To get to the Pioneer Dragon, firstly go into the tree to climb the stairs up to the treehouse. Then, walk straight forward, down the narrow walkway, and into the building. In the room, you will find a glowing teleporter on the floor, decorated with a red dragon. Step on it to be teleported to the Pioneer Dragon’s cave of gold.
The Pioneer Dragon can drop gold, pet snacks, reagents (including Fossil, Nightshade and Water Lily), treasure cards, and seeds (including Venus Fly Trap and Evil Snow Peas).
Peppergrass Glen – Cliff Dive
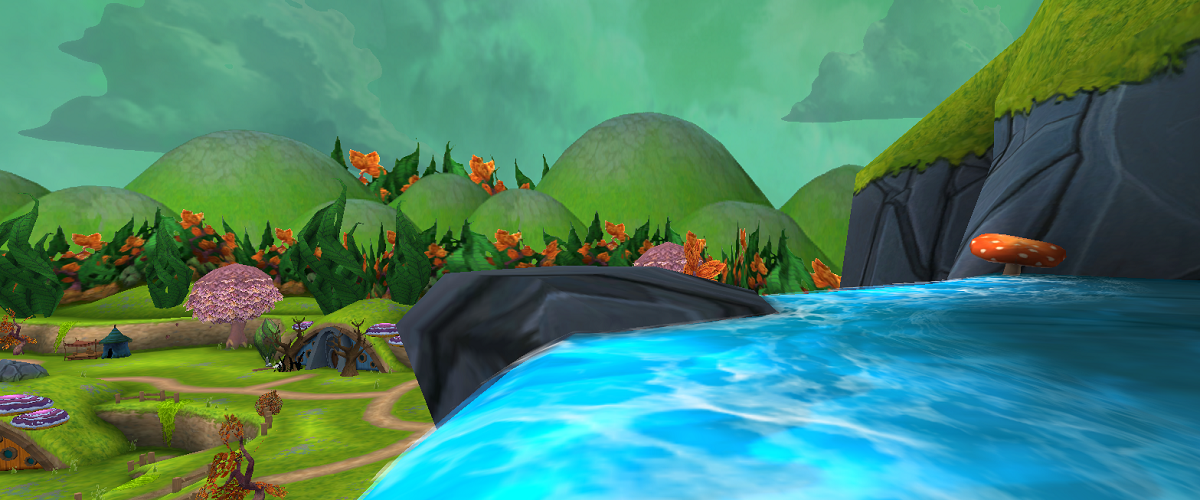
- Peppergrass Glen Bundle Gift Card
In order to Cliff Dive, you need to get to the top of the cliff. Walk towards the water, and around the back of the waterfall by either the left or right side. There is an entrance in the rock wall to walk through, which will bring you out at the top of the waterfall. Now all you need to do is jump off!
The Cliff Dive can drop gold, reagents (including Deep Mushroom and Stone Block), treasure cards, housing items (Khrysalis music scrolls), seeds (including Pink Dandelion and Key Limes), and pip jewels.
Polarian Shipwreck – Cargo Crate
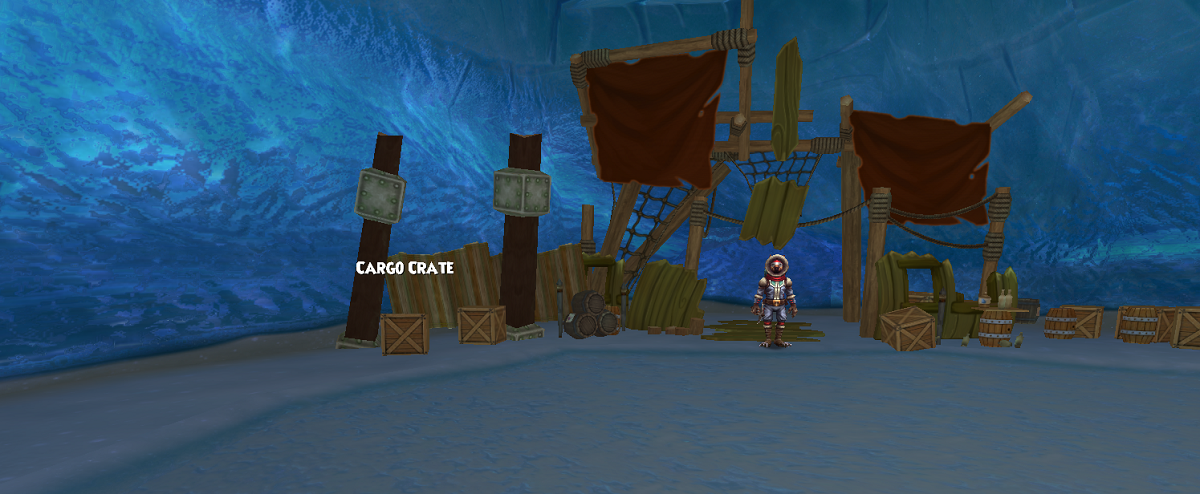
- Polarian Explorer’s Bundle Gift Card
To find the Cargo Crate, walk towards the Shipwreck but do not go inside. Before you get there, turn left, and go down into the ice. Then, turn right, where you will find the NPC Captain Shakleton, and his Cargo Crate.
The Cargo Crate can drop gold, pet snacks, and housing items (including Marleybone-related items).
Sky City Estates – Strange Interface

- Sky City Bundle Gift Card
This Strange Interface is located in a secret underground lab, similar to those in Lemuria. There are two ways to access the lab. When you appear at the Spiral Door, turn immediately left, and there will be a set of stairs leading down underground. Alternatively, there is a trap door in one of the rooms of the first house, leading to the same place.
The Strange Interface can drop gold, pet snacks, reagents (including Nightshade and Sunstone), treasure cards (including all school versions of Forest Lord and Efreet), and the Crabling and Ice Colossus pets.
Sultan’s Palace – Magic Lamp
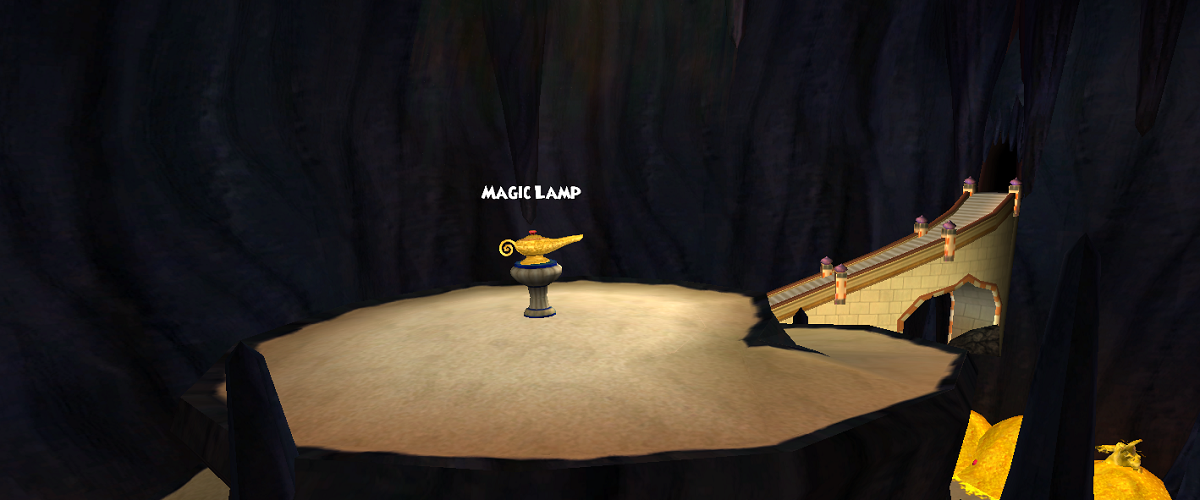
- Mega Bundle Gift Card
The Magic Lamp is located in a cave of wonders – full of gold and jewels. There are two ways to get there. Firstly, when you appear at the Spiral Door, turn right, walk beyond the PvP duelling circle, and underneath the waterfall. Alternatively, enter the Palace, go through the first archway and turn right. There is a picture of the cave and the lamp on the wall, which you can walk through.
The Magic Lamp can drop gold, pet snacks, reagents (including Water Lily, Diamond and Nightshade), treasure cards, and seeds (including Prickly Bear Cactus and Deadly Helephant Ears).
The Acropolis – The Minotaur

- Olympian Bundle Gift Card
The Minotaur is located within a maze, in the basement of The Acropolis. Quite fittingly, it is very hard to find if you don’t know where you’re going. Of all the Daily Rewards, it is definitely the most well-hidden! Luckily, there are several ways to get there, starting from where you appear after going through the first teleporter.
- Go inside the Acropolis by walking through the columns and down the stairs. Then, go to the room at the back-left. Take the first left, go down the steps, and then turn left again to reach the basement.
- Turn left and go down the stairs on your left. Follow the slope in a zig-zag pattern all the way to the end, until you reach a stone entranceway. From there, take the first right, go down the steps, and then turn left into the basement.
- Turn left and go down the stairs on your left. Follow the slope to a building with pictures on 3 sides. Walk through its walls into a secret passageway, then turn right after you reach the end. You will find another stone entranceway. Once inside, the basement is located on your right.
Once you reach the maze, start by keeping right. I’ll let you figure out the rest!
The Minotaur can drop gold, pet snacks, reagents (including Diamond and Sunstone), treasure cards, and seeds (including Key Limes and Deadly Helephant Ears).
The Sun Palace – Giant Gorilla
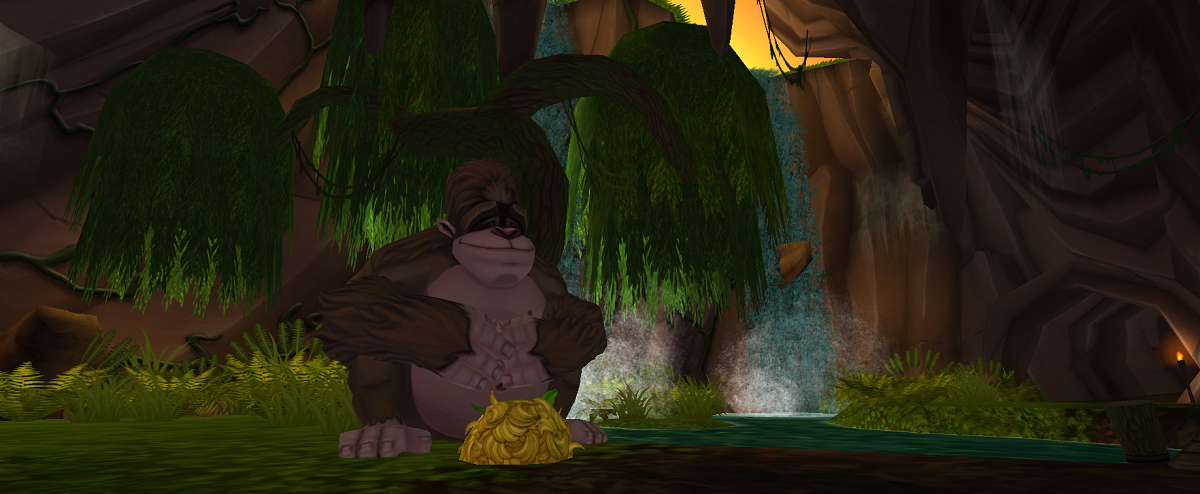
- Super Bundle Gift Card
Obviously, every Palace needs its own personal Giant Gorilla. To find him, walk down towards the Palace but take the first right, to follow the path next to the water. Keep right and go up the hill to behind the waterfall, where you will find the secret entrance to the Gorilla’s cave.
The Giant Gorilla can drop gold, pet snacks, reagents (including Grendelweed, Nightshade and Water Lily), treasure cards, and seeds (including Key Limes and Deadly Helephant Ears).
Winter Wind Tower – Horn of Plenty

- Majestic Bundle Gift Card
It is easy to find The Horn of Plenty. Go through the initial teleporter, then follow the path to the Tower. Once inside, go up the stairs and into the centre room with the long table. Once you interact with it, a great feast will appear on the table before you!
The Horn of Plenty can drop gold, pet snacks, reagents (including Nightshade and Water Lily), treasure cards, and seeds.
Daily Rewards from Housing Items
These items are harder to find using Castle Tours, because they are not linked to a specific house. Also, not all of these items are usable if you reach them through Tours. But if you don’t own them yourself, you can still usually find them in castles categorised under “Collections”.
Bountiful Mine – Bountiful Cart

- Jewel Crafter’s Bundle Gift Card
The Bountiful Mine is not currently usable through Castle Tours, so you need to own it, or know someone who does, to use it. The Bountiful Cart can drop gold, reagents (including Flawless and Perfect gemstones), and many different jewels (mostly defence or health jewels).
Fantastic Fish Bowl – Treasure Chest
- Atlantean Bundle Gift Card
The Fantastic Fish Bowl is usable through Castle Tours. The Treasure Chest can drop gold, pet snacks, reagents (including Fossil and Water Lily), treasure cards, and seeds (including Pink Dandelion and Ninja Fig).
Magic Treehouse – Magic Eggs
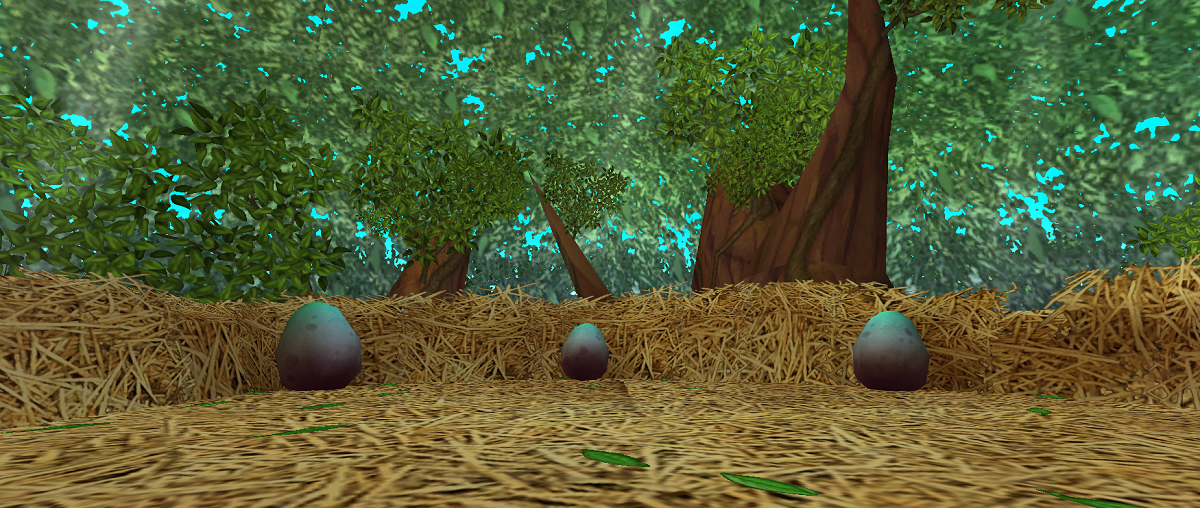
- Prehistoric Bundle Gift Card
The Magic Treehouse is currently usable through Castle Tours. The Magic Eggs can drop gold, pet snacks, reagents (including Acorn and Sunstone), treasure cards, and seeds (including Prickly Bear Cactus).
Shinobi Dojo – Great Moodha Statue
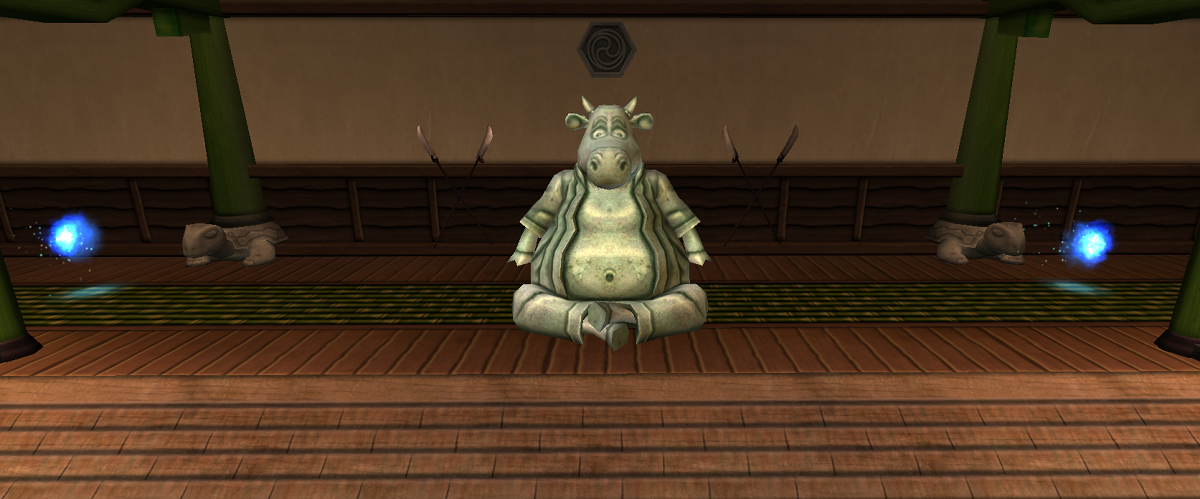
- Shinobi Bundle Gift Card
The Shinobi Dojo is not currently usable through Castle Tours, so you need to own it, or know someone who does, to use it. The Great Moodha Statue can drop gold, pet snacks, treasure cards, housing items (mostly Mooshu-related items), seeds (including Key Limes and King Parsley), and over 20 different pets, mostly pig-related pets. The dropped pets include Arctic Ninja Pig, Battle Pig, Defender Pig, Hero Pig, Ninja Piggle, Premier Porker, Pugilist Pig, Scout Pig, Skyscream Demon, War Pig.
Thanks to Mike Firehammer for the picture.
Great Sky Train Robbery Gauntlet – Treat
The Great Sky Train Robbery Gauntlet is not currently usable through Castle Tours, so you need to own it, or know someone who does, to use it. At the end of the gauntlet, use Play As Your Pet to enter the Pet Only carriage and receive a tasty treat! The Treat drops pet snacks and the occasional Armadillo Mount from the Great Sky Train Robbery Pack.
 Iron Sultan Statue
The Iron Sultan Statue is obtained after defeating Metallos and completing the Sinbad & the Iron Sultan Gauntlet. Anyone can get the statue and place it in their house; you don’t need to own the gauntlet.
The Statue can drop gold, pet snacks, reagents (including Amber), treasure cards (mostly mutate and astral spells), housing items (including plant, tent, and wallpaper items), seeds (including Ultra Snap Dragon and Sugar Khrystal), and over 20 different pets. The dropped pets include Chameleon, Horned Monkey Spider, Magma Spider, Meow Wing, Mirth Spider, Mummy Cat, Royal Ibis, Stone Colossus, Therizinosaurus, Velociraptor.
The Gift That Keeps On Giving!

The Gift That Keeps On Giving! is usually available to purchase from the Crown Shop around Christmas and Christmas in July, for 200 Crowns. It has also previously been a reward in Crowns Reward Events, after spending a certain number of Crowns during the event. The Gift grants a random amount of gold every day.
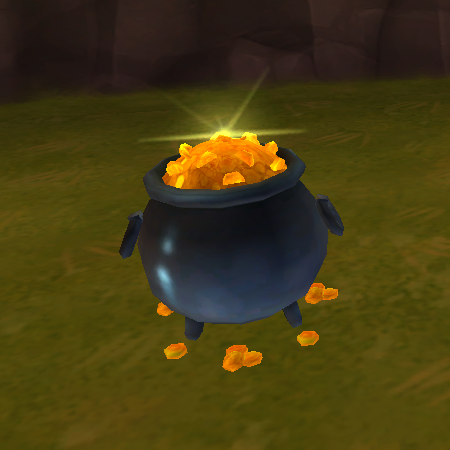
Lucky Pot o’ Gold
The Lucky Pot o’ Gold is usually available during the St Patrick’s Day festivities, for 1,500 Crowns. It has also previously been a reward in Crowns Reward Events, after spending a certain number of Crowns during the event. Just like the Gift above, the Pot grants a random amount of gold every day.