August 1, 2019 May 20, 2023
Comprehensive Beginners’ Guide
to the Beastmoon Hunt
The Beastmoon Hunt is the newest Wizard101 special event, released in the Summer 2019 update. This event is unlike anything Wizard101 players have seen before. The event combines team PvP, capture the flag, and a little bit of polymorphing magic to create an entirely unique battle environment.
This is a comprehensive guide for beginners. Beastmoon Hunt can be very overwhelming at first, so if you’ve never played before you may want to start with Patrick’s guide to Getting Started with the Beastmoon Hunt in 15 minutes, play a few matches, and then come back here to for a more thorough review of all aspects.
Table of Contents
Locating the Event
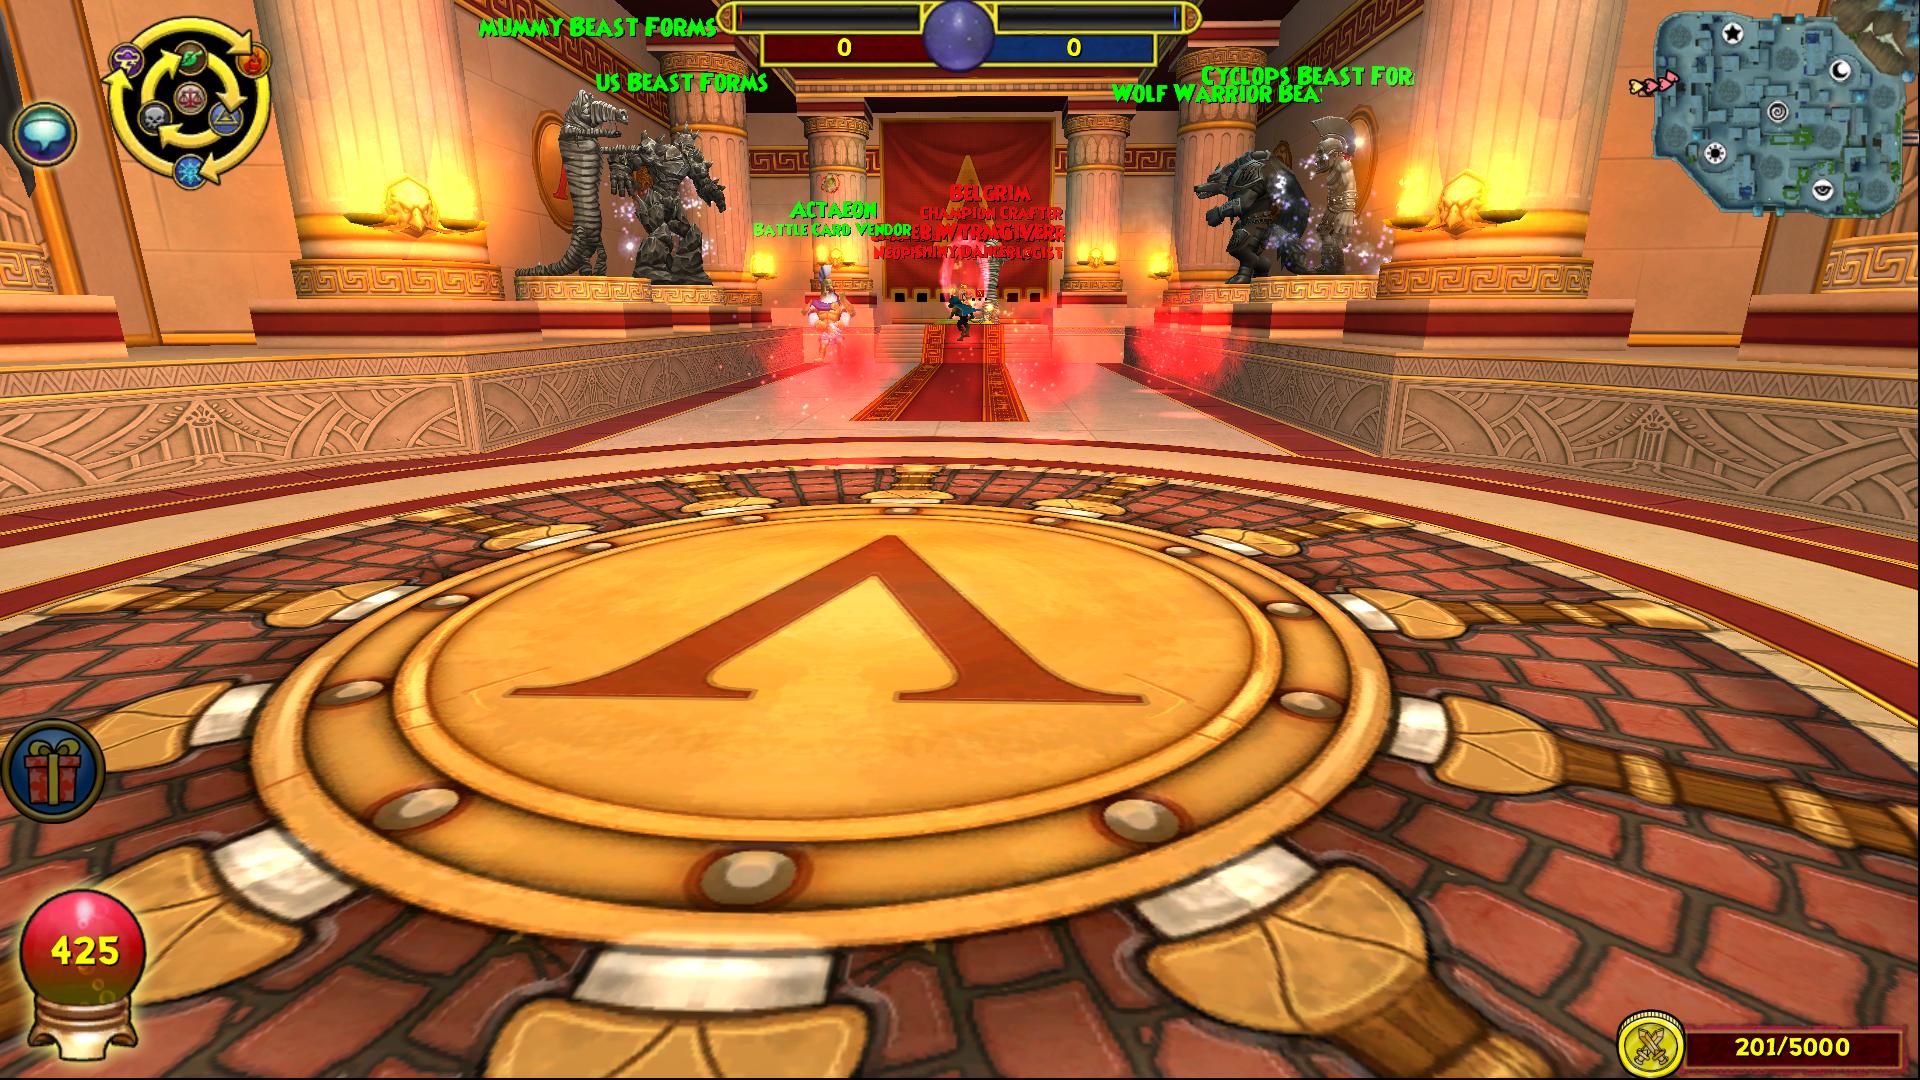
The Beastmoon Hunt is accessed the same way the Deckathalon event is accessed. Simply look in the upper right corner of your screen for the Gamma icon. Clicking on this icon will open all special events currently available, including the Beastmoon Hunt. You can then teleport to the event, which uses the PvP Arena as a staging area. Here you can find Artemis New Moon, the NPC that introduces us to the hunt. Near her is Actaeon, an NPC that sells Beastmoon-related recipes. The Beastmoon Cultivator (an item used as the “crafting table” for Beastmoon seeds) can also be found here.
One of the most important parts of the Beastmoon Hunt is also here: the Beastform Upgrade Kiosk. From this kiosk, you have access to the stats of every beastform transformation and can preview every card they can obtain at each level. However, the most valuable aspect of this kiosk is that players use it to upgrade their Beastforms. Beastforms can upgrade their level and their tier.
Pro Tip: This is the only place you can upgrade your beastforms. You cannot upgrade your forms when in the Beastmoon hunt arena or when selecting what form to play as!
Levels vs. Tiers(Unlocking vs Upgrading)
Unlock vs Upgrade

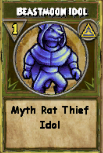
Some Beastforms remain locked during each hunt. In order to use these Beastforms you must Unlock one of their tiers using the Gold Beastmoon Idols. These idols are exclusive items that can only be obtained via the Scroll of Fortune or the event reward tab.
To Upgrade Beastforms that have already been unlocked one must use Regular Beastmoon Idols that come in a variety of colors(such as red or blue for example). These idols can be most commonly obtained via gardening different school specific Beastmoon seeds(e.g. Storm Beastmoon Seed).
Joining a Match
You can join a Beastmoon Hunt match right from the event screen without teleporting to a different location! Simply hit the Join Match button at the bottom of the event screen. You will then be put into a randomized queue. Once the Ready to Go icon pops up on your screen, hit it to start the hunt!
Play with Friends!
Alternatively, if you want to play with friends there is now a way to do so. Simply add up to 5 friends to a group and hit the Join Match button. You will see an option to join as group or join solo. Once you select join group-each group member will also receive a prompt to join as well. Once all members confirm(or the timer expires), the match will begin.
Match Objectives
The Beastmoon Hunt pits 2 teams of players against each other. Each player (or group of players if playing with friends) is randomly assigned to a team: Red or Blue. By capturing circles and defeating enemies, teams accumulate points. The first team to hit at least 100 points wins. Alternatively, the team with the most points after 20-25 minutes(if no team has reached 100 points within this timeframe) will win.

The Battle Arena
Maps
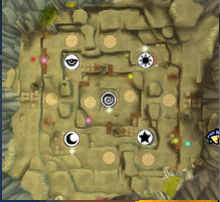
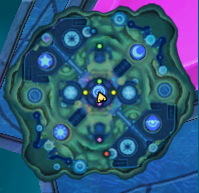
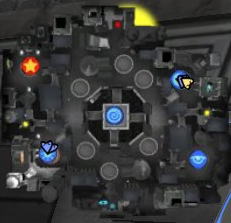
Depending on which map is active, your battle will take place in either the Mirage, Avalon, Aquilla or Celestia Arenas. The Mirage Arena is more simplistic and straightforward while the Avalon arena is more complex with multiple levels and varied, maze-like pathways. The Aquilla Arena is a large, valley like map with multiple levels and open lines of sight allowing you to see more of the map. The Celestia map is a beautiful underwater map with limited line of sight but lots of ways to get to the spiral. At the moment only one arena is active per hunt but that may change down the line.
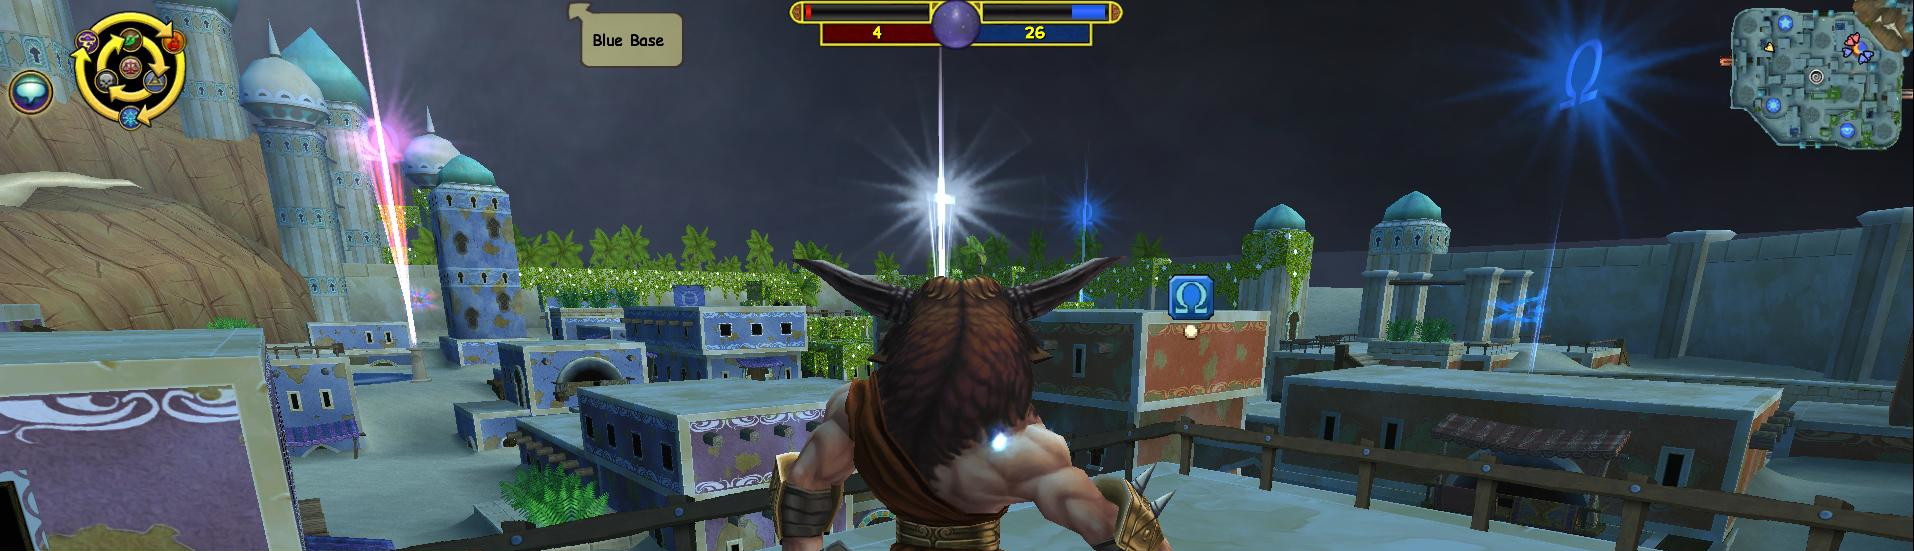
Your Base
The first area you immediately appear at is your base. Here stands a teleporter and 10 different statues. Each statue represents a Beast Form that you must choose from before entering the Arena at large. Only one of each particular type of Beastform can be active on a team simultaneously. You need to be fast or a good negotiator if you want to ensure you play as your favorite.
At the front of your base stands the familiar NPC Actaeon who sells Battle Cards. The Battle Cards from this vendor are extra copies of cards you currently have access to. You can purchase these Battle Cards with Battle Coins. Battle Coins can be acquired from treasure chests found in the Arena or from harvesting Beastmoon Seeds(more on this later). Finally, your base has a teleporter in the center. This is your gateway to the arena. There is a brief countdown until the teleporter is active. Once that countdown finishes, the teleporter activates. By traveling through it, you start the game.
Pro Tips…
The Minimap
When in the Arena, you will notice that you have a minimap at the top right corner of your screen, your go-to source for information. The minimap shows all the battle circles as well as the controller of each circle. Teammates are represented by always-visible arrows that match your team colors. You can only see enemies when contesting a circle or when in battle.
Mirage Map: On the far left and right of the minimap, you can see teleporters to both bases. The teleporter to the blue base is on the far right of the minimap, while the teleporter to the red base is on the far left. Players cannot enter the opposing team’s base, only their own.
Avalon Map: On the top and bottom of the minimap you can see teleporters to both bases. Players cannot enter the opposing team’s base, only their own. The teleporter to the red base is on the top of the map and the teleporter to the blue base is on the bottom.

Aquilla Map: On the upper left corner and lower right corner of the map you can see teleporters to both bases (the red base teleporter is at the upper left corner and the blue base at the lower right corner). Players cannot enter the opposing team’s base, only their own.
Celestia Map: At the top center and bottom center of your map lies teleporters to your base. The blue base teleporter is at the upper center of the map while the red base teleporter is at the bottom center. Players cannot enter the opposing team’s base, only their own.
Heap Map: On the top and bottom of the minimap you can see teleporters to both bases. Players cannot enter the opposing team’s base, only their own. The teleporter to the red base is on the top of the map and the teleporter to the blue base is on the bottom.
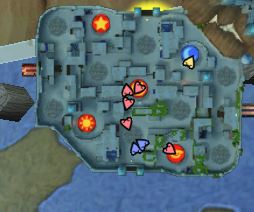
The Circles
The map is marked by 5 circles that players try to control. The circles have symbols that appear on your map. The four outside circles are named Sun, Moon, Star and Eye. Sun and Moon only support 2v2 battles, while Star and Eye support 3v3 battles. The central circle, Spiral, supports 4v4 battles. You can access the exterior 4 circles at all times during the match, while the center circle remains closed until about halfway through the match.
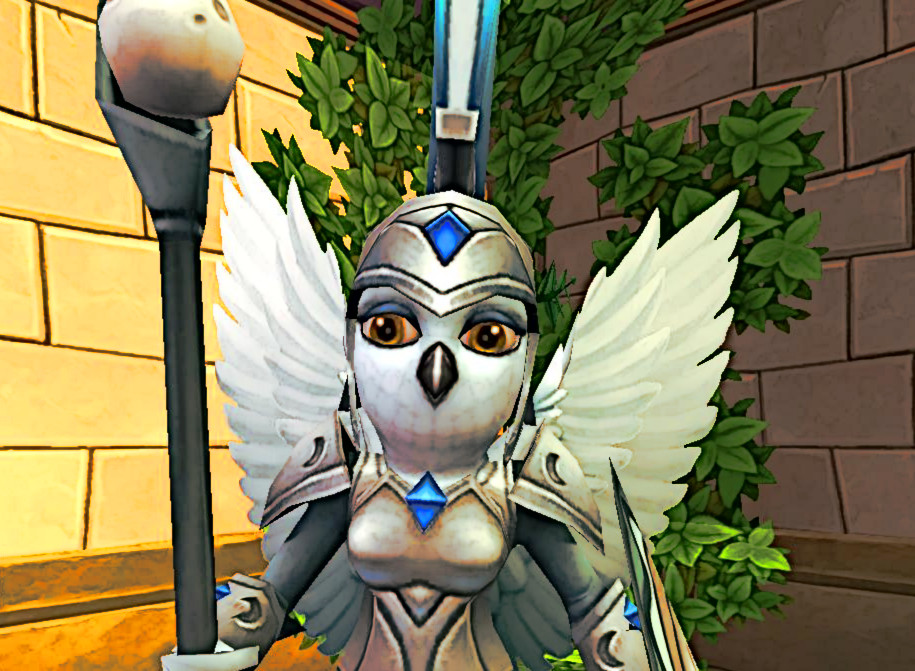
Beastform Overview
This section will give you a basic idea of each beastform’s playstyle and capabilities. Click on (Spells) to link to a guide explaining the mechanics of each beastform’s spells. Since the release of Beastmoon, new Beastforms are regularly introduced. See our Beastmoon Hub for details of every form as they are released.
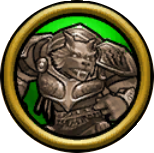
- Ice Colossus
- Life Colossus
- Ice Krokomummy
- Storm Krokomummy
- Fire Elf
- Ice Elf
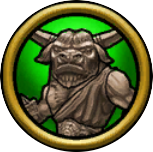
- Fire Minotaur
- Myth Minotaur
- Storm Wolf Warrior
- Balance Wolf Warrior
- Balance Cyclops
- Death Cyclops
- Death Fairy
- Balance Fairy
- Life Fairy
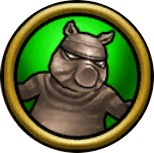
- Death Ninja Pig
- Fire Ninja Pig
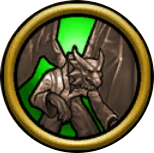
- Life Draconian
- Myth Draconian
- Storm Rat Thief
- Myth Rat Thief
Ice Colossus – (Spells)
The Ice Colossus is best described as a tank. Sporting the highest health of all the beastforms at 600 hp, this form specializes in shielding itself and its allies. It has stellar defensive capabilities, possessing a plethora of shields and the strongest AoE shield. Its offensive capabilities are somewhat limited, but it does have some spells that counter blades, interact with traps and a powerful conditional AoE. This form has normal speed. This form cannot collect combat pips. Thus, it will always start the battle with only one pip.
Life Colossus – (Spells)
The Jade Warrior of Beastforms, this form combines the healing capabilities of the Life school with the tank capabilities of the Colossus form. Like it’s Ice counterpart, this beastform cannot collect combat pips and travels at a normal speed. To compensate it has a solid 550 health. This form has a very powerful(but risky) damage intercept that allows it to tank 100% of the damage it’s teammates receive. The Life Colossus also sports spells that counter minions directly and excels at redirecting DoTs. Finally, this form has a plethora of heals for sustaining the team.
Pro Tip: Heal over Time spells cannot revive defeated players!

Ice Krokomummy – (Spells)
A more offensively oriented Ice beastform, the Ice Krokomummy has 500 hp, a normal (average) movement speed, and the ability to collect up to 2 combat pips. This means that this beastform has the potential to start combat with 3 pips. It has shields, but they are less effective than the Colossus’. Instead, it makes do with the ability to buff damage via traps, better damage per pip, and a 4 pip AoE at level 1+. This form also has spells that counter blades and carries a few spells that interact with traps.
Storm Krokomummy – (Spells)
Another addition to the offensive Storm beastforms, this form focuses more on the risk/reward dynamic of the school. It sports blade spells and spells that increase in power or give an additional effect when the beastform is at or under 50% health. This beastform has a normal running speed, 400 health and the ability to collect one combat pip. This form also sports a powerful x pip attack spell.

Fire Elf – (Spells)
Our first look at the glass cannon archetype, the fire elf focuses on burning its opponents with consecutive DoTs and detonating them to great effect. It has the fastest movement speed in the event at +20% and can collect 2 combat pips, potentially starting a battle with 3 pips! The elf has spells that counter shields and interact with heal over times. It also has a 5 pip AoE+DoT at level 1+. It pays for this increased offensive potential with 325 hp, the second lowest health in the hunt. Finally, it further embraces its glass cannon roots with the ability to sacrifice its health to give pips to allies.
Ice Elf – (Spells)
This Ice beastform is more offensive than the Ice Colossus and primarily concerns itself with charm removal and trap placement. Almost all of its spells interact with or counter charms in some way or leave a trap. This form also has access to shield spells and likes to recover pips or give them to allies when casting it’s spells. The Ice Elf sports 400 health, +20% speed and the ability to collect a whopping 3 combat pips, the highest combat pip limit to date!
Fire Minotaur – (Spells)
A bulkier version of the Fire Elf, this Beastmoon form has stellar damage but focuses more on disruptive utilities instead of devastating back to back DoTs. It has normal speed, 425 hp, and can gain one extra pip, starting battle with 2 pips max. This is only Beastform with direct accuracy debuffs. This beastform hopes to buy extra rounds to shut out the opponent and has a modest DoT removal suite and a heal to help it achieve this goal. This form excels at dealing damage both to single targets and teams with it’s newly buffed 4 pip AoE.
Myth Minotaur – (Spells)
The defensive counterpart to Myth, this form focuses on shielding and interacting with shields. It can give shields to allies and, more notably, steal shields from the enemy. Like the myth rat thief, this form also has its own minion, although this minion is more defensive in nature. This beastform mimics its fire counterpart with 425 health, normal speed and the ability to acquire one combat pip.
Storm Wolf Warrior – (Spells)
At 500 hp, 1 extra starting pip (starting battle with 2 pips max) and a normal speed, this beastform is best described as Offensive Artillery. It carries the strongest blades in the hunt and can buff it and its allies effectively. However, it struggles with multiple opponents initially, having only a very weak 3 pip AoE and the most expensive AoE in the hunt (6 pips). It gains a 4 pip AoE but only at level 5. On the other hand, the form makes up for this with its ability to remove DoTs, synergize with heal over times, and 1v1 better than any other form, thanks to its many buffs and a cheap offensive stun.
Balance Wolf Warrior – (Spells)
Taking buffing and hitting to the next level, this form easily competes with the Storm Wolf Warrior as the best 1v1 form this update. It has a plethora of blades, the ability to steal blades, and the ability to trap enemies. It has a few skills that recover pips and it can donate some to friends with no consequence. One of the more notable aspects of this form is that its blades are Aegis-protected when cast, meaning that the first attempt to remove or steal them will fail. This form sports a respectable 575 health, normal speed and can collect up to one combat pip.

Balance Cyclops – (Spells)
Almost as tanky as the Colossus at 575 health, this beastform shares many of its attributes. It also travels at normal speed and is the only other beastform unable to collect any starting pips, beginning battle with only one pip. A very technical class, it differentiates itself with its ability to shield and blade simultaneously and to swap wards. Sporting the only team dual blade/shield, as well as the unique ability to double the entire battle circle’s pip gains, this beastform is hard to master but offers great potential.
Death Cyclops – (Spells)
The Death Cyclops stands at 550 health, making it the bulkiest Death Beastform to date. It has the ability to collect one bonus pip and travels at a normal speed. It seems to draw from all aspects of death’s repertoire, having the ability to debuff, suppress heals, drain, deal DoT damage and trap. However it is quite weak on the burst damage and AoE end, receiving only a high cost, low damage AoE and an expensive AoE/DoT later down the line.

Death Fairy – (Spells)
Death’s “Fire Elf”, this light and speedy form zips around at +20% speed. It also has the ability to gain 2 extra starting pips(starting battle with 3 pips). At 350 health, it is slightly more bulky than the elf but is still very fragile. This beastform can place traps on its opponent and has the most powerful drain in the event. Drains now recover 100% of the damage they deal, so this is nothing to scoff at. This form also sports DoTs and focuses on stealing blades and heal over times from the opponent. Just like the Fire Elf, it has the ability to damage itself to give allies extra pips.
Balance Fairy – (Spells)
This speedy form has the highest pip capacity of any form(tied with the Ice elf) with the potential to acquire 3 combat pips. It has the highest speed at +20% and has 375 health max. The balance fairy, much like the life draconian, sports the ability to heal fallen teammates. Pip manipulation is a big part of this beast’s repertoire and it has the ability to donate pips to itself or it’s teammates. Finally this form has the most expensive and most damaging single target hit in the entire hunt.
Life Fairy – (Spells)
A versatile, speedy form that does it all. The Life Fairy buzzes around the arena at +20% speed with the ability to collect up to 2 combat pips(potentially starting battle with 3 pips). This beastform has a diverse repertoire including blades, heals, heal manipulations, shield removal and revival. This beastform is a great pick against myth beastforms, joining the Life Colossus as one of the beastforms with a direct counter to minions.
Death Ninja Pig – (Spells)
The Death Ninja pig is a tankier Death beastform with 450 health, +10% speed, and the ability to collect 2 extra starting pips (potentially starting battle with 3 pips). Debuff is the name of the game with this form, sporting damage debuffs, heal debuffs and a conditional dispel. It struggles to deal with multiple opponents early on with its only AoE attacks at 5 pips. However, at Level 5 it gains a strong burst damage AoE with a relatively easy conditional requirement that buffs all allies.
Fire Ninja Pig- (Spells)
The Fire Ninja Pig is an DoT and AoE specialist. Virtually all of it’s spells are DoTs and it has one of the largest volumes of AoE spells in the hunt. This form loves to remove shields- dedicating many of it’s utility spells to this purpose. Finally this form has the ability to summon a minion under the right conditions and has some utilities that depend on the minion being on the field. The fire ninja pig comes with 425 health, an extra pip of 1(potentially starting battle with 2 pips) and travels at +10% speed.
Life Draconian – (Spells)
This is the first healer class added to the Beastmoon Hunt. Sporting a single target heal that can revive allies, several heal over times and a guardian spirit like spell, this form often finds itself as the first target. Standing at 450 health, 2 extra pips max(potentially starting battle with 3 pips) and a normal speed, this form can start healing right away. It does suffer offensively with only 4 damage spells to it’s name and it’s only damage AoE at Level 5. However, it compensates with it’s unique ability to push DoTs back to foes and can even completely remove all DoTs from every ally while healing.
Myth Draconian- (Spells)
A myth form that dives into the pip manipulation aspect of the school while retaining other myth specialties. This form specializes in giving pips, gaining pips and countering traps. Sporting one of the cheapest team pip donation spells in the hunt, a leveled up myth draconian can certainly sustain it’s team’s appetite for pips. The myth draconian also sports a minion and a number of minion dependent spells, making it a solid option in both individual and team contexts. However, this form is not flawless- depending on sacrificing a minion to deal any AoE damage. The form sports 475 health, the ability to gain 1 extra starting pip(potentially starting battle with 2 pips) and a normal speed.
Storm Rat Thief – (Spells)
Fusing offense and utility, this form loses some ability to buff to gain versatility and supportive diversity. Many of its spells deal great damage and become more damaging or pip efficient under certain conditions. This form also sports the ability to debuff and stun the opponent. Even more impressively, this form has the only non-conditional universal dispel in the game. To balance out these powerful abilities, the Storm Rat Thief has the lowest health at 300 HP. Finally, it can gain 1 bonus pip (potentially starting battle with 2 pips) and has a +10% movement speed.
Myth Rat Thief – (Spells)
Mixing glass cannon with utility, this beastform is one of the most versatile offensive options. It sports the low health of 325 and an extra pip capacity of 2(potentially starting battle with 3 pips). The Rat travels at +10% movement speed, only outsped by elf and fairy. It complements potent burst damage with the ability to push traps onto opponents and remove blades. It can summon a 200 hp minion for free. This minion debuffs opponents and can hit the entire enemy team with a potent 4 pip +100 damage AoE trap. Finally, it can target or sacrifice its minion to apply additional powerful effects.
Out of Battle Mechanics
Movement Speed
Each Beastform has a different movement speed varying from Normal(+0%) to +20%. This speed affects how fast the beastform can traverse the arena and has no effect in battle. Faster beastforms can more easily collect combat pips and Beastmoon chests. They can also quickly traverse the arena to support teammates or capture unoccupied circles. Each beastform’s movement speeds are listed below from fastest to slowest.
- Fire Elf, Ice Elf, Balance Fairy, Life Fairy and Death Fairy: +20% speed
- Myth Rat Thief, Storm Rat Thief, Fire Ninja Pig and Death Ninja Pig: +10% speed
- Life Draconian, Myth Draconian, Fire Minotaur, Myth Minotaur, Storm Krokomummy, Ice Krokomummy, Storm Wolf Warrior, Balance Wolf Warrior, Ice Colossus, Life Colossus, Death Cyclops and Balance Cyclops: Normal speed (+0%)
Combat Pips
In the Beastmoon hunt, free floating combat pips drift around the arena. You can collect these pips to give you an advantage in the next battle you enter. Collected combat pips only last for one battle, so after each battle you will need to collect more. Each combat pip counts as one additional starting pip in the next battle. Remember, each beastform has a limit to the number of combat pips they can collect. The Ice Colossus, Life Colossus and Balance Cyclops cannot collect combat pips at all. Combat pips can be found in a variety of different areas depending on the arena. As such, knowing the likely location of these pips can easily hand you a key advantage.
Pro Tip: You can see your opponent’s combat pips in a tab immediately adjacent to their beastform. Use this to challenge them when you are at an advantage(i.e you have combat pips but they don’t)
Arena Specializations
Each Beastmoon Arena has certain characteristics that affect combat pip generation. These characteristics are unique to that specific Arena.
Mirage Arena: The Mirage Arena spawns the largest volume of pips throughout the map.
Avalon Arena: The Avalon Arena spawns Victory Pips. Victory pips are pips that appear after you have successfully battled for control of a circle. Victory pips are spawned from every circle except the spiral.
Aquilla Arena: The Aquilla Arena spawns Defeat Pips under certain conditions. Defeat Pips appear inside your base upon losing a battle. This allows you to quickly pip up and potentially make a comeback.
Celestia Arena: The Celestia Arena sports many unique mechanics. Some health vats will spawn pip wisps instead of health wisps on occasion. Running in and out of certain combat circles will give you the speed boost typically associated with movement archways. Finally, a teleporter back to base appears at the spiral upon a team’s victory.
Movement Archways
When passing through certain archways you will often go through a veil that matches the color of one of the teams. Passing through a veil that matches your team’s color will give you a temporary boost to movement speed. Use this boost to quickly traverse the arena. Do note that the Aquilla Arena and Celestia Arenas have no movement archways.
Pro Tip: Rapidly walking back and forth repeatedly through the veils will give you an insane burst of speed that allows even the slowest Beastforms to rocket across the map
Health Vats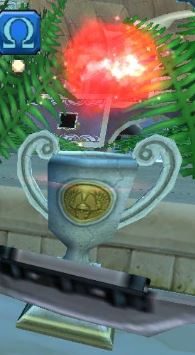
Scattered around the arena are vats with health wisps in them. Walking up to these vats will restore up to 250 health. Beastforms do not automatically recover health after battle, so use these health vats to get back into shape after a hard won fight. Returning to base can also offer you the opportunity to recover health! Pip wisps sometimes appear in these vats in the Celestia Arena.
Arena Teleporters
Located at the top and bottom center of the Mirage map and the left and right center of the Avalon map, these yellow teleporters instantly take you from the one end of the map to the opposite end. Since these are an important tool for contesting circles on opposite ends of the map, make good use of these Teleporters.
Pro Tip: The Avalon Arena has combat teleporters that appear when you capture either sun or moon. Use these teleporters (they match your team colors when you can utilize them) to quickly pivot between sun and moon
The Aquilla Arena has it’s own unique set of teleporters. Adjacent to the base teleporters are a green teleporter(next to blue base teleporter) and a purple teleporter(next to the red base teleporter). These teleporters take you from the top of the valley- to the bottom(next to the spiral) and vice versa. These teleporters are the only way to move quickly in the Aquila arena so use them wisely.
The Celestia Arena has a unique set of teleporters too. There are 4 teleporters of varying colors around the center that take you to the spiral. Under the blue base teleporter and above the red base teleporter are two more teleporters to the spiral.
Base Teleporters
- On the far-right of the Mirage arena is the teleporter to blue’s base and on the far-left is the teleporter to red’s base.
- On the Avalon map the blue base teleporter is at the bottom of the map while the red base teleporter is at the top.
- The Aquilla arena’s teleporter to the red base is on the upper left corner and the teleporter to the blue base is on the lower right corner.
- On the top center of the Celestia map is the blue base teleporter. On the bottom center of the Celestia map is the red base teleporter. Remember, you can only enter your own team’s base!
Beastmoon Battle Chests – Battle Coins
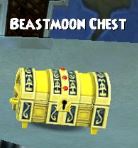 Battle coins are an exclusive currency that can only be used in the Beastmoon arena. Each player can collect up to 100 battle coins. Spend these in your team’s base to buy extra copies of your Beastform’s learned spells. You can acquire them via opening Beastmoon chests or harvesting Beastmoon seeds. They are a vital asset on your road to victory.
Beastmoon Battle Chests – Treasure Chest Battle Cards
Treasure Chest Battle cards are exclusive, modified versions of certain schools’ spells. Currently, these battle cards from Beastmoon chests are the only way to access out of school spells. However, these treasure chest battle cards are much weaker versions of out of school spells. They offer a taste of what the other school can do, rather than a straight up copy. All treasure chest battle cards currently cost 0 pips. The known battle cards are:
- Beastmoon Blessing (Life School): Heal an ally 50 health
- Beastmoon Pixie (Life School): Heal an ally 75 health over 3 rounds
- Beastmoon Burn (Fire School): Deal 75 Fire damage to an enemy over 3 rounds
- Beastmoon Blade (Storm School): Apply a +50 flat damage blade to an ally
- Beastmoon Shield (Ice School): Apply a 50 flat damage absorb shield to an ally
- Beastmoon Curse (Death School): Apply a +50 flat damage trap to an enemy
- Beastmoon Boon (Myth School): Give 1 pip to an ally
Capturing a Circle
Capturing circles is the most essential function of the Beastmoon Hunt. To capture a circle, simply stand on it until the timer that appears counts down to 0. Certain types of circles have different time requirements for their capture.
- Unclaimed Circles- Showing up as gray/white on the map, these circles take 10 seconds to bring under your control.
- Enemy Circles- Claiming a circle that belongs to the opposing team takes 30 seconds to bring under your control.
Pro Tip: If a second person on your team attempts to capture the same circle the timer will speed up so it often pays to run in pairs!
Battle Mechanics
Contesting a Circle
When one or more players from opposing teams attempt to capture the same circle, they will engage in combat. Combat largely works like normal Wizard101 combat. However, it sports a unique turn system and unique school boosts that we will explore below.
Pro tip: There are unmarked combat circles scattered throughout the arena. Catch an enemy off guard in one of these unmarked circles to engage in battle, stalling them or denying them access to an area of the map.
Turn System
The Beastmoon hunt sports a unique alternating turn system never before seen in Wizard 101. In every round, each player alternates who goes first. For instance, in a 1v1 it would look like: A-B ; B-A ; A-B etc. In team duels, where members of Team A are A1 A2 A3 A4 and Team B are B1 B2 B3 B4 the system goes: A1-B1, A2-B2, A3-B3, A4-B4 ; B1-A1, B2-A2, B3-A3, B4-A4 and alternates following this pattern each round. This system works extremely well for Team PvP scenarios and is well balanced within the Beastmoon Hunt itself.
School Advantage
The Beastmoon Hunt uses its own unique school advantage chart, which can be found on the top left of your screen. The school advantages are as follows:
- Fire has an advantage over Ice
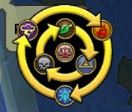
- Ice has an advantage over Storm
- Storm has an advantage over Fire
- Balance has no advantages or disadvantages
- Life has an advantage over Myth
- Myth has an advantage over Death
- Death has an advantage over Life
In the Beastmoon hunt, you take an additional 25 flat damage per attack from a class that has an advantage over you. Beastforms with advantages also tend to have spells that counter or neutralize the disadvantaged class. For example, Ice has an advantage over Storm and comes with many blade removal spells to counter Storm’s many blades.
Pro Tip: The +25 bonus flat damage ignores absorbs. Even if the opponent has an active absorb shield you will still deal at least 25 damage to a disadvantaged class.
Point System
Points Awarded for Circle Capture

Capturing a circle nets you 1 point. You also gain 1 additional point for each circle you control. For example, if you capture 1 circle you will gain 1 point. If you capture a second circle you will gain 2 points(1 for the circle just captured and 1 for the circle you already control) for a total of 3 points. In other words it pays to control circles, as the more circles you control, the more points you gain for taking other circles.
Points Awarded for Contested Circle Capture
Unlike empty circles, circles that are contested(i.e circles you must fight for) award many more points for their capture. Winning a contested circle gives you 10 points at base. The spiral circle in the center gives a whopping 20 points at base if captured while contested! Furthermore, contested circles also award you bonus points based on the amount of circles already controlled and even more points for defeating enemies (see below)!
Pro Tip: Winning a contested circle spawns “Victory Pips” at the center of the circle in the Avalon Arena. Run up to these to refill your pips quickly after a victory.
Pro Tip: The Spiral is not open till about halfway through the battle. Focus on the outside circles until the spiral opens. Winning the spiral can easily switch who is winning a game or further extend a lead making this circle one of the most important.
Defeat
Defeating an opponent earns you 2 points. Points are calculated at the very end of the battle, so simply defeating an opponent but losing the battle may not net you any points at all. A defeated opponent returns to their base and receives a 30 second penalty before they can use the teleporter and return to the battle arena. Similarly, being defeated awards your opponent 2 points at the end of the battle in most cases. While defeated, if a teammate wins a battle within 2 rounds of your defeat, you are revived at 1 hp and the opponent gains no points.
Pro Tip: Defeat points are tallied before victory points at the end of battle, so it is entirely possible to lose a battle but win a match if an opponent was defeated longer than the 2 round grace period.
Fleeing
Fleeing counts as a defeat and awards the enemy 2 points the moment you flee(instead of at the very end of the battle). It incurs the same 30 second cooldown timer as being defeated. Learning when to flee and when to stay are key to successfully winning contested circles.
For instance, let’s say my team has 88 points and the enemy team has 98 points. Both of our teams are battling at the spiral. My team is about to win the spiral battle which would win us the game. However one of our members is defeated the round before.
- If said member chooses to flee we would instantly lose the game as the opponent’s team would gain the 2 points needed to reach 100.
- However, if the defeated teammate stays, we will win the battle by capturing the spiral.
 Domination
Domination occurs when one team controls all the circles in the Arena. When this occurs, the team with control of all the circles will receive one extra point every few seconds. This Domination bonus continues until the enemy team attempts to take control of a circle. Thus, holding control of all the circles can result in a very rapid victory.
Mercy
Mercy is a condition that I have seen rarely. If a team has only one player left in the arena, while the enemy has 2+ players or, if your team is outnumbered by the enemy by more than 3 players, the mercy bonus will apply. The opposing team will gain one point every few seconds for the rest of the game. The only action that stops the mercy bonus is engaging in battle, but the bonus will apply as soon as battle is over.
Beastmoon Seeds and other Rewards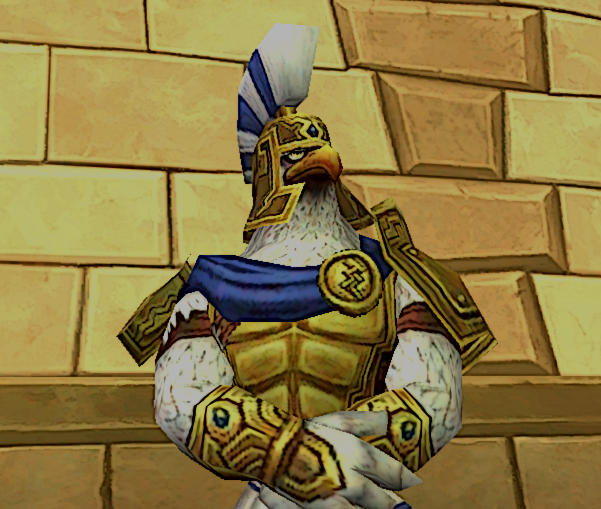
Win or lose, each Beastmoon hunt awards you with unique, never-before-seen rewards. After each fight, you will get your rewards. The winning team earns 2 pages of rewards, while the losing team earns one page of rewards. The rewards are as follows:
Lunari
Lunari is the exclusive currency of the Beastmoon hunt and is used for virtually all of your Beastmoon-related needs. It purchases both level and tier upgrades for the various beastforms. You can also use it to purchase recipes for the exclusive Beastmoon robes and Beastmoon seeds. Lunari is acquired via participation in the Beastmoon event, the Scroll of Fortune and the Beastmoon Hunt event reward tab. Win or lose, players gain Lunari based on the amount of points they earned their team so it literally pays to be active.
Moonstones
Moonstones are special reagents that are needed to upgrade your Beastform’s levels and craft Beastmoon seeds. They drop from the Beastmoon Hunt and from Beastmoon seeds.
Thread
Another unique drop from the event and seeds, you need these ingredients to craft the coveted Beastmoon robes, available from Actaeon. They drop from the Beastmoon Hunt but to get enough thread to craft the robes, you will need to garden Beastmoon seeds as well.
Beastmoon Seeds
Beastmoon Seeds are unique plants that drop battle coins, threads, moonstones and idols. These are needed to upgrade your beastform level and tier. Different Beastmoon seeds drop different rewards.
- You can acquire regular seeds by participating in the hunt, from the hunt rewards tab and from the scroll of fortune.
- Unfortunately, Elemental and Spirit seeds are a little harder to acquire. However, you can purchase the recipe from Actaeon. Furthermore, some come from the hunt rewards tab or the scroll of fortune.
- Finally, school specific Beastmoon seeds are the hardest to acquire–available only via recipe purchased from Actaeon. School-specific Beastmoon seeds are one of the only ways to acquire the elusive Beastmoon idols needed to get your beastform to level 5 and to tier up your beastform.
Pro Tip: Acquiring a Beastmoon seed recipe does not give you the seed. Instead, you must head over to the Beastmoon Cultivator to craft your seed. Different seeds require different moonstones to craft.
Unique Properties
Beastmoon Seeds have unique properties that differentiate them from other plants, such as:
- You can only plant them in Beastmoon planters. You acquire 2 of these planters after your first hunt (win or lose). Upon your 25th Beastmoon match you will acquire your 3rd and final Beastmoon planter. Try not to feed these to your pet!
- Beastmoon seeds do not have a mature harvest and can only be harvested at elder. Beastmoon plants grow incredibly fast compared to their regular gardening counterparts. Normal Beastmoon seeds take about 30 minutes to an hour to hit elder, while Elemental/Spiritual take about 2 hours, and School Specific seeds 4+ hours.
- Unfortunately, there is no item or plant that can speed up your Beastmoon seed growth rate. That being said, there is a gardening treasure card called hasty harvest. This treasure card takes your mature Beastmoon seed immediately all the way to elder. These treasure cards drop from the hunt and from Beastmoon seeds themselves. Furthermore, you can even get some of these handy treasure cards in the Beastmoon hunt rewards tab!
Badges
Finally, the Beastmoon hunt adds badges, lots and lots of badges. Badges for unlocking forms, for maxing out forms, and for unlocking tiers. Badges for winning and participating in matches. Can you hunt down all 122 new badges?
But Wait… There’s More!
We have 3 other guides the discuss Beastmoon Hunt strategy and upgrades/rewards further. Check them out if you’d like more information:
- Beastmoon Hunt Strategy
- How to Get Beastmoon Hunt Upgrades & Rewards
- How to Rock the Beastmoon Hunt Battlegrounds (some discussion on both strategy and rewards)