August 23, 2020 April 2, 2023
Fellspawn Speed Run Guide
OUTDATED – due to several spell changes
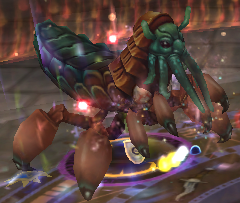
Are you familiar with Fellspawn? This is a boss found in the Wizard City Catacombs that drops some of the best level 130 gear in the game. As you can imagine, gear this good will most likely be found behind a challenge, which is exactly the case here! Fellspawn has some of the toughest cheats in the game, but we have a way you can counter them in this Fellspawn speed run article.
Huge thanks to Scion aka Logan Legendhunter for sharing all this speed run information with us and testing it throughout several runs.
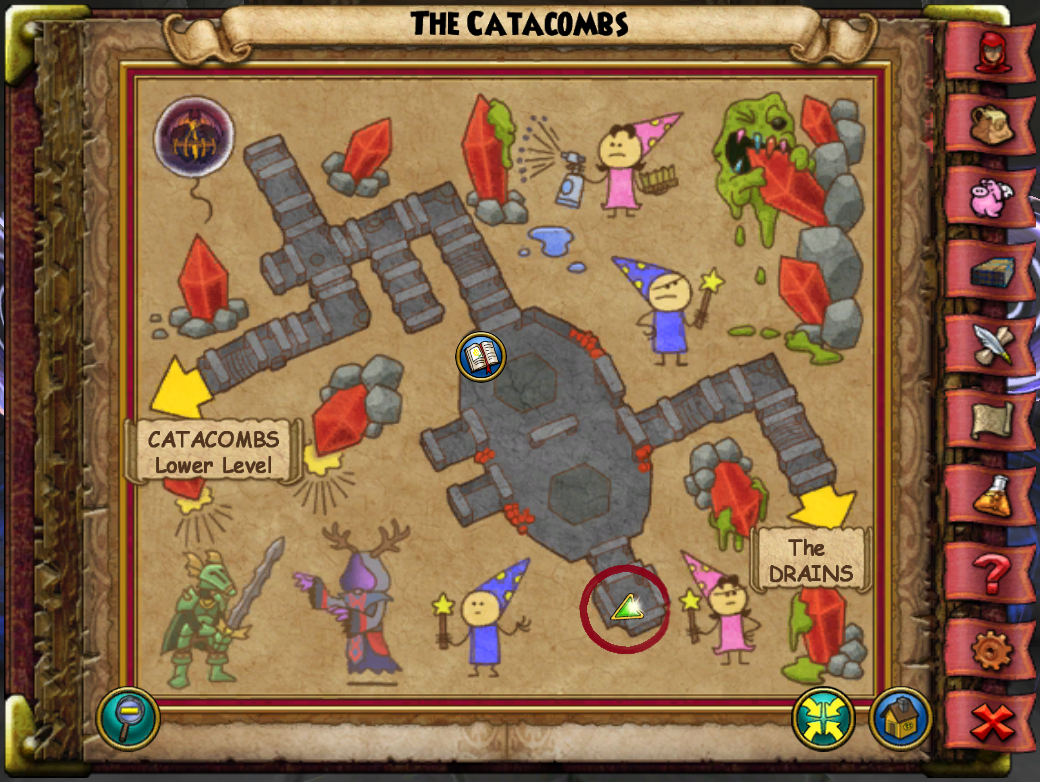
To start with, head to the Catacombs and locate Fellspawn in the location marked on this map. As a note, make sure to bring with you several gold skeleton keys as you will always need one to access the battle and the drop rates aren’t exactly kind.
As a twist, this boss has several badges you can unlock for completing different challenges. Very little was known about these badges until recently, but we knew there was one for soloing him and one for defeating him in three rounds. And that is where this article comes in. Scion managed to prepare several strategies that allow each of the main seven schools to defeat Fellspawn in three rounds. The good (and probably the most astounding) news of this all is that it even includes one for Ice.
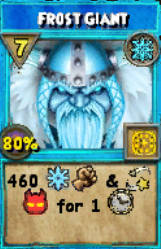
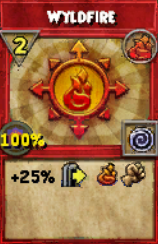
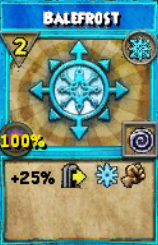
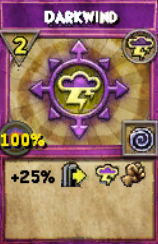
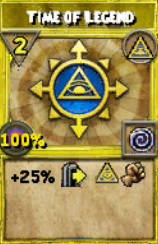
It shouldn’t be that surprising as Ice is a good school, but the surprise lies with the fact that each school uses its rank 7 AoE spell in this strategy. This means that Ice does this with Frost Giant that only does 460 base damage!
Battle Overview
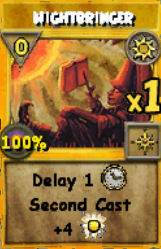
As of Summer 2020, Fellspawn has 46,000 HP to account for the spell changes from the ongoing audit. The battle mechanics remain exactly the same. Fellspawn cheat casts a bubble that puts a cap on spell damage to 9999. Meaning that alpha striking (one-shoting) the boss is not possible. This can only be countered with multi hit spells like Hydra and Chimera that allow for up to 3 x 9999 hits from one spell. Unfortunately, the mystery remained as to how one can possibly defeat Fellspawn in 3 rounds or less. Luckily, Scion shed some light as to how we can remove that pesky bubble at least long enough for us to land a blowing hit to Fellspawn. The answer lies with none other than Nightbringer!
Simply cast the attack with Nightbringer and cast a bubble on the round the hit actually goes off. The bubble is temporarily changed, allowing the attack to do more than 9999 damage. This article will detail exactly how this strategy works. Additionally, for a more detailed overview of the battle including all the cheats, spell casts by enemies and minion overview, I highly recommend reading Blaze’s article.
What are the speed run requirements?
Among the requirements, you will find some basic things like Feints, and Sharpened Blades which I covered in a previous article. I’ll be going over the tougher items you will need to complete this challenge. There are some things that you could find an alternative for, and some others that are unfortunately a must have at the moment. Let’s take a look at the main requirements of the speed run strategies before we delve deeper in how it all works together.
Nightbringer
Each strategy requires the hitter to have Nightbringer available. However, you won’t need to upgrade it, just simply have it unlocked. This means that you only need a total of 35 Nightbringer spellements for this to work.
This spell will be used to delay cast the attack. This means that you won’t be using any other damage enchants like Colossal or Epic, as you can’t use another Sun enchant on an already enchanted spell.
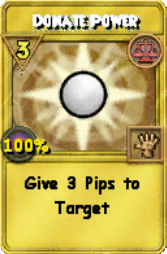
Donate Power Treasure / Item Card
With great power comes great… requirements (that is how that goes, isn’t it?). The hitter will require a great deal of pips to be able to cast their hit and this happens as early as round two. Nightbringer adds 4 to the pip cost a spell is supposed to be cast, or 3 if it upgraded far enough. Donate Power helps counter this high pip requirement.
The trained version is unfortunately not good enough as it only gives 2 regular pips. You will need the treasure card or item card version of Donate Power as it gives 3 regular pips instead. It is not that common, but here are some useful sources where you can obtain this spell:
Donate Power Treasure Card Sources:
- Angel Oak mature and elder harvest;
- Crafted – Recipe from Niles, the Balance Tree;
- Dropped from several creatures.
Donate Power Item Card Sources:
- Auctionable Robe – Drape of the Wild
- Auctionable Balance ONLY Amulet – Shadowmark’s Charm of Making
- Jewel – Donate Power Citrine
- Pack Hat – Allfather’s Helm
- Pack Robe – White Pandamonium Lamellar
Frenzy
This is not an absolute must, but its extremely helpful. It is also very useful in general combat and not just for Fellspawn. Certainly worth investing training points in this spell. You will need to train Berserk before you can train it which means it will actually cost two training points. It is available from Qyburn Stellargaze in the Astral room of the Arcanum.

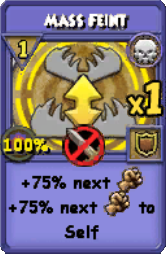
Mass Feint & Mass Trap Item Cards
Due to the inability to use blades in the first three rounds, the strategy relies heavily on traps. Additionally, having minions with high HP will require universal traps. These traps include the ones found on the Dragoon Hats and the Mass Feint from the Dworgyn Hat from the Professor’s Hoard Pack.
As an alternative, you can also find a Mass Hex item card on the universal vanguard hat. This can help with any school strategy and the vanguard hat itself is not that difficult to obtain, as it can be crafted or dropped from King Detritus.

Armor Piercing
Fellspawn has a 70% Storm resistance which means you basically have to use a prism if you’re a storm wizard. On the other hand, it resists 25% to Balance, Ice, Fire and Death, which means it can be countered with enough pierce. As an added bonus, having pierce in this battle will also help counter any same school minions you might face. Keep in mind that minions spawn on the second round and can be of any school, including Shadow.
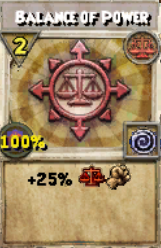
2 Pip Global Spell Treasure Cards
The hitter will be required to cast a global spell as a core part of the strategy. Ideally, a treasure card version is used to gain more effectiveness. Unfortunately, Life and Death don’t have it easy here as they don’t have a 2 pip global that gives damage. Death can still cast Doom and Gloom to fulfill the strategy, but it won’t have any positive effects. Life will need to use a mastery amulet and cast any of the below bubbles. Luckily, mastery amulets are easier to obtain nowadays from multiple sources including Cronus, the Gladiator, Omen Stribog and many others!
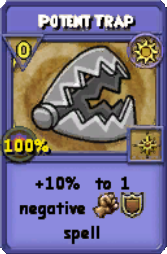
Potent Trap Item Card
You will require Potent Trap from item cards to enchant a Feint so that you have another variation of it. This spell can be obtained through many sources including the Dragoon boots, the Kalamar amulets dropping from many creatures in Empyrea part 2, and even bought from an amulet vendor in Khrysalis’ Silent Market.
How exactly does the Fellspawn speed run strategy work?
It all revolves around Nightbringer. As I already mentioned, Fellspawn doesn’t allow you to deal more than 9,999 damage at a time unless you cast a spell like Hydra or Chimera. However, this strategy counters this entirely. The way Fellspawn doesn’t allow you to deal that much damage is by casting a cheat bubble that cannot be replaced… or can it? That is where Nightbringer comes in!
The basic idea is the usual alpha striking scenario, where we buff the hitter for one huge attack. In order to achieve this, the bubble will need to be replaced to allow more than 9,999 damage to go through. Enchant your attack with Nightbringer and cast a bubble on the round after you cast your attack spell. When both spells go off, you will cast the bubble first (the spell you actually cast on round three) and then the Nightbringer-ed attack (which you cast on round two).
Keep in mind that for some unknown reason, critical hits don’t work in this battle no matter how much critical rating your wizard has. Thus, you will need to rely mainly on your damage and pierce. Also, in the first three rounds, one won’t be able to use any blades without getting hit by Mana Burn and Enfeeble. One blade can be used if protected with Aegis. The only other blades that could work are Bladestorms that are not cast by the hitter.
Strategy Guidelines
Scion managed to lay down at least one strategy for every school. Keep in mind that these are not rules set in stone and if you think you can replace something with another go for it! If you test out different ways to do this, you might find something we haven’t thought of yet. Ideally, you and your team are should cast spells in the exact order shown below, as switching a spell with another might throw everything off! That said, if you think anything can change feel free to try it and speak out.


What could go wrong throughout?
Through testing, we found that several things could go wrong and throw off the entire strategy. So far, we’ve noticed the below issues that could come up and potentially force you to restart from scratch.
Failing to join on the first round
It is of extreme importance that you join on the first round or none of the above strategies will be able to work. Casting any of the spells on rounds 4 will trigger cheats that remove traps and undo all your work.
Fizzling
There is a chance you might be hit with spells that put a mantle on you like Raging Bull and Sirens. Fizzling any of the spells will either put you on a delay or have you fail doing enough damage to one shot Fellspawn.
 Shields and Debuffs
Tower Shield, Mass Tower Shield and Legion Shield are all possible if you are facing against an Ice minion. Be on the look out if you have one spawn. On the other hand, both Death and Shadow minions have a different version of Virulent Plague that stack. In this light, be very cautious when dealing with Ice, Death or Shadow minions. Sometimes it might be best to reset especially if you are going second to avoid any surprises on the third and final round.
Dying
Unfortunately, it is all too possible for Fellspawn to knock you out before you are able to complete the strategy. It is unlikely, however it can happen at any time. Marking location next to Fellspawn may be a great idea just in case you need to reset.
Power Pip Fails
Make sure your hitter can generate reliable power pips, as a regular pip can throw off the entire run. Let’s work it out together… your initial pips will get you 5 pips (2 from turn + 2 from wand + 1 from deck). Donate Power TC / item card provides a total of 6 more pips which will get your hitter to 11 pips. This means that by the end of round 1 your hitter will have enough pips to cast the hit which requires 11 pips due to Nightbringer. After the hit is cast, the hitter will need to generate a power pip to cast the bubble on the third round.
Wrong Player Order
Some of the strategies will require a specific player order. This simply means that player 1 will need to be in the first spot, player 2 in the second and so on. Generally, you just need to have the hitter in the last spot, but some strategies require specific turn order which is why I recommend following above strategies to the letter if you are to carry those out.
As an example, casting a Bladestorm first and then a protected school specific blade after will end up removing the Bladestorm and only keeping the last blade on the hitter.
Speed Run General Tips
A speed run is much more critical than a regular battle. Thus, you will need to make sure each player is well informed and prepared for what is to come. Unfortunately, anyone can gain access to the Fathomless Tomb where the Fellspawn lurks, so make sure you plan and communicate before using the gold skeleton key. Choosing a coordinated team is a major deal for this to work.
 Having the non hitters have high accuracy from gear for the school of the spells they will be casting can be helpful. This could help counter fizzles from Raging Bull and Sirens.
Empty your decks! Before going in, make sure to only put in the truly essential spells. Ideally, you only put in the three spells you will be needing – one for each turn. If you’re planning to farm for a long time, you can try shaping the strategy more to your need to include more counters such as Shatter, Cleanse Charms and heals, so you are always prepared for what’s next.
The Badge…s
As we know by now, Fellspawn is a skeleton key boss so it is only right that he has a badge for defeating him. However, the Devs have taken this one to a whole new level! Fellspawn has a total of 6 badges that you can obtain! I like to refer to them as challenge badges as each will require you to do a different challenge or method of winning against Fellspawn. Thanks to Mattnetic we were able to obtain more details as to how exactly we can obtain each badge. Let’s get to it then!
Fellspawn’s Striker – defeat Fellspawn in three rounds or less. Should be easier now that we laid out the idea as to how you can do this.
Fellspawn’s Foe – no one on your team is defeated. Probably the easiest one to obtain.
Fellspawn’s Bane – solo the match against Fellspawn. A handy tip here would be to use the monstrology extracted Germ Ghosts from Mirage as they are immune to any hit they receive.
Fellspawn’s Nightmare – entire team has to stay at high health the entire match. Probably the most mysterious of them all as we don’t know what is exactly considered high HP. Bad Juju and Virulent Plague would probably come in handy here.
Fellspawn’s Adversary – go through the entire match and defeat Fellspawn without using any blades or traps. Reminds me of the good old days when we spammed Belloq with enchanted hits.
Fellspawn’s Master – obtain all the above challenge badges!