August 16, 2013 March 28, 2024
Tartarus – The Final Immortal Game
Epic graphics, epic battles and epic gear! Kingsisle ups the game with this Wizard101 dungeon.
To obtain this quest your wizard must be level 90.
A Rarified Invitation

Cyrus Drake summons to the ‘Wrath of the Immortals’ [0:51] quest. After attracting so much attention by defeating Zeus and Poseidon in their realms, you meet a Harpy Messenger. She stands aside Drake and opposite the Quetzal Messenger in the Myth school.

She is not a happy harpy. She screeches about your incompetence just before she delivers the message for you to battle nightmares in Tartarus. The upmost challenge from the Immortals is to meet the lost brother, Hades the Unseen. Despite the Harpy’s vision that you will fail, Cyrus exclaims to ignore the puffed-up pigeon and head for Legionnaire Romulus on Cyclops Lane for stories of Tartarus.
 Hades sent for YOU
When you ‘Talk to Romulus in Cyclops Lane’ [2:37] Romulus is terrified for you and explains that Tartarus is a realm of suffering. Great Hades the Unseen lives amongst the spirits of the dead! Romulus points you to the Chariot of Aethon once again to reach Silenus in the Garden of Hesperides to quest for the ’Lost Pompeii.’ [3:23]
Bright-eyed Days
Seek the ultimate test? (Well, the ultimate test thus far in Wizard101.) ‘Midnight in the Garden’ [4:13] leads to his youngest daughter Erytheia.
She goes into additional detail about how the Pompeii people pursued forbidden arts. The Immortals sent a Gorgon to attack them without mercy. She bids farewell and returns you to Silenus once more.
Coincidentally, Erytheia also has the quest ‘Revenge of the Immortals’ [6:12] which is to Cronus, the extra boss in Tartus.
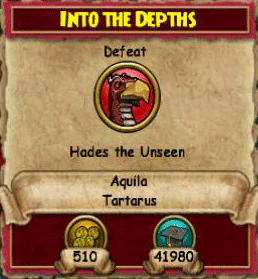
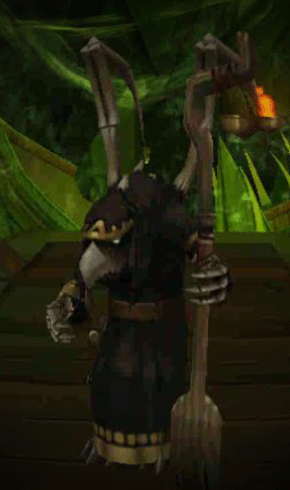
![]() Silenus sends you to the abyss, to seek the poet Orpheus. He warns the Immortals do not play fair. ‘Into the Depths’ [6:00] through the screaming gates we go!
Silenus sends you to the abyss, to seek the poet Orpheus. He warns the Immortals do not play fair. ‘Into the Depths’ [6:00] through the screaming gates we go!
Beyond the Sigil
Fall of Pompeii
Orpheus sends you to the House of Faun for a guide. ‘Locate the House of Faun’ [7:32] to ‘Defeat Death Satyr.’ [7:42]
Battle One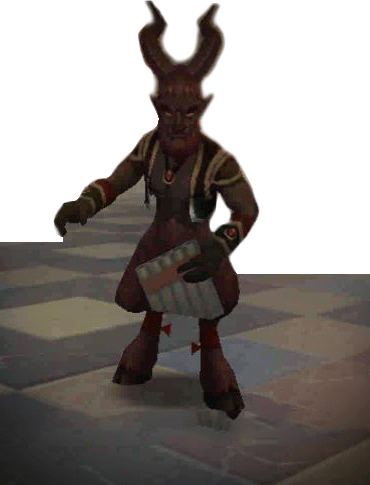
Finally a battle! They all begin with six (6) pips to twelve (12) pips. (Closer to 10-12.)
- Death Satyr, rank 12 Death boss, 12,400 health
- Lamenting Sprite, rank 12 elite Ice, 2,880 health
- Night Imp, rank 12 elite Myth, 2,680 health
- Anguished Woodman, rank 12 elite Fire, 2,640 health
I like the tank and hammer approach to all of these battles. I send a player in with resist/higher health first. This player draws the attention of the enemies. That allows all players to concentrate on setting up a quick hit. I used Ice, Life and Storm while perfecting my plan of action. Three players works well, but four will make it even faster. Two will slow it down a bit.
A couple of feints and a few blades is all it takes to defeat the House of Faun. Expect spells to slow you down such as Blinding Light, Smoke Screen, Tower Shields and Legion Shields. You might even see an Efreet; however, with the first player drawing the hits you should be able to steer clear of the weakness. I also find it helpful maintain a supply of Pierce/Steal Ward and Cleanse Charms in side decks because Death Satyr likes to use Virulent Plague and they may throw a shield on him.
After you defeat him, ‘Talk to the Death Satyr.’ [10:45] He sends you with a silver obol to ‘Talk to Charon.’ [11:20]
Come Sail Away
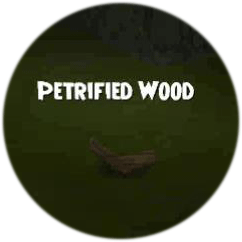 Set an open course to freedom. The Death Satyr gives you payment to cross the River of Souls. Unfortunately, Charon’s ship is shattered and you must ‘Find 6 (six) Petrified Wood’ [12:30] throughout the dungeon thus far.
Two of the six pieces lie very close to mobs with a very narrow area to walk around without being caught. The mobs are easy enough to defeat, however, they will slow you down and are not required. (It is a bit faster to flee and return to the dungeon.) The Petrified Wood will regenerate after some time if you would rather wait to collect them away from the mobs. See the video below for the exact locations of the Petrified Wood. Carry on!
 I send one player down to Charon as the other players collect the wood. One goes back toward Orpheus while another goes around the two mobs. I would use the player with the least amount of lag to go after the two around the mobs. Everyone should have full health before moving on to ‘Go to Charon’s Boat.’ [13:55]
Across the Styx
Take a long walk to the Temple of Longing. ‘Locate Garden of Statues.’ [14:05] The statues in the garden are interestingly interactive. The only benefit is a giggle or two. Before you may enter the temple where The Gorgon Stheno, sister to Medusa dwells, you must ‘Defeat Death Minotaur.’ [14:08]
 Battle Two
The enemies begin with six (6) pips to twelve (12) pips. (Closer to 12 pips.)
- Death Minotaur, Rank 13 Death boss, 15,840 health
- Three Ill-Fated Serpentine, rank 12 elite Balance, health 2,720
Send a tank in first round to draw their attention. This is a straightforward power hit battle. Set up multiple blades and Feints to hit with one all enemy attack.
First round the Death Minotaur casts a Death field of damage, not Doom and Gloom. Casting any heal spells will trigger a +75% death trap on the caster. Prepare for shield and weakness removal. Even with a quick set up of blades and Feints, I have seen Nova, Virulent Plague and Elemental Shields used.
 Living Breathing Warm Blooded Wizard
Puzzle Time
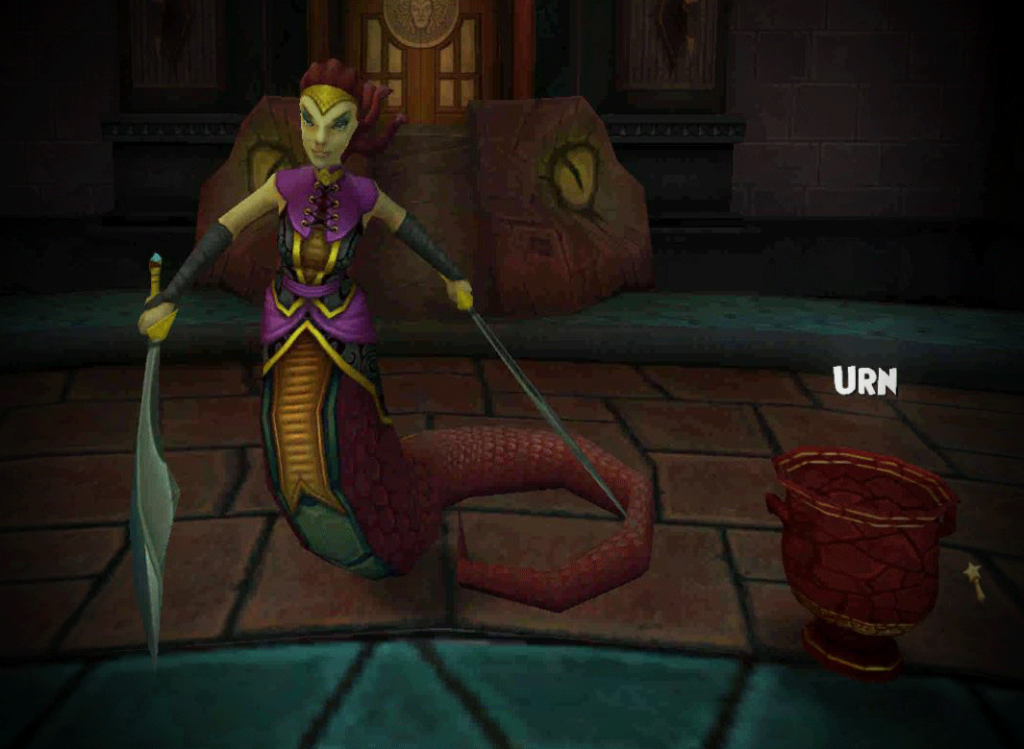
‘Talk to Stheno’ [18:35] in the Temple of Longing. (Her hissing makes me giggle every time!) The Minotaur broke her Grecian Urn. If you fix it, you may pass. If not, the Oran Silverhorn method works too. (Oran likes to ignore puzzles and do the battles.)
Enter four (4) Serpent Mazes. In each maze you find a piece of the Urn. The order in which they are found does not matter. The order in which you put them together does matter. As you enter the maze, look for the text ‘Urn Piece’ to find it quickly by looking over the tops of the walls. The mazes are fairly easy. As in many Wizard101 mazes, the outside edges typically allow you to reach the end the quickest. You will also find a helpful walkway horizontal through the middle of the maze. Watch the video beginning at [21:21] for maze specifics.
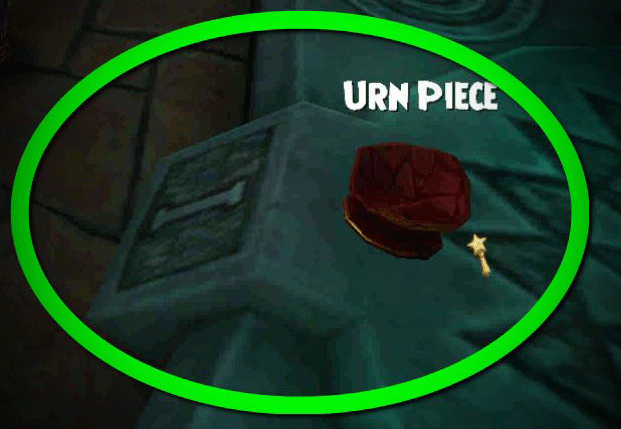 ‘Repair Urn’ [23:43] after finding all of the pieces. Assemble them in numerical order from (I, II, III, IV) 1-4. They are noted in roman numerals on stone plaques under the pieces
After restoring the Urn to its magnificent glory, you must ‘Find Lion’s Tail Leaves’ [24:14] to feed Cerberus. Ugh, back in the maze again!
Let Sleeping Dogs Lie? I wish.
You go through the trouble of collecting the leaves and feeding the dog for nothing, you still battle his heads. Yes, his heads. They each appear atop a flame. This is also the worst voiceover in Wizard101 history. The dog (human) barks at you with a “RAWR! RAWR! RAWR!” I would love to see an update here, even if it is the narrator saying the dog barks at you. Maybe the current “RAWR!” will grow on me, but so far it hasn’t.
Once you ‘Locate Cerberus’ [25:11] then ‘Feed Cerberus’ [25:26] then try to ‘Sneak by Cerberus’[25:39] you must ‘Defeat Cerberus.’ [26:01]
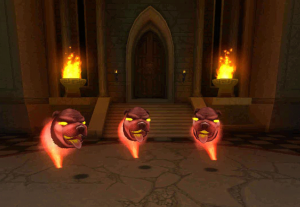
Third Battle (Or 4th if you battle Stheno)
They are all rank 13 bosses with 11,680 health and begin the battle with six (6) to twelve (12) pips. (Closer to 12)
- Myth begins the battle with three 40% towers. Cleanses most traps.
- Balance begins the battle with three 40% towers. Cleanses most traps.
- Fire: Traps allowed
You could remove the towers (Shatter, 6 wands/Pierce/Steal Ward, or 2 Fire Elves) and deal with their ‘Guard Me’ attacks. They will remove all shields at the beginning of the 5th turn and replace them with 3 new Tower Shields. At round 10, Myth will cleanse, put them up, and then move them to Fire. If you attack them one by one and defeat the fire head, they will remove all trap at their cleansing and not put them back up. They will still disallow most traps. Pet traps may work. That being said, there is no need to wait.
I choose to essentially ignore the towers and boost my pierce with spears and Infallible. If you only use your school Spear and trained Infallible, it reduces the Tower Shield by 25% not including any piercing you have on your gear. Add a treasure spear or Elemental/Spirit Spear and it reduces even more. TC Infallible will pierce at 20%. It is entirely possible to reduce their shield to zero. Hades gear does offering piercing. As you gain the pieces, it may behoove you to start wearing them.
A Quick Hop up the Stairs
Cerberus is defeated with another humanist canine voice over “Yipe! Yipe! Yipe!” (I’m sure there is a reason, but really KI? You usually excel at this! Oy!) You can now ‘Locate Hall of Hades.’[34:21]
If your health needs a boost, and you wish to save a potion, walk back to the Garden of Statues for red wisps.
Hades the Unseen, Poseidon Earth-Shaker and Zeus Sky Father greet you in the Hall. They express they will not hold anything back and fully anticipate your defeat. Now, it is time to ‘Defeat Hades the Unseen.’ [36:19]
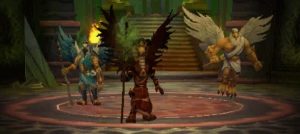 Final Battle — The Three Amigos
Zeus will use Earthquake. Using Vaporize on Zeus is very effective. Vaporize is also effective for lessening the stuns from Blinding Light, Medusa and Basilisk. ****Be sure to take Pierce/Steal Ward and Cleanse Charm. They use Virulent Plague and Tower Shield.
They are all Rank 13 bosses that begin with seven (7) to fourteen (14) pips. (Usually at least 12.) See [35:07] for additional detail.
- Hades is Death with health 18,000
- Poseidon is Storm with health 20,000 and also uses Ice spells
- Zeus is Myth with health 22,000 and also uses Storm spells
Send a tank in and consider using Fortify. Stay alive or Hades will cast heals over time to his team that are incredibly annoying. He will cast one for every one on his team that is standing. Imagine a 3v3 PvP match with 3 heals over time on every wizard. If a second member of your team is defeated, he will cast 3 more! If all three are standing, that is six heals over time on each one of them.
Don’t put any single-target traps on Poseidon, as he will simply remove them. Multi-target traps like Mass Feint or Windstorm can still be used, though. If you use any spells of 6 pips or more (including hits or heals), Zeus will use Minotaur on the caster. So be ready to take some serious damage in this fight!
One all enemy hit is possible for all schools, but a bit more difficult with storm. Think speedy hit. Use a very small deck with only the cards you need, including treasures. Stack blades on last player to hit as quickly as possible. If you are second, consider using a Cleanse Charm on the one casting the massive power swing. Poseidon may also tower, so a Pierce/Steal Ward may be in order also.
Try not to miss, but it isn’t over if you do. If your hit fails you have options. Reshuffle and start over. You may not have any treasure cards blades left, but you will have your hit and your trained blades. Most likely, you won’t need anything else. If you are out, it is possible to flee and walk back to the battle. Being in the battle longer does mean you are taking on additional damage and may need healing.
Learn More: Breaking down the battle even further
It’s all about effectiveness of speed for me.
Using a Storm as a hammer in the Hades battle required some thought and a bit of trial and error. In my attempts, the easiest way seemed to be two hits. Why 2? There are a couple of additional issues to overcome for Storm because of Poseidon. He has high Storm resist like most Storm bosses at this level of play. He does not allow Storm Prism to be placed on him.

The best work around I have found in the Atlantea final battle with Poseidon is to use Mass Storm Prism. You have to work quickly because his natural attack will remove it, but it does allow you to power hit once and be done. In this battle, Mass Storm Prism causes an additional issue. Zeus is Myth and to convert to Myth on his increased Myth resist is futile. You could add a Myth Prism to him first, then Mass Storm Prism turning the hit from Storm to Myth to Storm.
You could use a storm wand on the Mass Storm Prism on Zeus if you are so inclined; however, you are still dealing with a speed and/or a stun issue. Let’s say Storm is in the last spot all bladed up and ready to hit and uses Mass Storm Prism. Any player before the Storm could use any Storm spell on Zeus, another player could even put up a Feint after if you need it. If you are first, you may be safe. If not, you run the risk of any player being stunned or Poseidon using his natural attack and removing the prism. You could use dispels on Zeus to prevent the stun, but not on Poseidon because of his ‘cheat.’
Is it possible to make this work? Sure is. Is it worth it? I think not, but you may feel otherwise. I found it more consistent to hit once to defeat Hades and Zeus with a multi-hit spell, and then hit again a singular hit for Poseidon with a Mass Storm Prism. A Storm Lord and Triton work well.
Another alternative would be to blade two players and the storm do the bulk of the damage by defeating Hades and Zeus and another player defeat Poseidon. This would also work well because Storm with stacked Feints and blades will be able to reach the targeted amount of damage and hit fairly quickly.
See the video [35:23] of the Mass Storm Prism plus Leviathan hit on Poseidon.
 I like Ice as a hammer for this battle very much and it works very well for me. In my set up with Life, Storm and Ice, I set my Life and Storm up with the highest resistant gear I can muster from my backpack. Remember, you need the most resist to Storm, Ice, Myth, and Death.
With my gear on Ice, I need 10-11 buffs. There are many combinations of blades and Auras that work. There is an added benefit in this battle for Ice. Ice Helephant is frequently used and creates a Balefrost. This is demonstrated in the video.
This is how I set it up to give you an example. Many other combinations would work too depending on your players. With four players it could go a bit faster, with two players a bit slower.
Example:
Player1
- Fortify first turn (Only wizard in the battle)
- Vaporize Zeus
- Balance Blade from Amulet
- Treasure Iceblade
- Elemental Blade
- Heal (This player will be hit the hardest and will go in first to battle alone.)
Player 2
- Feint on Zeus
- Elemental Blade with Sharpen
- Dragonblade from pet or Treasure Elemental Blade
- Treasure Dark Pact
- Heal vs Vaporize on Zeus
Ice
- Iceblade
- Iceblade with Sharpen
- Iceblade Vial Amulet
- Berserk or Sleet Storm
- Frost Giant with Colossal
 If you have enough resist, you may be able to get out of the battle without healing. I recommend taking at least one heal on each player that can be used on anyone. There are critical sucker punches from time to time that cannot be avoided.
Rebirths will trigger a hit from Zeus with a Minotaur, but it is minor damage. Primordial Unicorns work without issues.
I do like to leave battles ready for the next one. Often, I will use heals if I have extra turns, even if they aren’t needed to complete the battle. This is useful when farming for loot. There are many red wisps at the beginning of the dungeon. If you plan on going right back into Tartarus, you can heal up there, thus skipping the victory heal.
If worse comes to worse during battle, a defeated player may flee to the Garden of Hesperides and walk back to the sigil, enter alone, and walk back into the battle.
Wanna see ‘em all go down? Check out the video at [42:00] Whamo!! I’m the best duelist they have seen! Woot! How did they know I work at Duelist? (tehehe)
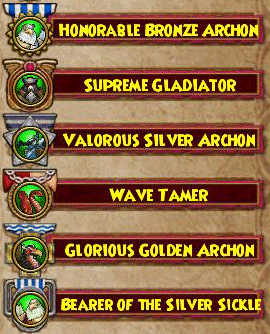
Badge Earned: Laurel Badge
After finishing Tartarus, we earn the Glorious Golden Archon Badge.
Final Notes
Special Housing Items!
Behind Hades, or the enemy in the Dagger spot, there is a ‘Hades the Unseen Mural’ [40:35] for you to collect. Walk up and click ‘X.’ You can also pick up an ‘Underworld Brazier [11:27] and an ‘Ember Stone of Tartarus.’ [11:41] (I have been able to get two of the items if I double click x really fast.) See all of them in my dorm room at [44:51]

Gear
If you want the top of the line Hades gear, channel your inner farmer Joe. Deck renaming can make farming this dungeon quicker. Once you find your preferred strategy, you can just switch out decks to go faster. Remember to reload things like treasure Cleanse Charms and Pierce and any treasures used for your final battle. Here are a few examples of the gear.


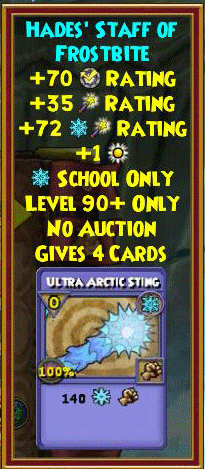
Click for our guide on all of the Hades’ Gear. There are two sets.
One is an upgrade to Waterworks gear and the other takes a more offensive stance.Click for Full Hades’ Gear Guide
Hades Farming
Respawn
Currently, there is a way to get Hades to reappear after the battle a second time. Place a mark inside the Hall of Hades then defeat Hades (not Zeus and Poseidon.) Have the person who marked then flee the battle and return via the mark. Join the battle for the defeat of Zeus and Poseidon. Watch Hades magically reappear!
Battle Partners
If you are looking for help, check outside the dungeon in a busy realm. Feel free to refer your new friends to this guide if they are having difficulty getting through the dungeon.
Have fun! Farming gets tedious and farming in this dungeon is much like the Tower of the Helephant or Waterworks. It takes time. It can be done in under an hour with a good crew. Find ways to keep it interesting and enjoyable.
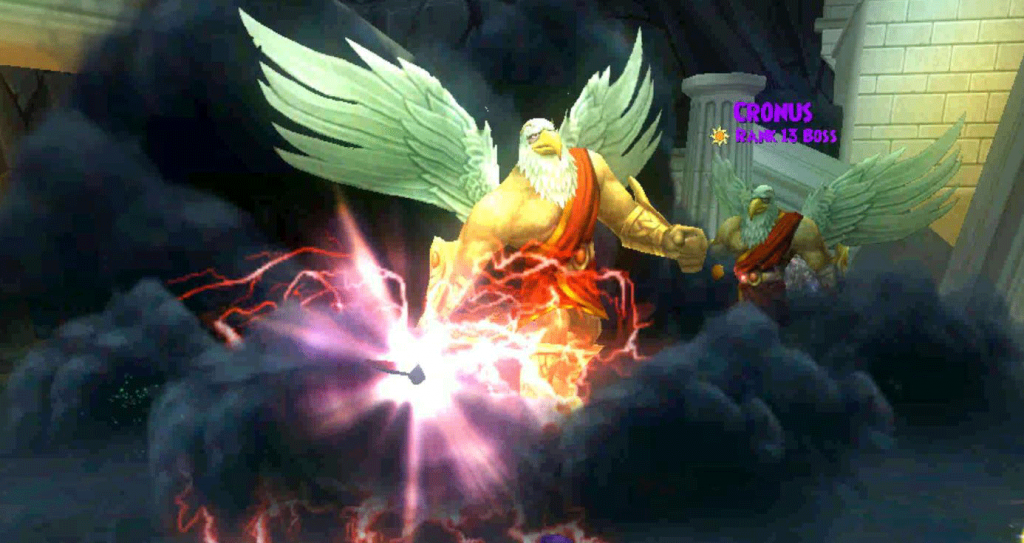
Cronus Bonus!
Watch my Cronus beat down! ‘Revenge of the Immortals’ [45:16]
This is a fast paced battle you can repeat easily. Cronus is Sun with 30,000 health. Feint him, blade up and power hit to your heart’s content. A heads up for Earthquake since Cronus and one of his minions have it.
This is the place to go for the athame with 15% damage! The Blade of the Felled Titan is sure to help you out in PvP.

Happy questing and good luck on speedy gear collection!