August 14, 2016 November 12, 2023
Fallen Angels: How To Defeat the Angel Strategy in Ranked 1v1 PvP
In Ranked PvP another stall strategy has risen in popularity in recent days. Like Jade Juju, this strategy has existed for a long time before becoming more mainstream. It is just as controversial, just as hard to defeat and has caused many Arena regulars a lot of strife. The strategy I am referring to is, of course, the Angel Strategy. This guide will describe what the Angel strategy is, common types of Angels you may encounter in the arena and the key to defeating this once uncommon playstyle.
What is the Angel Strategy (What is an Angel)?
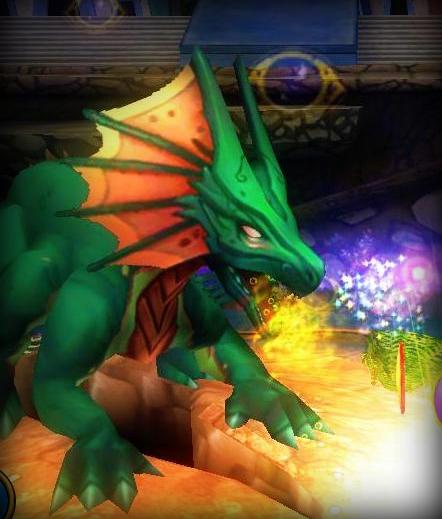
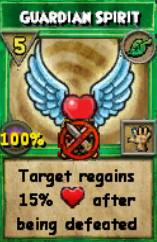 The Angel strategy is a strategy typically only available to the life school. It revolves around exploiting 2 key mechanics available to the life school: High Heal boost(with lots of natural heals) and Guardian Spirit. The strategy gets its name from the Angelic wings that appear in the casting animation of Guardian Spirit. An Angel player strives to gain as high a heal boost as they possibly can. Utilizing this high heal boost an Angel makes it almost impossible for an opponent to outright kill them via spam strategies. A properly equipped Angel can achieve a 2 pip Fairy heal of 1400+ which heals off more damage than most 6-8 pip attack spells. A satyr from an Angel will often heal enough to completely erase the damage from a Shadow Enhanced Spell. Angels strive to achieve bubble control: repeatedly casting Sanctuary for even more heal boost and to deny an opponent offensive momentum. Finally, an Angel relies on the spell that defined the strategy- Guardian Spirit. By utilizing guardian spirit with a high heal boost and a bubble an Angel can assure that in the rare cases they do die they will pop back to life with a solid 2500+ health buffer. This guide will illustrate how to defeat this seemingly unbeatable strategy.
The Types of Angels
Despite common belief, not all angels are created equally. Identifying the type of Angel you are facing is the key to determining how best to defeat them. In this segment, I will highlight the 3 most common angels, their tactics and how to identify them.
Stall Angels/Defensive Angels
The most common type of Angel seen is the Stall or Defensive type Angel. This type of player focuses purely on defense, healing, shielding and debuffing. The goal of this player is to stall out the match to where the opponent flees due to lack of cards, frustration or time constraints. These Angels are fairly easy to identify as they do not carry any types of buffs or offensive spells and will frequently utilize the rounds they are not healing to shield, debuff and dispel.
Slow Offense/Old Meta Angels
This type of Angel is the the predominant type from the first 2 ages of PvP before reshuffle became 1x. With the Reshuffle change many Angels switched over to the stall style highlighted in the first post but this style is still fairly common. This style involves the constant healing and debuffing that is the hallmark of any angel strategy. However, this style then attempts to trap stack using school specific traps and feints for a late game one hit knockout combination. This style will often use a late game shatter to finish off its combos. It is usually very easy to identify as well. If you start to see traps being stacked, you are facing an Old Meta Angel.
Fast Offense/New Meta Angels
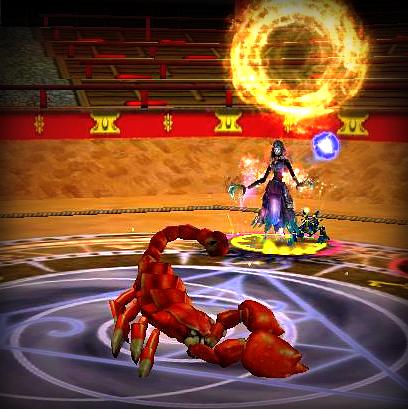
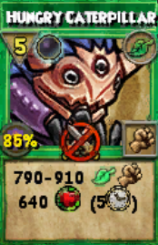 This type of Angel is the least common but most effective type of Angel in today’s arena. Popularized by Angel strategy pioneer Corwin Lotusmancer, this Angel variant attempts to fuse the typical Angel tenants of high heal boost and guardian spirit with the offensive spells today’s meta provides. In today’s meta most schools are not running heals. Even those that do frequently cannot heal effectively due to the critical system changes. On the flip side, all schools have access to shadow enhanced spells that deal a huge amount of damage at base. In addition, every school has access to the offensive bomb: shadow shrike which offers enough pierce to wipe out most school’s base resist. An offensive angel takes advantage of both sides of the spectrum. With its high heal boost and guardian spirit, it has a solid defensive stance. By utilizing Shadow Enhanced Spells and the utility of luminous weaver it can deal solid damage to schools who are hard pressed to heal said damage off. This combination is very hard to defeat as this Angel Variant can kill you long before you have a kill solution in turn. This angel is also fairly easy to identify as it will not hesitate to blade, weaver or caterpillar you given any opening.
Note: It is entirely possible that with the buffs to Shadow Creatures that some Angels will incorporate Dark Nova into their strategies. As this meta has not taken form yet I will not be writing about these Angels in this guide. I will write a supplementary piece if said strategy becomes common.
How to Counter and Defeat Angels
Much like countering Jade Juju, countering Angels requires a deeper understanding of outdated game mechanics (such as the neutral). This requirement makes this strategy particularly hard to counter for new age warlords who are used to playing in a straightforward offensive meta. The typical strategy of 4 pip hits followed by shadow enhanced spells (with debuffs in between) simply does not work on Angels. An Angel can heal off multiple 4 pip hits with a single fairy. They can hard counter a shadow enhanced spell with Satyr. Even if you do manage to spam an Angel to death, they will simply pop back to life with 40%+ of their health buffer while you remain pip starved. As such 2-main methods exist to take out Angel users: One Hit Knock Out and Combo.
One Hit KO
One Hit Knock Out (OHKO) is the most reliable way to take out a Jade Angel as it preempts their usual strategy of healing off the damage they take as quickly as possible. Thanks to Shadow Enhanced spells, achieving OHKO is easier than ever and does not cost as many pips. To achieve an OHKO most schools need only 2-3 buffs and a clean shot. Buffs can easily be achieved in 3 main ways in this meta: Bubbles, Blades and Auras.
Bubbles
Bubbles are the single most effective way to buff your damage vs Angels. While most Angels carry enough bubbles to win the bubble war; well timed bubbles will cause them to waste resources (most Angels carry a 4 pip bubble vs your 2 pip) and can lead to open shots (example you bubble-Angel will try to remove bubble which is a round they are not shielding or debuffing)-granting you an opening.
Auras
Auras are the next best way to boost your damage output against an Angel. Infallible acts as a 4 round surgical knife-allowing you to cleave through an Angel’s resist or counter fortify. High Pierce schools such as balance, fire and storm can utilize their Aztecan aura which acts as an additional 25% blade for 4 rounds. As most Angels rarely carry supernova, an aura cast is a 4 round offensive buff that most Angels do not have an answer for.
Blades
Blades as an offensive buff are the most easily countered but simultaneously the easiest to establish and stack. With sharpened blade and a regular blade, one can easily double their damage output for the next offensive strike. Unfortunately, many Angels carry an enfeeble pet which can make this strategy a bit unreliable. However, with only 1-2 blades needed and with the addition of your other buffs-blades form an important part in creating the OHKO needed to take out an Angel.
Combo
Combos follow the same principle of OHKO by denying Jades the ability to heal out of an attack. Combos can be more effective than OHKO as they can be harder to counter but they typically cost a larger amount of pips and can often be preempted. There are 3 main types of combos available to counter angel jades: Stun, Fizzle, and DoT
Stun Combo
A stun combo is exactly what it suggests. It involves using a heavy damage spell on an open Angel (such as Storm Lord or Medusa) and then following this spell up with another heavy damage spell. As such, you can shut down an Angel without affording them the opportunity to heal. Another form of a stun combo involves using an off school stun (such as myth banshee) to clear away universal debuffs and then following up with an OHKO shot. Yet another stun combo involves stunning a newly revived Jade, so you can hammer in the final shot before they fully recover. Stun’s one main weakness is that they can be preempted via the use of stun shields.
Fizzle Combo
Fizzle combos follow the same principle of a stun combo. However, they come with the added benefits of being unable to be countered preemptively. There is no fizzle prevention spell outside of infallible or accuracy enchants. However, fizzle spells do come with the disadvantage that they can fail. A popular fizzle combo is using the spell Shift Grendel to remove stacked universals while retaining buffs and then following up with an OHKO move. Balance can also use fizzle combos to a lesser extent in a pressure strategy(shrike-lore-lore etc).
DoT Combos
DoT combos are available to schools with heavy hitting DoTs(such as Death, Myth, Fire). They typically involve blade stacking into a large DoT. This strategy comes with its advantages and disadvantages. Advantages of this strategy include the fact that it can preempt shields. The damage can also be buffed after the attack is launched via feints or other traps. You also benefit from being able to cast other spells on the rounds before the DoT kills (such as Doom and Gloom). A weakness of this strategy is that it can be removed via triage. In addition, some jades may be able to out heal the DoT’s damage as it is happening. To counter this: follow up your DoT with a stun, another weaker DoT (the triage will remove the weaker DoT first) or a Doom and Gloom. Using Doom and Gloom with a DoT strategy is very effective. It forces your opponent to address one or the other(the doom or the DoT damage) while also ensuring that if it remains on the field the Angel will return with significantly less health and no effective way to recover.
Note: The Importance of Shrike
You will have no doubt noticed that within the above explanation I did not mention Shadow Shrike. This is not because Shadow Shrike is a bad tool to use against Angels. In fact it is a very effective tool that I encourage players to use in these matches. However, contrary to popular belief shadow shrike is not the only tool needed to defeat Angels. I cannot tell you how many times I have seen a PvPer enter shrike as soon as they gain the shadow pip and start spamming hits in what seems to be a desperate attempt to take out the Angel. Not only is this method unreliable, it is also a massive resource drain. Many times it leaves you right back where you started as the Angel easily heals off your damage. Shrike should instead be used as part of a surgical strike. You should have the pips and buffs necessary to execute a killing combo. In other words, you would be wise to save shrike for an opportune moment against the opponent rather than using it as soon as the shadow pip appears.
Getting to your Kill Solution(Understanding The Neutral)
Now that we understand some of the methods to taking out an Angel, we can dive into the difficult part: getting to the point where you can unleash a killing strike. To get to this point, you must understand a defining feature of old-meta matches: The Neutral Phase. It is almost non-existent in typical top level matches:
A Brief Explanation of the Neutral Phase
 The Neutral Phase of the battle is when the combatants attempt to build the resources necessary to enter the offensive stage while also preempting countermeasures by the opponent and defending from the opponent’s strike. The neutral phase is typically entirely absent in today’s top lvl meta. Typically today’s meta is always in the offensive phase with brief defensive intermissions between pip costs(Think Lore-tower-Lore-tower-stun-Gaze). This is Not So against an Angel user. Against an Angel user, you will be playing in a neutral phase for the majority of the match. As soon as you try to enter the typical offensive phase, the Angel will pivot into their defensive phase. They will probably outlast your offense. As such it is up to you to take control of the neutral and in doing so the match. Luckily this is very easy to do against an Angel.
What can an Angel do in the Neutral?
An Angel actually has very few things they can do in the neutral. Their strategy revolves around reaction rather than action which puts the ball firmly in your court. As such an Angel can do only 3 main things in the neutral. They can establish their bubble, they can cast Guardian Spirit and they can defend from potential attacks/set up an offense.
Establish Their Bubble
An Angel will work very hard to establish their bubble in the neutral. They often carry many more bubbles than typical players. As such, they will almost always win the bubble war if it is played in the neutral. Because of that I recommend you do not try to challenge their bubbles in the neutral phase. As tempting as it may be, remember that the bubble offers them no tangible benefit against your preferred KO methods (combo or OHKO) until they die. Not challenging their bubble while in the neutral has many benefits. It allows you to more effectively cycle through your cards than the Angel (For an Overview of this tactic: Cycling). As an Angel carries a glut of bubbles, if you refuse to change their established bubble during the neutral they will either:
- Have to carry the extra bubbles in their hand (meaning they will be cycling much less effectively than you)
- Use up other unnecessary cards (such as satyr in response to a 2 pip attack which leads to a waste of resources)
- Overpredict a bubble change (leading them to waste a bubble and 4 pips)
- Discard the additional bubbles (which helps you control the bubble when it actually matters later in the match)
Cast Guardian Spirit
The hallmark of the Angel strategy is this one card. As such an Angel will try to establish it early in the match. They will maintain it as often as they can. There is no practical way to prevent this spell from being cast(even dispels are nearly useless against a slow opponent). However, by applying pressure you can ensure your opponent will always cast this spell at a position of pip exhaustion, helping you to win the pip war(an important aspect of the neutral).
 Defend From Potential Attacks/Set up an Offense
Once an Angel has established their bubble and guardian spirit, the only thing left for them to do is to try to prevent too much damage from your attacks. Unlike Jade/Juju an Angel has no active lock-out mechanism. Instead they depend on you locking yourself out by wasting your resources. Don’t fall into their trap! An Angel will try to get you to launch full on, high pip attacks into their shields and weaknesses. While you will do respectable damage, the Angel will easily be able to heal off said damage. Because of that you will be down key resources and pips. Once you are resource starved, the Angel will start to stack traps (in the case of slow offense) or start dealing chip damage (in the case of fast offense). Instead of exhausting your resources, remove an Angel’s defenses with low pip and no pip spells. If they cast a specific shield, remove their defense and augment your offense with combination spells. These are spells that leave behind buffs (thunderbird, fire beetle, ice bird, savage paw etc). By doing this you effectively apply pressure on an Angel. You are forcing them to discard for defenses, waste pips on unnecessary heals and never gain a safe position from which to launch an offense.
What can YOU do in the Neutral
Now that we have established what an Angel can do in the neutral, it is time to establish your goals and options. Remember, that you are in control of the neutral-most of what an Angel does is reactive. As such you have the benefit of taking your time and lining up the cards you need at your own pace. In Angel matches, I recommend utilizing neutral cycling until you have the necessary cards lined up to launch your offensive attempt. Here are the key requirements you should strive to meet (in the neutral) when fighting an Angel.
Build Pips
In order to effectively take down an Angel with either an OHKO or Combo you need pips. It is important to preserve enough pips to ensure your combo will go off without a hitch. This entails breaking an Angel’s defenses with low pip spells. You should also be applying controlled pressure with mid pip spells that leave buffs. One absolutely important thing to note is that if you are not breaking defenses, applying pressure or lining up for a later combo, IT IS ABSOLUTELY OK TO PASS. Usually passing is frowned upon in this offensive meta where one missed round can cost you the match. However, against a slow tempo strategy such as Angel-passing is ok. You should still try to avoid it too much. Frequent passing is an indication of poor deck construction. Still, understand that in many cases against an Angel-Passing>Wasting Pips on unnecessary moves(particularly since an Angel can heal off most non-combo hits).
 Cycle for Your Combo
I have stressed the importance of cycling multiple times already and this is no exception. One of the biggest advantages you have over an Angel is your ability to cycle fairly frequently. Most variants of Angels are very passive and reactive. As such, they will want to conserve as many cards as possible to counter your moves. This means that they will rarely be discarding and will have trouble finding critical cards later on. With the use of neutral cycling, you can look for the buffs, shield breakers and finishing hits you need to defeat an Angel while they can do very little in return.
Clear A Path While Maintaining Threat
One of the few active plays an Angel can make is attempting to mitigate your damage with shields, debuffs and more rarely dispels. Your job is to clear the path while using as little pips as necessary. In this way, you create a large amount of Potential Pressure as you always leave yourself in an advantageous position-ready to strike at a moments notice. Clearing a path does not mean clearing every single debuff all the time. Most Angels carry more debuffs than you carry low pip-no pip clerical strikes. Instead, try to clear multiple debuffs in one fell swoop and attempt to read your opponent’s deck. With a little bit of experience, you will be able to tell when you need to make 1-1 debuff-clerical trades and when it is more effective to clear multiple debuffs for the price of one.
Apply Controlled Pressure
Many will remember in a previous guide how I discussed the difference between pressure and potential pressure. In this guide I will introduce a new concept I refer to as “controlled pressure”. Controlled Pressure is a type of Direct Pressure. Like all types of pressure, it attempts to force your opponent to play a certain way in response to this pressure. The difference between controlled pressure and direct pressure is that controlled pressure attempts to force an opponent’s hand while conserving resources. Most pressure strategies require you to rapidly utilize your resources to force an opponent’s hand. Controlled pressure works the opposite way. It involves utilizing opportune moments to launch a concentrated(and relatively inexpensive) strike that also leaves the way open for a follow-up. Common Controlled Pressure spells include DoTs and Multi-Buff Spells.
Mid Pip DoT’s
A relatively strong mid-pip cost DoT such as Frostbite, Scald or Wings of Fate can act as an excellent source of Controlled Pressure. With a few buffs this spell won’t be able to take out an Angel but it will be enough to force their hand. They will have to make the decision. Do they heal the damage off tick by tick? Do they spend an equivalent number of pips on regenerate? Or do they attempt to Triage or shield in anticipation of an incoming strike? You are forcing them to either waste resources by casting spells that may not necessarily be useful or to waste resources via discarding cards in an attempt to find a counter.
 Mid Pip Multi-Buff Spells
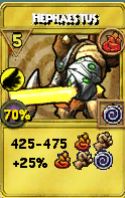
Mid Pip multi-buff spells are spells that leave a buff or buffs that can be utilized for several rounds. These Spells tend to be in the 4-6 pip range allowing them to deal decent damage while also leaving the buffs. Popular “multi-buff spells” include Hephaestus, Thunderbird, and Fire from Above. These spells help to leverage a lot of controlled pressure. Let’s take Hephaestus for example. This spell will deal a decent amount of damage to the Angel and change their bubble. This puts the Angel in an awkward position- Do they heal? Do they shield? Do they change the bubble? The more often you can force these tough decisions on Angels the better.
Type Specific Methods
Against the three main types of Angel, there are different ideal ways to effectively play aginst them while you are in the neutral
Against Stall Angels/Defensive Angels
Stall Angels give you the greatest degree of freedom to do what you want. They typically have the slowest cycling methodology allowing you ample time to find what you need and build pips. They do tend to have the most debuffs of the three main types. Because of this, it is recommended you remove multiple debuffs with your clerical spells instead of making a one to one trade.
Against Slow Offense/Old Meta Angels
Playing aginst Old Meta Angels is almost exactly the same as playing against Stall Angels. The only difference is you may have to shield or remove buffs with empower if they become too threatening. With Aegis being a thing, you can easily stop an Old Meta Angel’s Offense, preempting the shatter that often leads to their late game combo.
Against Fast Offense/New Meta Angels
Playing against New Meta Angels requires a more active stance. As they are able to launch an offense you will need to shield and heal on occasion. The best method to use against New Meta Angels is controlled pressure. By using Controlled Pressure you force them to consider defense or heals instead of offense. As New Meta Angels have a hybrid deck, pressure is particularly effective as they have less uniform resources and more diversity in their decks. This means that they will often struggle to find what they need and each discard will be painful.
Addressing Guardian Spirit
You have perfected your cycling technique, you have the Angel wide open, you have the pips and you are ready to strike. However, there remains one more aspect of the angel strategy you need to address- Guardian Spirit. Guardian Spirit is the hallmark of the Angel strategy, allowing them to effectively reset if the opponent has managed to counter them. It can be a frustrating experience to see your opponent bounce back after all your hard work. Never fear Duelists! This section will illustrate exactly how to counter this card and finally seal the fate of any Angel.
The Weaknesses of Guardian Spirit(GS)
Many are aware that Guardian Spirit revives the opponent at the end of the round they died. What many may not be aware of are the unique weaknesses of Guardian Spirit that we can use to our advantage.
Guardian Spirit reacts to the conditions on the field when it activates, NOT when it is cast
Did your opponent cast Guardian Spirit with Sanctuary active? There is nothing to fear, as long as you change the bubble before they die. The guardian spirit will react to the bubble that is currently on the field.
When Revived, a GS user loses all pips, all buffs, and debuffs
When a GS user is revived they come back to the field with nothing but their health. They lose all pips, shadow pips, blades, shields and even stun blocks. This gives you the opportunity to strike before they can cast a heal in an attempt to get back into the game.
Guardian Spirit activates at the end of the entire round not the end of the turn
This is a little-known weakness of Guardian Spirit that gives an advantage to the player going second(note this only applies to going second). If you are second and the Angel was killed via a DoT from a previous round they will not revive until after you get to make your move! Thus if you are second you can anticipate and prepare for their death. Here is an example of how this works:
Turn 1-Angel casts a bubble
Turn 2-You cast a DoT
End of Round
Turn 1-Angel shields
Turn 2-You cast a second DoT
End of Round
Turn 1-DoT kills Angel
Turn 2-You cast Doom and Gloom
End of Round- Guardian Spirit Activates
They cannot cast another GS for at least 2 additional rounds
As a GS user is revived with a pip, they cannot cast another GS for at least 2 rounds once again giving you an opportunity to finish them off.
How to Prepare to Counter Guardian Spirit
 Preparation is key to successfully addressing Guardian Spirit. As such there are several things you can do to ensure you defeat the Angel when they revive. Note that you do not need to have all of these things to successfully counter a revival but having at least one of them certainly helps.
Have a Stun or Mantle
Having a stun or mantle can prevent an Angel from making a counter move as you build the pips to kill them.
Have leftover pips/shadow pips after your killing move
Remember that one of GS’s weaknesses is that the revived user loses all of their pips. If you maintain pip advantage after your combo or OHKO then you will most likely win as you can immediately launch a finishing move.
Win the bubble war immediately before starting your kill attempt
Remember how I stated that you are not really worried about the bubble while you are in the neutral? Well once you are ready to start your combo it is imperative to win the bubble war. Not only will this deny them the additional heal boost from their bubble, it will also serve to boost your offense(in the case of a damage bubble) and give you a free buff once they revive. If you can win the bubble war with doom that is even better as they will revive at a piddling amount of health.
What to do when they Revive
 You have all your preparations complete, you just killed the GS user on your terms and now they have revived. Finishing them off is relatively easy compared to the previous steps but is still important as one missed step can see them reviving back to full health. Once an Angel returns they will have 2 things on their mind: Healing and Casting Guardian Spirit again. As such many Angels will attempt a variety of methods to ensure their revival. Here are some common attempts and how you can counter them.
Shield to Satyr
Many Guardians will attempt to shield into Satyr. You can counter this with a stun combo, fizzle combo or simply by removing the shield with a low pip clerical move that leaves a buff(midnight sprite, rain beetle, life scarab, death scarab etc).
Shield to Shield to GS
Some Angels may want to establish GS again in an attempt to crush the will of the opponent. To counter this you can use a low pip DoT, stun and then finish. If you can’t prevent the GS then simply kill them and start ready another finisher when they once again revive.
Fairy to Fairy
Some Angels may attempt to constantly heal to relieve pressure. You can counter this by buffing. or by responding to their low pip heals with your own low pip attacks. Assuming you have a bubble, Aura or blades you can out damage their desperate heals.
Stun or Mantle to Heal
Some Angels will attempt to stun or cause you to fizzle in order to effectively heal. While there is not much you can do about fizzle combos, you should have at least placed a stun block during one of your many turns during the neutral.
General Rules of Thumb
There exist many different ways an angel can attempt to regain their footing after revival. As long as you remember these 2 goals you should easily be able to shut them out:
1)Kill them asap
2)If you cannot kill them then simply buff and clear the way so you can kill them before they re-cast GS.
Things to Remember

Don’t Give Up!
This is probably the single most important rule when fighting Angels. A lot of Angels know that their strategy is often frustrating to play against. They know that all they have to do is counter your moves and many will give up in frustration. Don’t prove them right! Remember an Angel has no lock-out mechanism and can only react to what you do. Patience will lead you to victory.
You are in Control!
An Angel wants you to think that they have control of the match. By attempting to counter your every move, they attempt to maintain the illusion that you are reacting to them instead of vice versa. Be disciplined, remember your cycling rules and maintain control.
Setbacks don’t mean Defeat!
Sometimes despite your best efforts, an Angel may survive your combo or revive from defeat to full health. Perhaps you underestimated your damage, perhaps they had a timely shield or critical, perhaps a pet enfeeble or heal saved them. It doesn’t matter in the end. Thanks to the slow tempo of an Angel you can easily reset your combo or OHKO. Heck, you may even need to reshuffle against an Angel user and do so safely. As frustrating as it can be and as much as I have said this before: MAINTAIN CONTROL.