March 14, 2015 November 12, 2023

Get Ready for Exalted Storm PvP!
With the release of Darkmoor top level PvP was once again turned on its head. Gear that was previously a pvp must was replaced by the darkmoor sets (the waterworks of lvl 100). Along with this new set of gear, which offered the best in almost everything (resist damage pierce health accuracy power pips), came the all new shadow enhanced spells. Each of these spells came with a tremendous amount of power for a relatively cheap pip cost. Every school now could achieve 90%+ damage 50% resist and 15%+ pierce along with decent critical and block.
As such, defense began to revolve around health buffer and critical heals, while offense began to revolve around stun fizzle or DoT based combos. As the Storm school we lack a health buffer and DoTs. We do have some of the aforementioned tools but almost all of them come with a limiting factor. We have a critical heal, but it’s unreliable. We have a stun combo, but its an odd pip spell that deals very poor comparative dpp. We have a fizzle combo, but it is the worse accuracy debuff in the game in a high accuracy meta.
In other ways, darkmoor hit the Storm school hard. Most schools gaining a higher health buffer means that Storm pressure strategies became harder to pull off. The other schools also gained access to a huge damage spell at low pip cost, previously Storm’s forte. Combine this with Storm’s low health buffer (1000+ below the closest schools fire and myth) and surviving becomes a struggle. Storm is constantly in the kill zone after even one four pip attack. A critical with almost any of the new 5 pip shadow-enhanced spells will be an instant gg for Storm.
With these factors in mind, I set out to create a playstyle that would allow Storm to deal a decisive blow in a short amount of time. My strategy focuses on three main tenets: Pressure, Damage Spikes, and Potential Pressure. This playstyle requires a working understanding of card cycling, pip-counting and a fair dose of prediction. As such, this is an advanced Storm 1v1 guide, but it does contain elements that can be useful to beginners. As this is an advanced guide, I will not be writing in terms of step by step card plays as most guides do. Instead I will be speaking in terms of principles which will guide your decision making process but will not make the decisions for you.
Note: This deck and playstyle are designed based on playing ranked PvP at the 1200-1600 range. Trying to utilize all of these tactics against lower rank opponents simply will not work as low rank opponents sometimes play either too predictably (casting spells immediately as they have the pips) or entirely unpredictably (making poorly thought out or often confusing moves). Against those opponents a simple spam-generic combo (Storm lord to triton) strategy will usually be effective.
Understanding Pressure
 How does a school with a low health buffer and unreliable heals compensate in this meta? By applying pressure. Pressure is the act of constantly being assertive — acting rather than reacting — and typically involves “spamming” low pip attacks. As a school with many damaging low pip attacks (bolts, bats, krakens), Storm is notorious for a fast-paced pressure-oriented strategy.
Let us discuss the advantages and disadvantages of this tactic.
Advantages
A properly applied pressure strategy will often pin your opponent down by forcing them to discard for heals and shields (leading to deck clutter and poor card cycling), enabling Storm to survive by virtue of limiting incoming hits. A pressure strategy is also a great way to take advantage of Storm’s relatively high critical. In this meta criticals will often be blocked, however we do have enough critical to occasionally overcome critical block. By launching more attacks, we increase our chance of landing a critical through an opponent’s block by sheer volume of attacks.

Disadvantages
A pressure strategy leaves Storm players in a state of constant resource drain.
By utilizing low pip attacks on nearly every round, a Storm is not building pips; essentially preventing themselves from ever being able to launch a combo. If the opponent is high in block and/or has a large amount of Storm shields, then this strategy is often a losing proposition, as you will be dealing very limited damage while starving yourself of pips. On the other hand, the opponent will be gaining pips, will be able to easily heal off the attacks and is in a great position to acquire the pips (and shadow pips) necessary to defeat Storm in a 1-2 combo.
In this meta of high health buffers and critical heals, the typical Storm pressure strategy is not enough for the school to succeed. Make no mistake — pressure is an important tool for Storm, but it is not the only tool or even the most essential. To succeed Storm must expand its toolkit, utilizing Damage Spikes and what I refer to as “Potential Pressure”.
Understanding Damage Spikes
 Storm as a school is graced with many mid-high pip attacks that deal an amazing amount of damage at base. Combine this with gargantuan-colossal and an attack boost that is often 100%+, and Storm has the potential to “spike” a huge amount of damage if given an opening. Creating damage spikes — particularly game-ending damage spikes — are the main focus of this deck.
Let us discuss the advantages and disadvantages of creating Damage Spikes.
Advantages
Damage Spikes can instantly shift the entire tempo of the match or end it. If an opponent feels safe and begins an offensive, you can be sure that 3000-4000 points of damage will instantly cause an opponent to hesitate or possibly shift his style. Much like constant pressure, a sudden damage spike can cause sloppy card cycling, as an opponent has to instantly discard his offensive cards in search of a heal, utility or shield.
Damage spikes have the advantage that they can lead into a unexpected combo or even end a match if your opponent incorrectly predicted your move or how much damage you can unleash. The preferred method of attack in this deck involves utilizing “potential pressure” and damage spikes to create an unexpected One-Hit or Two-Hit KO. More often than not, the last sight my opponent sees is a dive-bombing Storm Owl devouring their entire health bar in one go.
Disadvantages
Damage Spikes are a great asset but can be easily stopped by one main defense — a shield. A Storm damage spike is typically a large investment and tempo can easily be lost if you attempt to damage spike into a shield. As such, one of the focal points of this deck involves getting around shields in unique ways. Of course shatter would be the easiest answer in most cases, but I believe shatter does not provide a fair opportunity for my opponent to counter, and also encourages lazy gameplay. As such, shatter is not featured in my deck.
Another weakness of damage spiking is its reliance on having a relatively high pip level. This means that you have to spend more rounds building pips, which creates more opportunities for your opponent to counterattack or shield (and leaves you prone to mana burn). It also means that you must be very careful when applying pressure as pressure based strategies rapidly drain your pips.
Understanding “Potential Pressure”
The terms pressure and damage spike are familiar to many duelists. However, the term Potential Pressure may not be familiar to most Duelists. Potential Pressure refers to the changes in gameplay you force on your opponents based on the moves you could possibly make. An easy example of the effects of potential pressure is going second against a fire. Most people know that fire at 8 pips has the potential to Efreet. As such, you may be motivated to hold off on your attack until the fire has less pips or to predict the Efreet and wand it off. In essence, your normal style of style of play was disrupted by what your opponent had the potential to do.
Another easy example of potential pressure is going against a balance wizard. With balance having access to supernova, many opponents will not even attempt to utilize an aura against balance. Simply by having access to one card, balance wizards leverage pressure against their opponent, denying them access to an entire side school simply by what they have the potential to use. By effectively utilizing potential pressure you can predict or preempt an opponent’s move before he/she makes it (often several rounds ahead of time) or even better: force your opponent to make a move in response to what you could do.
 Storm has very few combination tools such as efreet or mana burn that can force an opponent to play a certain way. However, Storm can leverage potential pressure in the best way it can — with the threat of damage. There are several ways to leverage potential pressure but my favorite by far is utilizing blades. A Storm attempting to blade is an unusual sight in the arena and often confuses an opponent. Not only is it confusing for the opponent but a blade considerably increases Storm’s ability to spike damage.
 Here is some quick math — A Storm owl enhanced with colossal will deal 1800 at its weakest. With 100% attack boost that is boosted to 3600 at its weakest. Tack on a Storm blade and that increases to 4680. Tack on a second Storm blade(sharpened) and the damage jumps to a whopping 6552 at base. An opponent who notices a Storm blading will often begin to play very defensively — casting tower shields or Storm shields. Certain opponents such as balance may begin to play offensively — casting lore over and over. Due to the potential pressure we leveraged, we can anticipate when our opponent will shield and attack and thus prepare the necessary cards in hand.
Utilizing potential pressure is very important for a school such as Storm, which has very few opportunities to close out a match. Of course properly utilizing potential pressure depends on knowledge of your opponent’s class and their potential which only comes from experience.
The Gear


The Stats
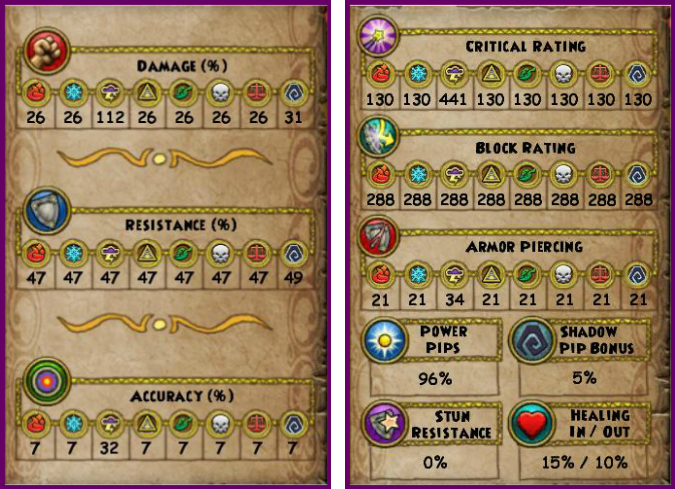
- 112% attack(114% with a perfect pet)-A deck that relies on damage spikes must inherently have high damage. 112% damage means my attacks are doing 2x damage at base which makes exploiting openings very much easier
- 47% resist(49% with a perfect pet)-With Storm’s chronically low health, having a decent amount of resist is crucial to survival.
- 32% accuracy– I can’t emphasize enough what a godsend perfect accuracy is to Storm. Being able to reliably unleash damage is very important to Storm as it often does not have the durability needed to survive a drawn out match. Furthermore, openings that Storm can exploit are very short-lived and a fizzle can make or break a game for the school.
- 441 critical(77%)-A high critical allows you to critical on the majority of your heals and allows the occasional critical to sneak past your opponents block.
- 288 block(55%)– Having a relatively high block is paramount to Storm in this meta as a critical attack can easily end a Storm or put it into a losing position.
- 96% power pips– Once again a failed power pip can be the end of many a combo or can ruin a pressure strategy. As such having a high power pip chance is key for this strategy.
- 34% pierce– This stat is key to ensuring you gain the most out of your damage spikes. 34% pierce will eat through a majority of your opponent’s resist allowing more of your attack boost to have an effect. I have the option to switch my ring for an extra 5% pierce.
The Deck

At the higher levels of play, rigid deck strategies fall away to be replaced with what I call deck principles. Deck principles are a structure that is less rigid than a pre-set strategy that allows you to adapt the flow of the match based on your opponent. Establishing reliable deck principles is important when playing at the warlord+ rank, where you will likely face many different opponents and strategy types. Also as deck principles are highly personal tactics, they all have my own unique names for them, which may differ from your perception of essentially the same concept. Since I won’t be going over exactly how to use these cards (this changes battle by battle) I will give a brief description of the function of the card and leave it up to the players on the if’s and how’s to incorporate into your strategy.
Main Deck Explanations
Main Deck
- 2 stun blocks- 2 stun blocks are put in my deck to insure that with proper discard I have access to them when I need
- 2 towers- Your general damage mitigators
- 1 double shield for every school(except life)- This serves to sponge up damage from an opponent’s major hitters.
- 2 Enhancement’s- one enhances my damage, the other my accuracy.
- 1 sharpen blade- Creates a more powerful stacked blade
- 2 Convictions- Serves to add block, defy stuns and bait balance
- 2 bubbles- Mainly used to counter your opponent’s bubble
- 2 healing current- Your unreliable but in school heal
- 1 insane bolt- For when you have nothing to lose
- 1 Storm minion- I use the minion to great effect agaist the elemental schools as it sometimes shields me and against the balance school or jades as a convienient pip storage tank.
- 1 Sap Power- Kill the minion for 4 pips – leads to interesting combos and is great against balance’s mana burn if you can predict it.
- 3 converts- Used for getting around Storm shields when you have multiple buffs
- 4 Storm blades- Generates potential pressure, buffs attacks and can be stacked with amulet, pet sharpened and sharpened versions
- 2 reshuffles- Sees the most use against jades
- 2 shadow shrikes- More pierce and damage for pesky shields or sudden damage spikes.
Side Deck Explanations
Side deck
- 1 stun- Setting up for a larger pip attack, buying yourself time to discard and find a useful card or limiting your opponent, stun is a great option
- 1 cloaked stun shield- Mind games! Stop a stun while simultaneously preempting an opponents attack.
- 2 towers- Adds some additional defense for when your main deck does not cycle the appropiate cards
- 2 myth banshes- This spell clears universal debuffs and stuns your opponent while leaving your buffs intact-a perfect combo setter.
- 2 acc enchanted myth bats- Clears out myth shields if your opponent attempts to usurp convert attempts
- 1 shift grendel- Clears out multiple towers and also acts as a combo or defensive move due to the accuracy debuff.
- 1 shift greenoak- Buffs me while debuffing the opponent and simultaneously removes universal debuffs
- 2 midnight sprites- See here (Link expired)
- 2 glow bugs- Damage spikes and blade removal
- 2 krakens- Pressure tool
- 1 leviathan- Damage spike and removes blades
- 1 lightning bats- Pressure tool
- 1 triton- Damage spike, pressure or combo closer
- 2 Storm cats/rain beetle- See here
- 2 Storm lords- Another option for combos that does more damage than myth banshee
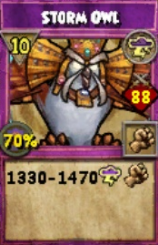
- 2 Storm owls- Your main damage spike and finisher 2 Storm blades- Extra buffs for main deck fails or more stacking potential
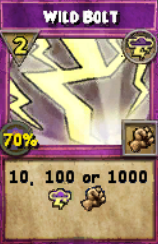
- 1 wild bolt- Pressure tool
Pre-battle Deck Principles
Efficiency: My in-battle strategy is focused on spiking damage after I create an opening via potential pressure and pressure. As such, it is paramount for me to draw the right cards at the right time. One way to do this is by condensing my deck, ensuring that I carry only the bare essentials to get the job done. To accomplish this I created a very small deck with only 32 cards in the main deck and 28 cards in the side deck. By utilizing proper discard methods and card cycling along with a small deck I can maximize my chances that, when an opening presents itself, I am in prime position to exploit it. You will also notice that I carry a very small volume of attacks. This is because Storm does not need a lot of attacks to close out a match — just a few or even one pinpoint strike can shut down an opponent.
Segregation: I am a big fan of segregation of tactics. What do I mean by this? Well, it means that my main deck and side deck will each serve their own unique purposes. For this set-up my main deck is primarily focused on defense and defensive support while my side deck is primarily focused on offense and offensive support. By segregating my decks in this way, I can manipulate which cards I am most likely to draw based on my position in the match (especially due to the small deck size). Example- I am on the defensive: I would utilize heavy discard and limit my draws from the side deck therefore cycling more main deck (defensive) cards into my hand. On the contrary I am on the offensive: I would discard heavily and draw more heavily from the side (offense) deck. Segregation of tactics along with a small deck allows me to quickly shift gears in response to the ever changing game environment.
In-battle Deck Principles
Offensive Principle (Damage Spike): My deck is set up to create a one or two hit attack solution. Utilizing damage spikes is one way to exploit Storm’s naturally high attack boost and base damage. As such my main deck has 4 Storm blades and sharpen blade to tack on the offensive pressure. In total my set-up can achieve 5 different stacked Storm blades (Storm blade/sharpen Storm blade/pet sharpened Storm blade/amulet Storm blade and tc Storm blade). I use careful observation of which blades I have up at the time to create game winning damage spikes. My general rule of thumb for ending battles is 0-1 blades vs Storm/ 1-2 blades vs myth and fire/ 2-3 blades vs death and 3+ blades vs life, ice and balance. Subtract 1 blade from this set-up phase if you manage to shrike.
Offensive Principle (Shield Removal/Avoidance and combo setting): My side deck is almost entirely devoted to offense and offensive support. As such I have a variety of tools designed to break shields and create offensive pressure. My side deck is the only place I have offensive cards (in keeping with my principle of segregation of tactics) and rotates between 4 main offensive card types
- Pressure– Bats krakens bolts tritons all exist to create pressure
- Clerical– Leviathan/ Shift Greenoak/ Shift Grendel/ midnight sprite/ rain beetle/ Storm cat/ blood bat all exist to either clear away shields or blades and leave my opponent open to attack
- Spikes– Storm Owl and Glowbug are my main damage spikes and often serve to close out a match
- Combo– Storm Lord and Myth Banshee exist to create a combo, dealing damage and leaving the opponent open to a follow-up strike. Shift Grendel can also function in this way but is not guaranteed due to its variable accuracy debuff.
While my main deck is where most of my defensive drivers lie, I do have 2 exceptions- insane bolt and convert. Convert allows me to evade Storm shields when I am fully buffed, wheras insane bolt acts as a last ditch effort when I am against a wall. My main offensive drivers are in my side deck but with 2 notable exceptions- Cloaked stun block and tc tower shields. TC tower shields provide me wih a pinpoint defense on a round my main deck may fail while cloaked stun blocks can buy me a round (if an opponent uses a clerical move anticipating a specific shield) or even act as a “counter” stun (An opponent who attempts to stun into my cloaked stun shields has effectively stunned themselves-wasting a round).
Defensive Principle (Pinpoint Defense): As can be seen from the screenshot, the deck contains very little in terms of shield capacity. It has a total of 4 tower shields and 3 specific shields. How then are we able to defend ourselves? Well, its a very simple principle I call pinpoint defense. Pinpoint defense is all about shielding only at the point your opponent has the most potential to do damage. This often means taking damage head-on even when it could be avoided. For example, I know that my opponent has the capacity to use luminous weaver at a certain point of the match. I could shield with tower shield, but I know that my opponent will only deal 1000 points of damage to me and the tower would be better used against a later hungry caterpillar. Of course pinpoint defense does not mean leaving yourself open at all times. Sometimes it is better to use a tower shield against a weaker attack or a few turns ahead to trigger a clerical move by your opponent. Experience and knowing your opponent is key to this type of defense.
Defensive Principle (Health Monitoring/Buffering): This principle revolves around monitoring the amount of damage the opponent can possibly inflict and calculating how much damage you would be able to inflict in turn. This skill is very important, as in top level play every turn matters. Here is an example: I have 2500 health against a balance with a shadow pip. I anticipate him using gaze. If I did not know that gaze would hit for 2100, I would be motivated to shield. However, with knowledge that gaze will hit but not kill me, I load another blade in anticipation of closing out the match the next round. Poor health buffering can and does decide matches. Here is an example from an actual battle in game: I was going second to a Storm. We exchanged a few moves and he had me down to 2700 health with 2 power pips and a shadow pip. He was at 3 power pips and a shadow pip while at 1800 health. His turn he chose to utilize glowbug which only dealt 2300 damage, while I utilized stun and closed out the match the next round with my own glow. The only reason my opponent lost was that he failed to utilize proper health buffering, assuming instead that his glowbug would do enough damage to close out the match.
In-battle Play Principles(Card Cycling)- Many duelists are aware of discarding and how it can be effectively utilized to control your cards. Card cycling utilizes the process of discarding and takes it to the next level. Card Cycling is the process of ensuring a continuous flow of cards from both side and main deck, with adjustments made depending on the type of cards you need at a particular phase of battle. It involves discarding from your hand and drawing from your side deck, while leaving room for main deck cards to “cycle” in on the following round. By doing this you ensure you are cycling in new cards from both your side and your main every round. Proper card cycling reduces deck clutter (not finding the right cards when you need them) and enables us to keep less copies of a card in deck (leading to a smaller deck), which in turn….leads to more effective card cycling. Here are some guidelines for the 3 types of card cycling I utilize in conjunction with my deck segregation principle.
Neutral Cycling– Neutral Cycling occurs when I am in the build phase of my attacks or in the “defense” phase from combos (typically involves placing stun blocks or convictions). In this stage of the battle I am often blading and scoping out the play style of my opponent. Neutral Cycling involves discarding 3-4 cards per hand while drawing 1-2 cards from my side and playing 1 card per turn. In neutral cycling I ensure that every turn cycle I am gaining:
- 1-2 TC cards
- 2-4 cards from my main deck
Offensive Cycling– Offensive Cycling occurs when I am in the attack phase, typically either pressure oriented spam attacks or spike oriented clerical or combo attacks. In Offensive Cycling I am discarding 5-7 cards per hand while drawing 4-6 cards from my side (offensive deck) and playing 1 card per turn. In offensive cycling I ensure that every turn cycle I am gaining.
- 5-6 TC cards
- 1-2 cards from my main deck
Defensive Cycling– Defensive Cycling occurs when I am defending myself from an opponents attack or healing. In defensive cycling I am discarding 5-7 cards per hand while drawing 0-1 card from my side deck and playing one card per turn. In defensive cycling I ensure that every turn I am gaining
- 5-6 Main Deck Cards
- 1 TC card from my side.
Of course exceptions to proper cycling do exist, such as when you absolutely need to draw a critical card. However, by utilizing effective cycling, you can minimize the frequency of this occurence. In fact, by using proper card cycling you can often have your opponent convinced that you “set” for them.
In-battle Play Principles(Turn Advantage)- In today’s meta of damage spikes, attacks that can hit for more than 50% of your health buffer unbuffed and the ever present threat of a critical; turn advantage is huge. Having the first turn is more influential than ever before allowing you an unprecendented level of offensive control and allowing you the oppurtunity to defend from your opponents shadow spells on the turn they get them. The extreme differences caused by turn advantage means that for this deck we tend to emphasize different aspects depending on your position.
First Turn Advantage- From this position you are set to create game ending damage spikes. Blade up and shield/heal to maintain health until you can unleash your end combo. The main principles in use from this position are Potential Pressure and Damage Spikes.
Second Turn- Playing from this position is very difficult as all the disadvantages of Storm are instantly in play. The low health buffer means that one mis-predicted move or missed shield will lead to gg. The opponent can instantly shield any damage move, leading to a loss of tempo and they can heal off sudden damage spikes. As such your strategy from second tends to focus more on pressure, as you attempt to keep your opponent suppressed with a constant barrage of damage. You can also mix up pressure with some potential pressure to throw your opponent off and hopefully create an exploitable opening.
School Specific Principles
 The Verdict
The set is very effective allowing me to be competitive at the 1500+ ranks. However it is prone to setting (the practice of equipping gear and spells to directly counter an opponent) unless you are willing to counter-set (I am not).
Recently, I dropped to the 1100’s range attempting to use a defensive variant of the strategy with horrible results. I am now switching to a modified aggro-set that can be used for a less complex but beginner friendly guide and I eagerly await the results of testing.