November 25, 2022 June 16, 2024
Beastmoon Forms
Fall 2022 Update
Have you had the chance to check out the Beastmoon Hunt Forms introduced with the Fall 2022 Update? Today, we’ll be be taking a retrospective look at the forms released with that update! They are the Balance Minotaur, Ice Draconian, Fire Rat Thief, Death Wolf Warrior, and Myth Colossus. All of these forms will be usable in both the Beastmoon Hunt and Beastmoon Monster Mayhem.
Hover over a spell to find out what each spell does. For mobile users, tap on each spell to get more info.
Balance Minotaur
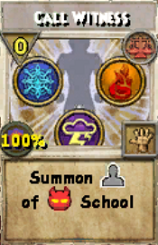
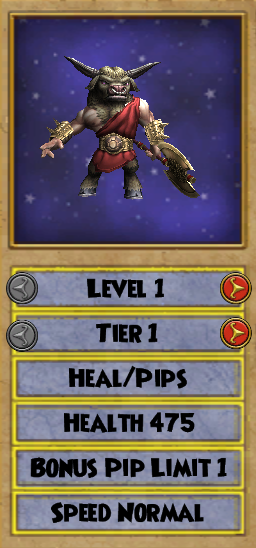 First we have Galkoth, the Balance Minotaur. This Balance form is more support focused, with lots of healing overtimes and some blades and pip donation. Balance Minotaur is the first Balance form to have a minion as well!
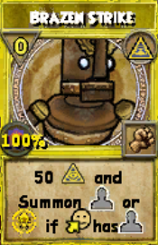
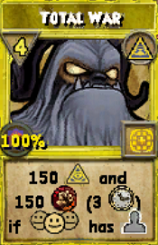
Galkoth can actually summon one of 7 minions, depending on the school of a targeted enemy. Each minion will use a 0-pip spell of that school’s primary hanging effect. Shields, traps, blades, and weaknesses are 25, while overtimes are 50 over 2 rounds. The Balance minion is actually quite powerful, since it acts like the Myth Draconian’s minion and will spam your team with pips. Something to note about these minions is that they will not target themselves with positive effects. Unfortunately, the minions have a limited lifespan, expelling themselves when they reach 5 pips. Unlike other minions, the minions from Balance Minotaur don’t provide infinite value by virtue of having unlimited spells due to their 5 turn limit.
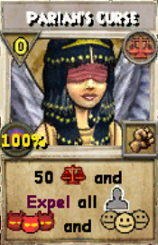
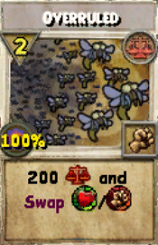
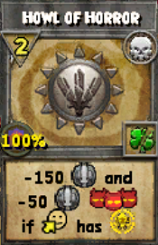
Like some previous Balance forms, Balance Mino can take advantage of a minion on either team. Galkoth even has the ability to remove ALL minions from the field. Be careful about your own minions! This conflict of interests is a bit of an issue when trying to build pips. Because one of your 0-pip spells counteracts your other one, and the minion spell itself will just overwrite an existing minion if you already have one up.
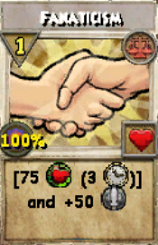
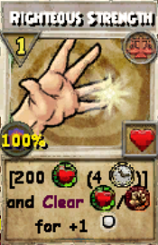
Balance Minotaur is one of the best HoT users currently. Thanks to having a couple of high value protected HoTs. One of which can give a pip back by clearing any overtime (including another protected HoT). In a 1v1, Balance Minotaur’s healing spam can become very difficult to get through. Though not as effective if the opponent knows what this form is capable of, they can deny Balance Mino’s value from their heals by buffing up for a OHKO or by using two consecutive high damage attacks.
Against other defensive forms, particularly Ice forms, Galkoth can run into an issue where its deck doesn’t contain enough total damage to end the fight in a reasonable amount of time, if at all. Part of the reason for this is because it has a 2-pip donate and a 3-pip donate. These are useless in a 1v1. Even in a scenario with teammates, you usually don’t want to donate your pips unless you are very coordinated with your team. Or you have nothing better to do. It’s hard to use higher cost donate spells on forms that don’t start with more than 2 pips.
Balance Minotaur ends up as sort of a larger version of Balance Fairy, with a focus on supporting its team and manipulating overtimes. However, unlike Balance Fairy, Balance Minotaur cannot revive its allies without a Beastmoon Blessing. Still, Galkoth performs well as a healing brawler. He’s able to deal decent damage and gain value from HoTs and minions in slower-paced fights. He’s definitely one of my favorites! 😉


Ice Draconian
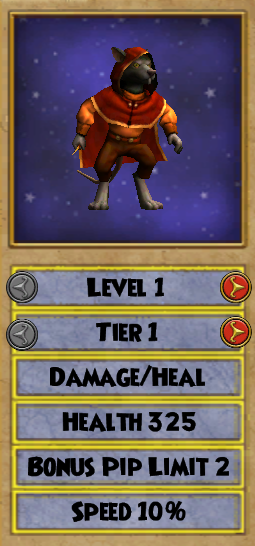
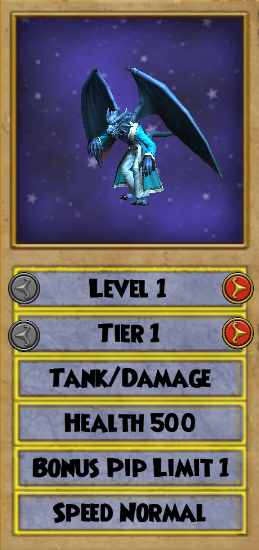 The Ice Draconian Xarthrax (The Bitter) is here to join Xythrax the Fire Draconian, who has a suspiciously similar name. This Ice form has a focus on synergizing with its minion and taunting while dealing decent damage.
That’s right, Ice Draconian is the first Ice form to have its own minion. This thrall minion can cast a 50 damage absorb, a -50 weakness, or an AoE stun block. Unlike previous Ice forms that have conditionals involving ally minions but no minions of their own, Xarthrax can actually enable their own minion conditionals.
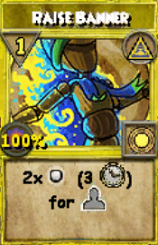
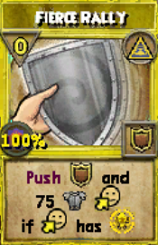
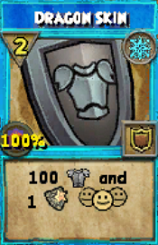
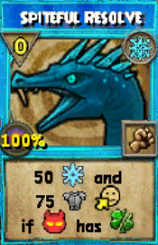
Ice Draconian’s 0-pip 75 shield puts up another 75 shield if your team has a minion. This is pretty impressive value for a 0-pip spell. There’s also a 4-pip AoE version of this shield, which can be a strong deterrent if you can survive until then with a minion up. There’s also an interesting 2-pip shield that puts up a shield on the target and an AoE stun block for the whole team. Unfortunately, the shield itself is only 100, which makes the spell bad. Unless you expect to be getting stunned a lot.
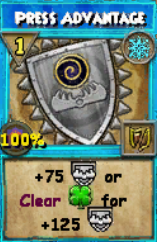
Unique to Xarthrax is the ability to taunt while doing damage. You can follow up the taunt with a 2-pip hit that applies a -50 weakness if you are already taunted. Taunt is a valuable utility to have on a defensive form, and being able to simultaneously do damage is quite handy.
Ice Draconian is a solid defensive form that can protect its allies by taunting. He can provide high defensive value in longer fights through its minion and conditionals involving minions. It also has the ability put stun blocks on its entire team at once. This ends up less worthwhile than a simple free stun block on appropriately valued shields, like Ice Krokomummy or Colossus. If you’re looking for an underrated defensive form, you can’t go wrong with Xarthrax the Bitter.


Fire Rat Thief
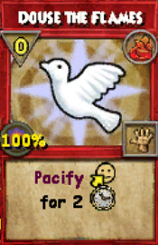
Next up is Quincy Sootbinder, the Fire Rat Thief. Quincy specializes in heal overtimes more than any other Fire form currently, alongside the ability to pacify himself and summon a minion under certain conditions.
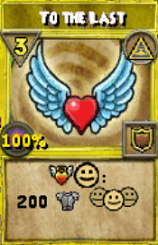
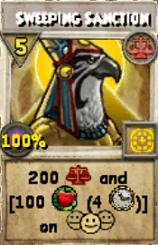
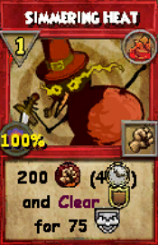
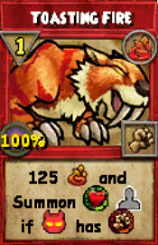
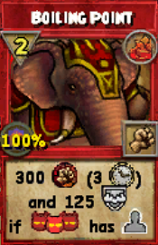
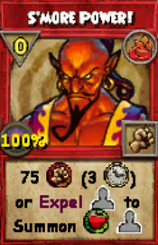
Interestingly, Fire Rat cannot summon its minion unconditionally. But it has two different spells which have conditional effects that summon the same minion. The minion in question is a marshfellow that uses a 0-pip 50 HoT on an ally until it reaches 4 pips, when it uses an AoE 200 heal over 4 rounds.
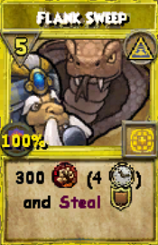
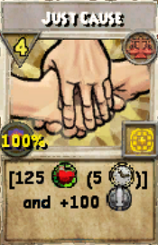
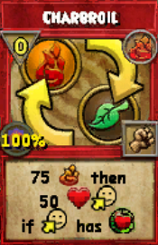
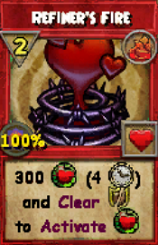
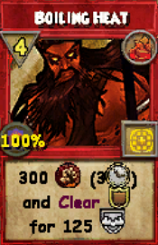
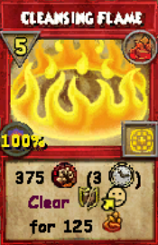
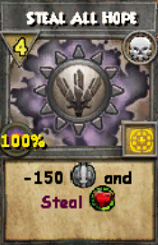
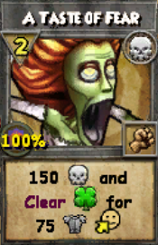
While not having any conditionals that capitalize on an allied minion, Quincy does have spells with HoT conditionals. One of the healing spells that Fire Rat itself has access to is a 2-pip 300 heal over 4 rounds that clears a trap to instantly activate the HoT. He also has a 3-pip 400 heal over 4 rounds that gives him a pip back if he has a HoT on himself.
Fire Rat’s access to a trap counter and minion counters mean that it can perform well against modern myth forms that rely on traps. Typically, the main game plan with Fire Rat is to pacify yourself on round one and go straight into a 4-pip AoE DoT.
Almost all of Fire Rat’s spells are overtimes. Which is not what a form with health as low as this should be shackled to. Healing over time is very unlikely to actually keep you alive. And for the pacify to be helpful you have to survive the turn that you cast it. Otherwise, you end up dying while contributing nothing to the fight. The most impactful thing that Fire Rat can do on the first turn is cast a 2-pip DoT. The heals are not a worthwhile alternative.
In practice, Fire Rat is pretty underwhelming and predictable. It is comparable to Fire Elf, trading a 3-pip DoT and the ability to detonate for a better AoE and the ability to pacify itself. Admittedly, Quincy can be threatening if left unchecked, or with a team that can stick around long enough to get value from all of the overtimes. If you’re looking for an impactful glass cannon, look elsewhere.

Death Wolf Warrior
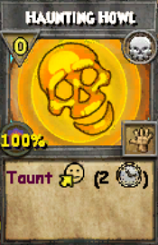
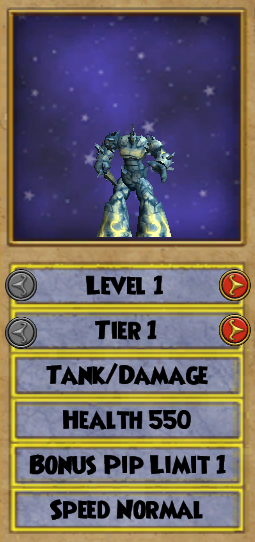
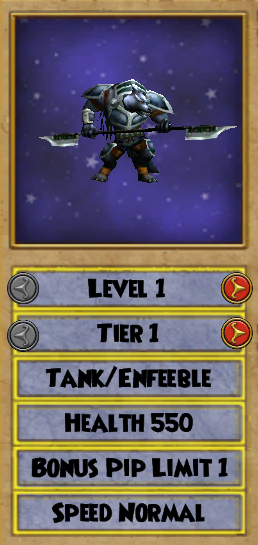 Introducing the Death Wolf Warrior, Varg Windhowler. Since his introduction, Death Wolf has become a staple among the top Beastmoon forms. A de-facto tank with the ability to taunt, prevent damage, and recover with drains.
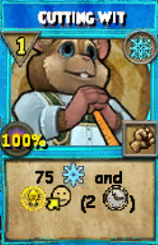
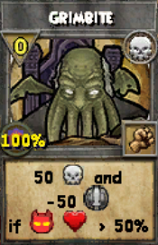
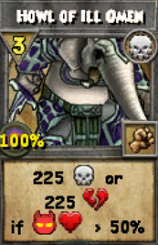
He features conditional effects that give a bonus from taunting, which is easy to pull off. However, due to the way that the taunt timer works, you only have a 1-turn window to pull off a taunt conditional. Death Wolf is the first form to have conditionals that trigger if the target is above 50% health! This condition is extremely reliable, effectively a “non-conditional.”
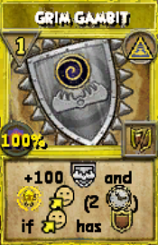
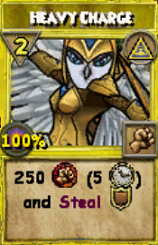
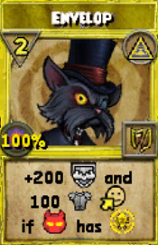
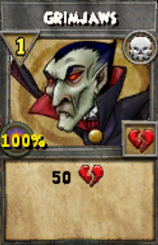
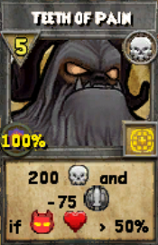
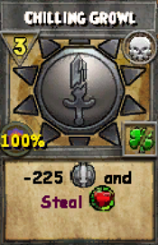
There are 3 spells in Varg’s arsenal with the health conditional. A 0-pip hit that puts up a weakness, a 3-pip hit that becomes a drain, and a 5-pip AoE that puts up a weakness. The ease of access to the conditional bonus gives these spells extra value at no expense to the Wolf. In particular, the 3-pip drain is extremely powerful. It drains for as much as Death Fairy, a form with 200 less health, and it pairs very nicely with the ability to taunt.
However, I would not recommend playing Death Wolf without leveling or tiering it up. At level 1, he has practically no damage in his deck. This is remedied somewhat at level 3, where Death Wolf gains access to its 2-pip attack. Though you may still find that he still lacks enough damage spells for a longer fight at level 3. Varg doesn’t gain access to his best spell until level 5, the 3-pip attack that drains instead if the enemy is above half health.
To be blunt, Varg is overpowered. His health conditionals provide too much value at no opportunity cost and with no setup. We’ve seen this same mistake with Scales of Destiny in the past. Hopefully Death Wolf will be adjusted in the future, to allow room for some other forms to breathe in the meta. I think even without his health conditionals, Death Wolf’s ability to taunt and drain make for a solid tank form. He would likely retain his taunt conditionals after a nerf, which are still extremely easy to set up and get value from. Be sure to unlock this form if you have the chance!

Myth Colossus
 Finally we have Graxus, the Myth Colossus. Myth Colossus takes Myth’s minion aspect to the next level, while also being heavily reliant on the effects now associated with Myth.
First and foremost, Graxus’ minion is attached to a 50 damage attack that will taunt himself for 2 turns if his minion is already active. As if that wasn’t already a lot of value for a 0-pip spell, the minion itself is the most powerful minion currently in Beastmoon. It can put up +50 traps or summon its own minion, if that minion is already active, it will place a 50 absorb instead. When it reaches 4 pips, it will cast either a 150 AoE trap or a 150 AoE shield. As for the minion summoned by Myth Colossus’ minion, it has 50 health and will pass until it reaches 3 pips, at which point it will sacrifice itself to deal 200 damage to all enemies.
If you were thinking that you could just deal with Myth Colossus and ignore his minions, think again. The Egg Bomb (which is the minion’s minion) will not disappear if the Myth Colossus or his minion is defeated. If you want to avoid taking 200 AoE damage, you have to deal with the Egg Bomb and hope that the Myth Colossus hasn’t already taunted.
Graxus also has access to traps that are the same value as Storm Wolf’s blades. He can also generate shields under certain conditions and has conditionals involving taunt as well. Myth Colossus is the first Myth form in Beastmoon to have damage over time effects.
Amidst all of this, Myth Colossus has one fatal flaw: there is no burst damage in his deck aside from the 0-pip summon and a 4-pip AoE. This leaves Graxus vulnerable to a well positioned counter. In particular, a Life or Fire form that can counter traps, minions, or even DoTs. For example, Balance Minotaur can take out both minions simultaneously, even through a taunt.
Currently, Myth Colossus is the ultimate Myth form. Graxus here is a favorite among Beastmoon players for his fun and unique minion gameplay, as well as an assurance of victory if left unchecked alongside their minions. If you are a fan of minions, I would definitely recommend looking into Myth Colossus.