December 24, 2021 May 21, 2023
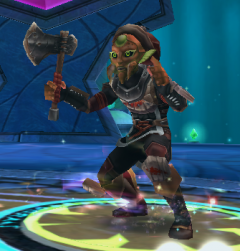
Beastmoon Monster Mayhem Guide
This guide gives you all the information you need to be successful in the Beastmoon Monster Mayhem events. It also will give you general information about the event, but this isn’t a beginner guide. If you are brand new to Beastmoon, here’s some Beastmoon Hunt resources that can help you get started.
Getting Started in 15 minutes!
Beastmoon Hunt Strategy
How to Get Upgrades and Rewards
Getting Started in 15 minutes!
Beastmoon Hunt Strategy
How to Get Upgrades and Rewards
In this guide we will cover the following topics:
#1 Rules Layout
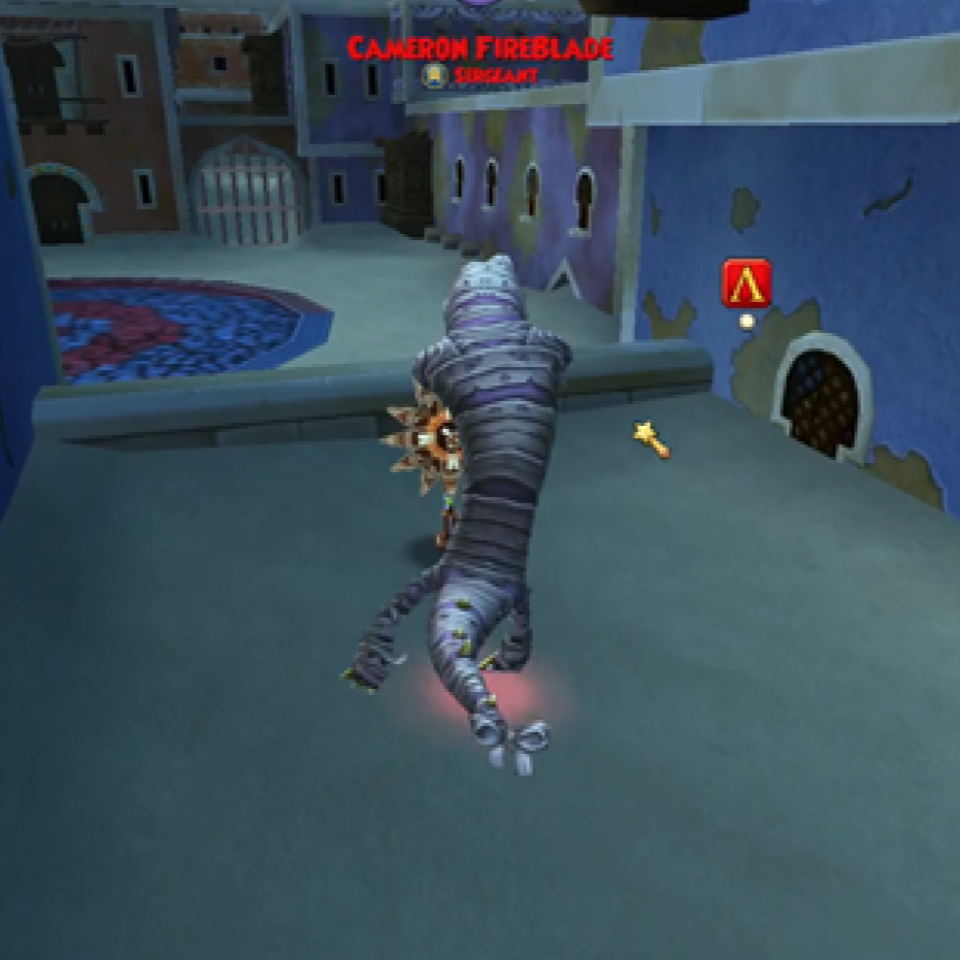
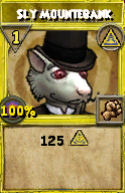
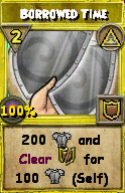
Beastmoon Monster Mayhem follows all the same combat rules as the Beastmoon Hunt, but the matches are structured very differently. Each match has 3 waves, and each of the waves has 2 phases, the mob phase, and the boss phase. In the mob phase of each wave, there will be 3 pairs of enemies sitting on a random 3 of the 4 outer battle rings (Moon, Sun, Eye, and Star). Each pair will have one elite enemy and one normal mob. The school of the enemies will show up on the mini map in the top right.
For the boss phase, there will appear a boss on the spiral battle ring in the center of the map along with additional mobs and elites, all equaling the wave number + 1. Once the boss is challenged, enemies will appear on the four battle rings on the outside that have no symbols. Wave 1 will have 1 mob at each spot, wave 2 will have one elite, and wave 3 will have one mob and one elite. Each fight has a spinning battle card that you can win by defeating the enemies. Check Outer Spells for what those cards are. Once you win the battle, this spell will be cast on the spiral fight before the next turn.
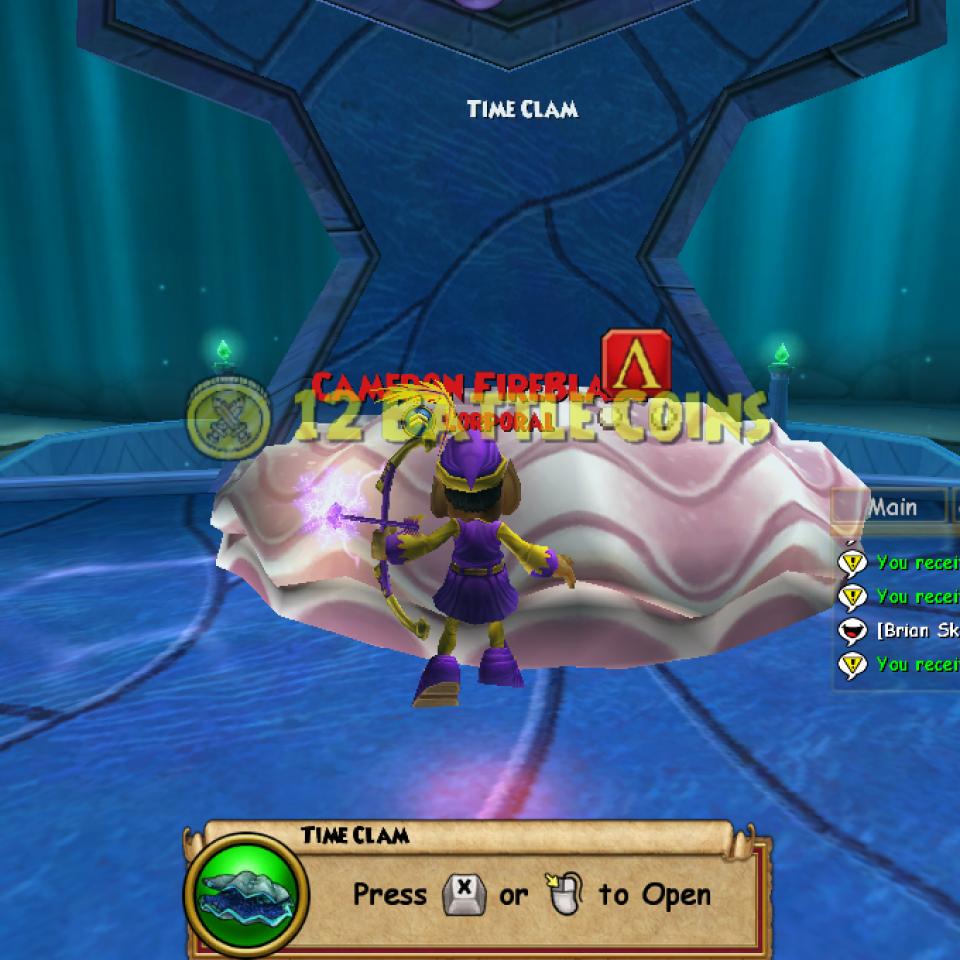
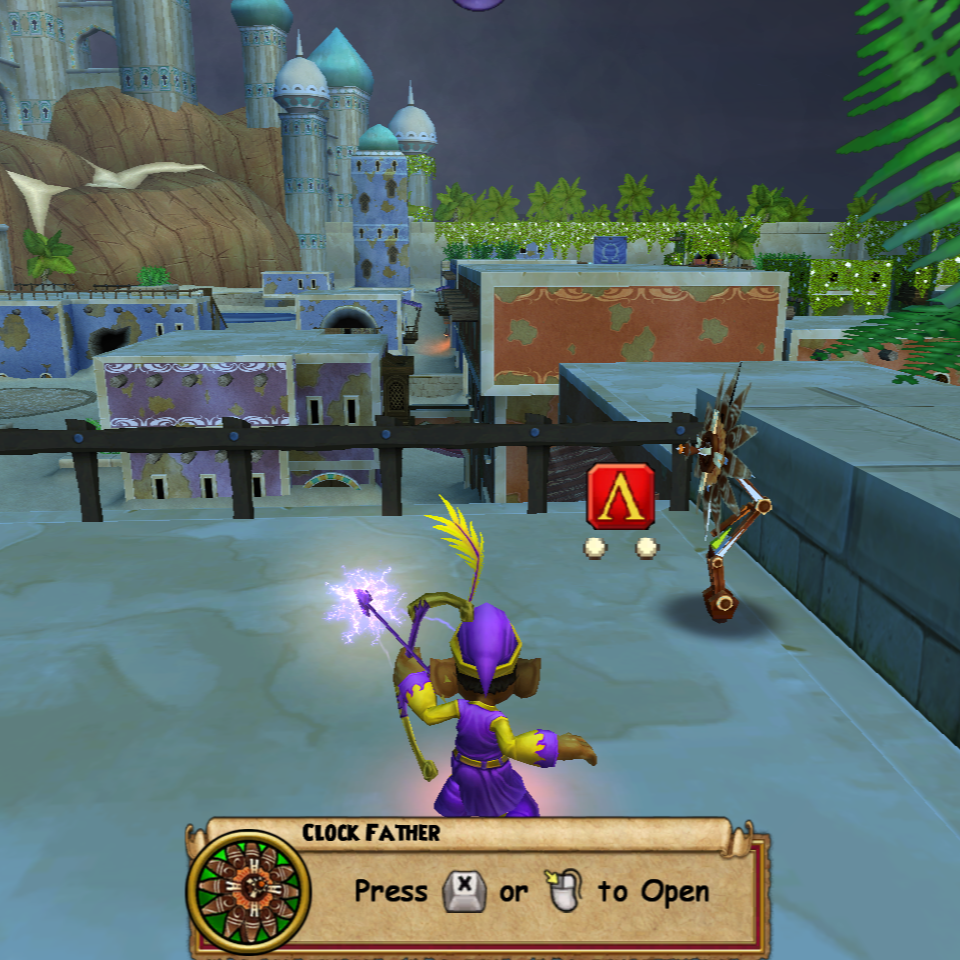
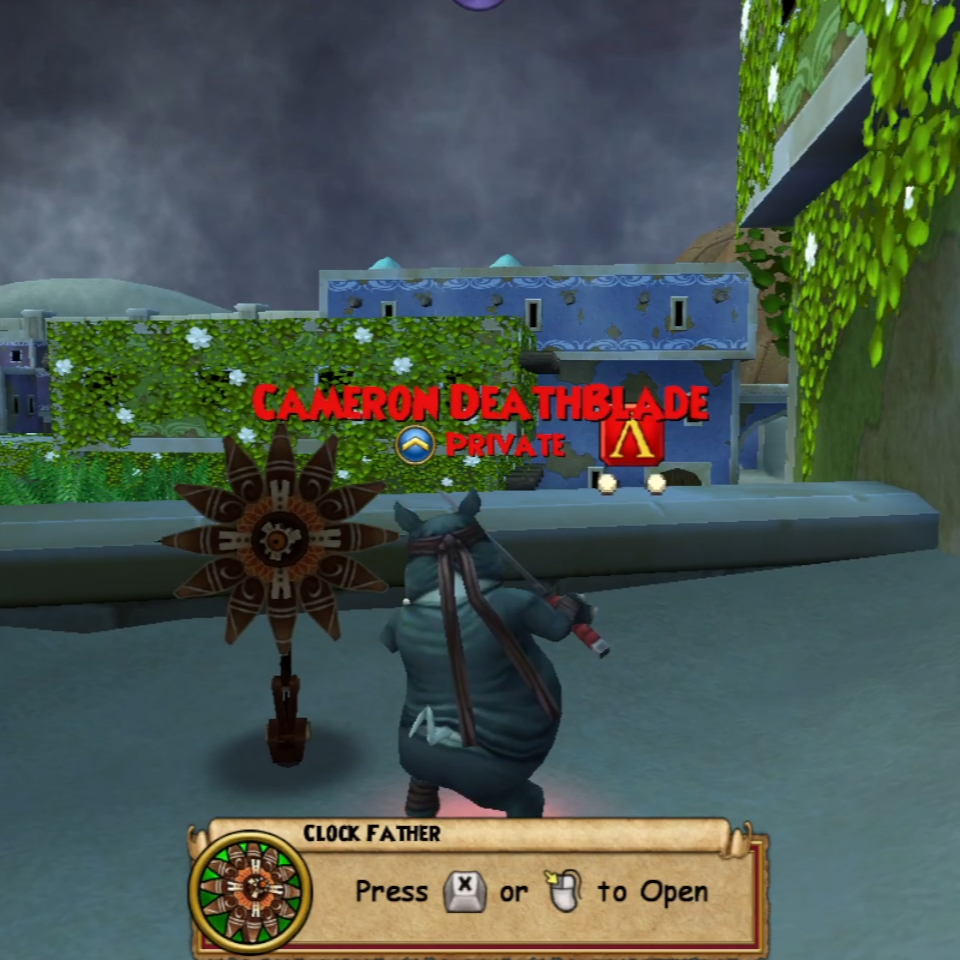
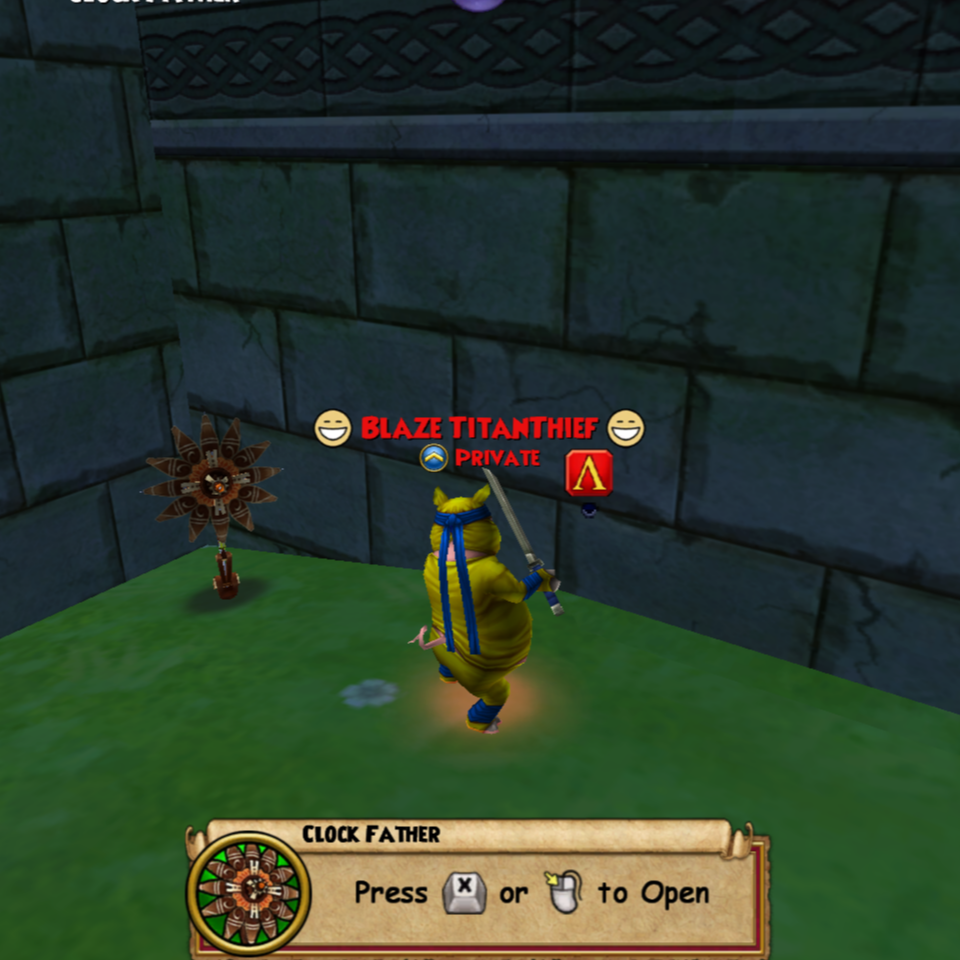
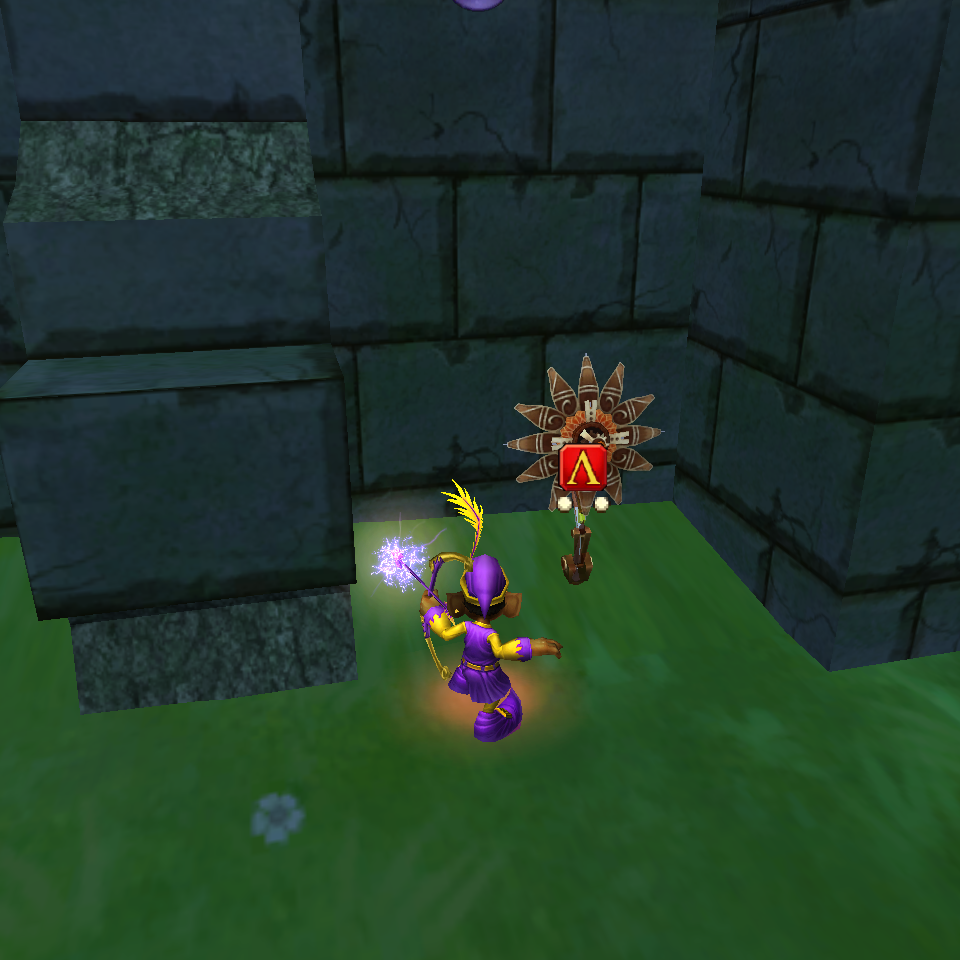
Also, important to note that this event is timed! You start with 10 minutes on the clock for Wave 1, and once you defeat a boss, you get extra time. You get 12 additional minutes for defeating Boss 1 and 14 additional minutes for defeating Boss 2. The only additional way to gain time is to find the Time Clams or Clock Fathers that appear once per wave during the initial mob phase. Check out Locations to help find them. These will give you 2 minutes. Once you defeat the 3rd wave boss or run out of time, the match will be over and you can collect your rewards!
Lastly, death works a bit differently. When you die in any battle, you lose your form and have to pick a new one. However, you can come back to your original form after your third lost form.
#2 Tips and Strategy
Now that you know how it works, here’s the best general strategy tips to use during your matches.
- Mob Phase – It’s most efficient to defeat the enemies in teams of two for the first wave and teams of 3 for the second and third waves. The enemies have more health, starting pips, and stronger spells as the waves progress, so it’s a good idea in order to avoid the risk of losing a form, and it doesn’t end up taking much extra time since you have a 4v2 battle after the initial 2 fights and the remaining 2 teammates can look for the extra time.
- AOE Boss Phase – The best way to win quickly in the center is to blade up one hitter (should be in the last slot), then have that hitter AOE taking out all except the boss, then you can easily win against the boss. This means bring lots of Storm forms to blade the hitter to ensure the AOE kills. For the hitter, having a 4-pip 250 AOE on a form with 2 bonus pips is amazing. Currently there are only 3 forms that can do this… Myth Rat at Tier 3, Storm Elf at Tier 5, and Myth Fairy at Tier 5. This gives you the best chance to win since the enemies won’t have the chance to kill your hitters. Without this, you will have to hit on turn 3 with a 5-pip 250 or more AOE, which a bunch of forms have even at tier 1. If you do this however, you may need to bring an absorbing form. Balance Cyclops is great because he can blade and absorb at the same time. Also, on Wave 3, it could be a good idea to have one of the first 3 players hit the enemy in the 4th slot so it no longer targets your hitter. The hitter needs to buy a Battle Card of the AOE and nothing else to maximize the chance of pulling what you need. They also must be discarding every card in their hand if they don’t pull the AOE first turn.
- Alternate Boss Phase – Sometimes you won’t have a coordinated team or a player with a good AOE hit, so in those cases, just take the 4 forms that can do the most damage, perhaps throw in a defense form if you need it, and go for it. Take out the enemies from least health to most health and do your best!
- Don’t Overkill – This applies to Beastmoon Hunt as well, but check out your teammates move, try to do quick math in your head incorporating blades and traps and such, and try to pick the best option you have to BARELY kill that enemy. That way, you’ll have more pips for the next one!
- Pull Orange Named Mob – For the outside mob fights, it’s always a good idea to pull the mob, the one with the orange name, first. Your team should focus on killing that mob first, then when you’re just dealing with the elite, more of your team will be able to go first.
- Pick Cards FAST / Pick Fast Cards – Time is of the essence, and you can’t waste any of it. Try your best to think ahead. If you know your teammate will be able to kill the next turn and you have a hit that won’t kill the enemy, then just pass. There’s no reason to spend extra animation time when you don’t need to. Another way to reduce animation is to try not to use DOTs when you don’t need to, and don’t use two 1-pip hits when you can use one 2-pip hit.
- COMMUNICATE – Tell your team before each wave where you plan on going to fight. “I’m heading to the double balance” or “Top left” or “I’m with rat.” Also tell in chat “Got Time Clam / Clock Father” when you pick it up so people know. Also, if you’re in any battle it’s good to tell your team your plan.
- Pick the Closer Portal – This one is kinda obvious, but there’s a Red portal and a Blue portal on each map and teleporters for each… make sure to pick the closer one to the fight you’re heading to.
- Smart Groups – If you do have low health forms, group them up with higher health forms. Likewise, group with someone who accounts for your weaknesses or strengthens your spells.
- Aggro – A short term meaning aggression, commonly in reference to who the enemies will target. The enemies will attack whoever is directly across from them until they’re hit.
- Outside Buffs – I’ll go over specific best outer spells for each map in Outer Spells but in general for the AOE strategy, you’re going to want to prioritize buffs like blades and traps over damage hits or heals unless your team asks you otherwise.
- Which Forms to Pick – This surprisingly doesn’t matter that much. Unless you’re using them for the spiral fight, it’s best to stay away from Elf, Rat, and Fairy forms because they have such low health. As long as you’re using a medium or large health form, you should be good. Check what your team needs most, what’s missing, and use what you have!
#3 Rho-Sham-Bo
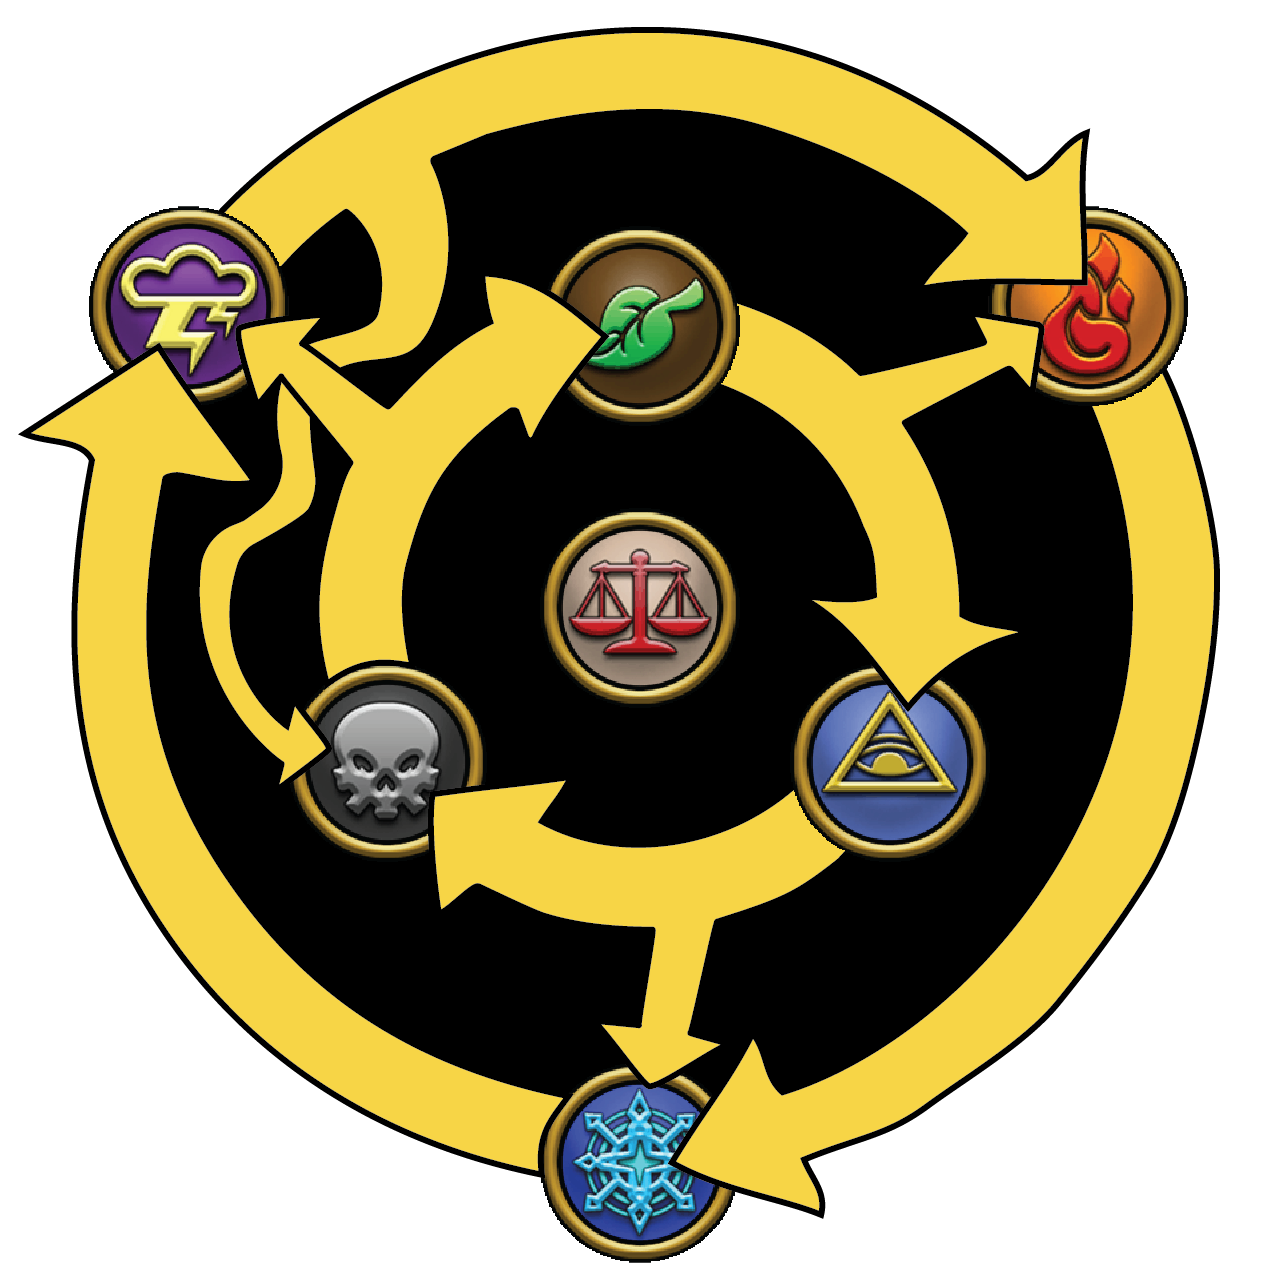
Spells Wheel

Boost Wheel
Here you can see a little bit different of a Rho-Sham-Bo wheel that I made to show you how the schools interact with each other in terms of SPELLS that they use. This doesn’t mean that you will boost on anything in this way, but you can use it to better chose your battles.
Let me describe how the enemies counter each other in these ways…
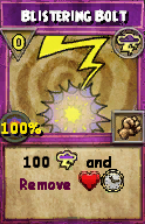
- Storm –> Fire – Storm removes Damage Over Time spells, which is a main spell type for Fire
- Fire –> Ice – Fire removes Absorbs, which is a main spell type for Ice
- Ice –> Storm – Ice removes Blades, which is a main spell type for Storm. Also, Ice has Stun Blocks and Storm commonly Stuns.
- Life –> Myth – Life doesn’t do a good job with this at all, but it’s supposed to counter Minions, which is a main spell type for Myth
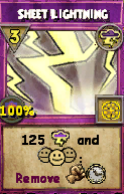
- Myth –> Death – Myth pushes / removes Traps, which is a main spell type for Death
- Death –> Life – Death removes Heal Over Time spells, which is a main spell type for Life. Also, Death puts on Heal traps and Infections to counter Life’s heals
- Life –> Fire – Life pushes Damage Over Time spells, which is a main spell type for Fire
- Myth –> Ice – Myth steals Absorbs, which is a main spell type for Ice
- Death –> Storm – Death steals Blades, which is a main spell type for Storm
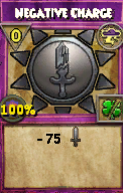
- Storm –> Death – Storm removes Damage Over Time spells, which is a main spell type for Death. Also, Storm has some spells that counter Death’s Negative Charms.
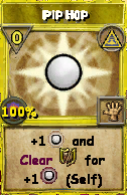
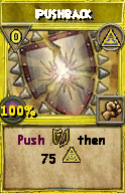
#4 Outer Spells
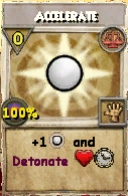
During the spiral fights, there are 4 different spells to acquire on the outside. As soon as you fight an enemy or pair of enemies at one of these battle circles, a spell will be cast on the spiral fight at the beginning of the following turn. They each have different values, but there’s a basic way to go about them.
Celestia Map

For Celestia, you want to first grab Redirect Current at the top of the map. This is vital if you’re going against a fire boss because of the DOT removal, but no matter who you’re fighting, the extra damage will help tremendously. Next would be Phalanx, which gives some blades as well as some defence. Your team at the spiral should be finished by the second spell, but if they’re still fighting just ask in the chat whether they’d like damage or defence, then go for the appropriate spell.
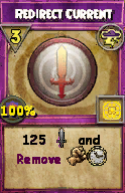
Redirect Current – Top Battle Circle
- Wave 1 – 200 Blade
- Wave 2 – 250 Blade
- Wave 3 – 325 Blade
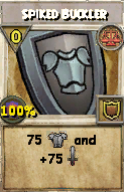
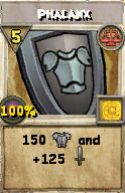
Phalanx – Right Battle Circle
- Wave 1 – 75 Absorb & 100 Blade
- Wave 2 – 75 Absorb & 150 Blade
- Wave 3 – 125 Absorb & 150 Blade

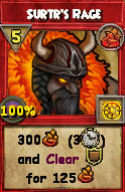
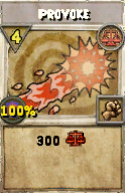
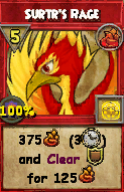
Surtr’s Rage – Bottom Battle Circle
- Wave 1 – 300 Damage
- Wave 2 – 375 Damage
- Wave 3 – 450 Damage
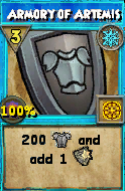
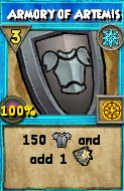
Armory of Artemis – Left Battle Circle
- Wave 1 – 200 Absorb
- Wave 2 – 250 Absorb
- Wave 3 – 300 Absorb
Mirage Map
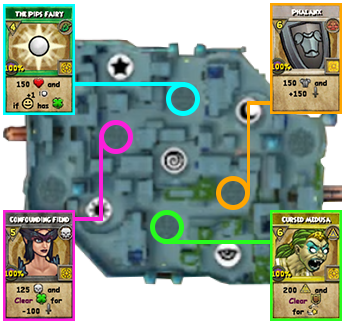
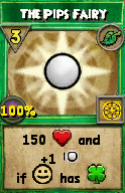
For the Mirage Map, you’re going to want to focus on getting Phalanx on the right. However, when you have a Balance boss, just note that if you are going against a Myth Elite (Trengil), it can steal all your absorbs, so be careful. Otherwise the Pips Fairy can be a good option to help stay alive. Otherwise both AOEs do the same amount of damage, so ask your team if the enemies are casting more absorbs or blades, and plan accordingly.
The Pips Fairy – Top Battle Circle
- Wave 1 – 150 Heal & +1 Pip
- Wave 2 – 200 Heal & +1 Pip
- Wave 3 – 225 Heal & +2 Pips

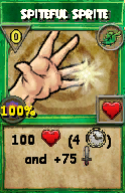
Phalanx – Right Battle Circle
- Wave 1 – 75 Absorb & 100 Blade
- Wave 2 – 75 Absorb & 150 Blade
- Wave 3 – 125 Absorb & 150 Blade
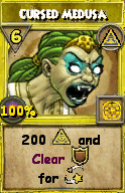
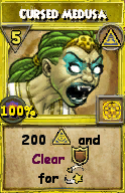
Cursed Medusa – Bottom Battle Circle
- Wave 1 – 150 Damage
- Wave 2 – 200 Damage
- Wave 3 – 250 Damage
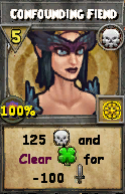
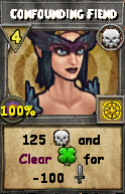
Confounding Fiend – Left Battle Circle
- Wave 1 – 150 Damage & -100 Charm
- Wave 2 – 200 Damage & -100 Charm
- Wave 3 – 250 Damage & -150 Charm
Avalon Map

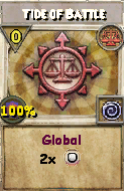
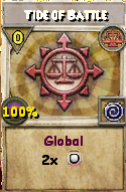
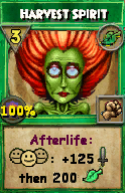
For the Avalon Map, you have the largest buff out of any outside spell in Scouring Sand on the bottom of the map, giving a blade and a trap, which you should almost always go for first. Next, you could go for either Phalanx, which is on the right as always, or Grave Imbalance, which is a Trap and Absorb spell on the top. Both have the same buff numbers, but you can choose which one you’re going for depending on the forms you have and the enemies you face. Typically blades are stronger than traps and harder to remove. Lastly, there’s Tide of Battle, which can help your team with pip gain, but be warned this also gives the enemies doubled pips! It’s more risky as the waves progress.
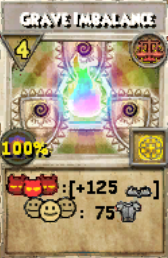
Grave Imbalance – Top Battle Circle
- Wave 1 – 75 Absorb & 100 Trap AOE
- Wave 2 – 75 Absorb & 150 Trap AOE
- Wave 3 – 125 Absorb & 150 Trap AOE
Phalanx – Right Battle Circle
- Wave 1 – 75 Absorb & 100 Blade
- Wave 2 – 75 Absorb & 150 Blade
- Wave 3 – 125 Absorb & 150 Blade
Scouring Sand – Bottom Battle Circle
- Wave 1 – 100 Blade & 100 Trap AOE
- Wave 2 – 150 Blade & 100 Trap AOE
- Wave 3 – 150 Blade & 150 Trap AOE

Tide of Battle – Left Battle Circle
No Wave Variations
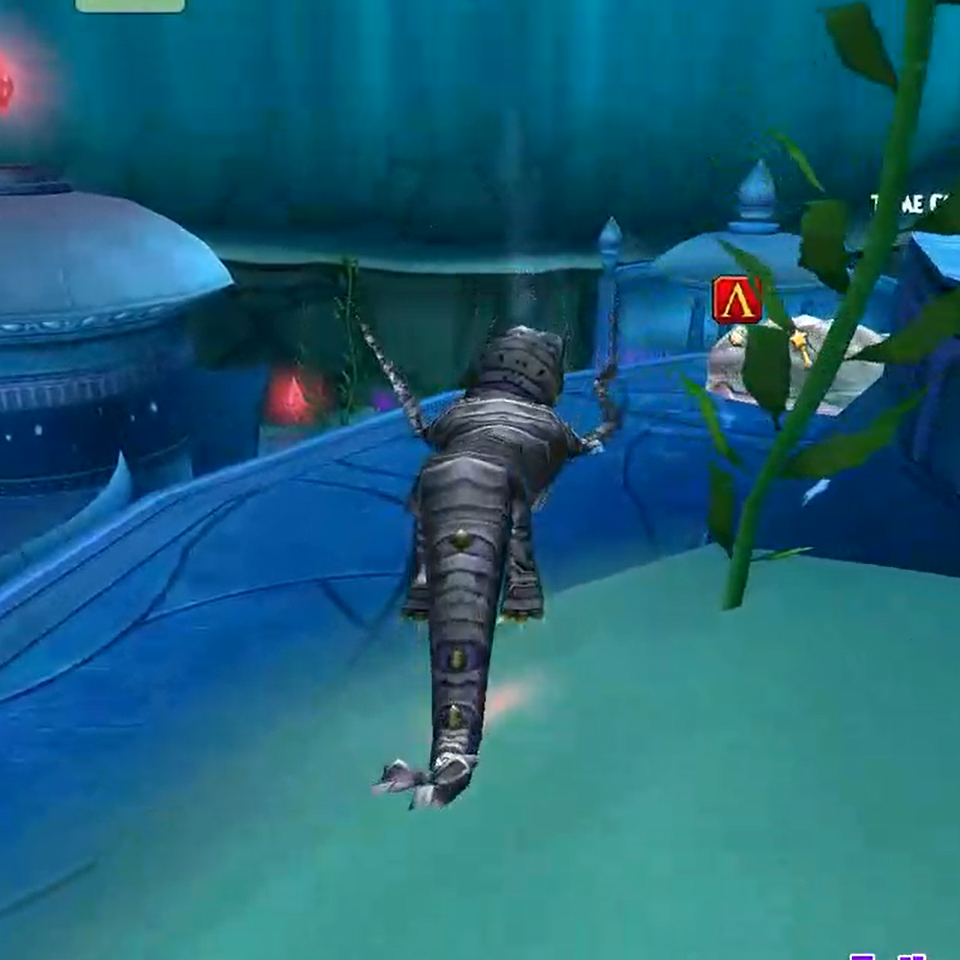
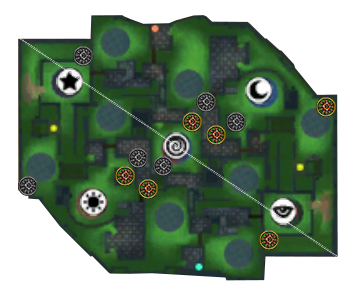
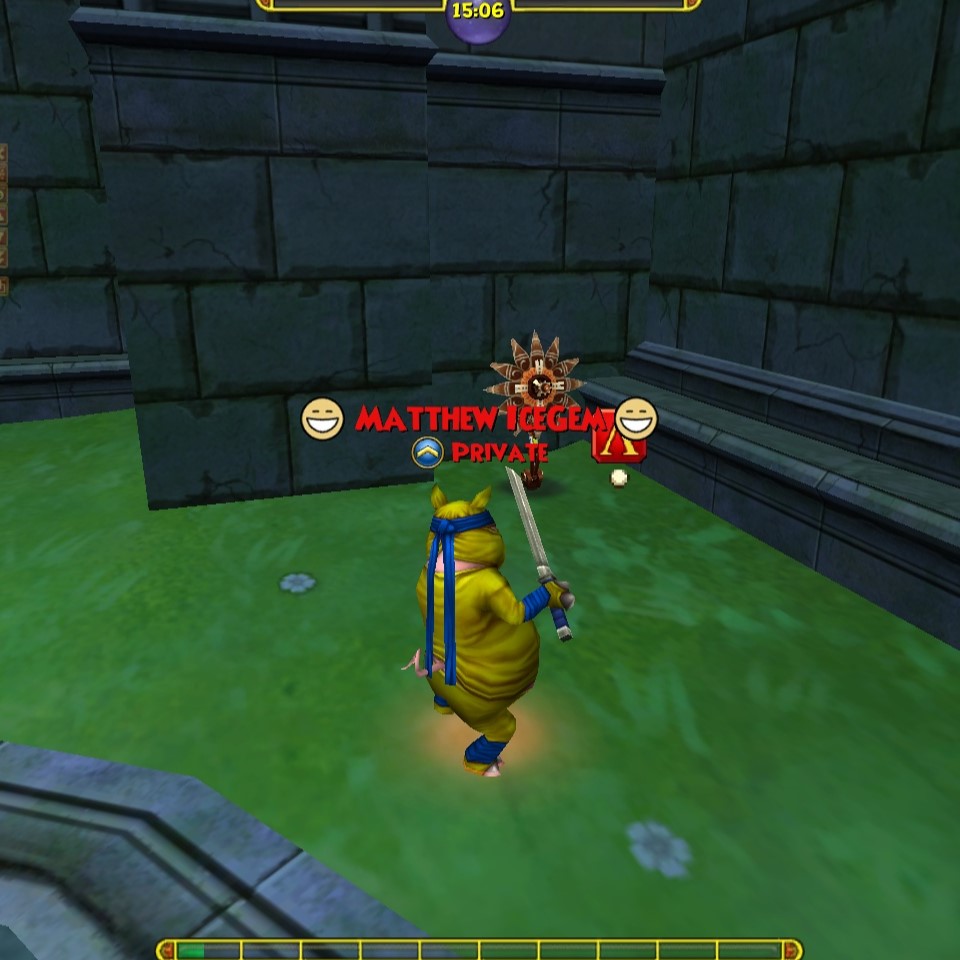
#5 Time Clam / Clock Father Locations

Each map has a bunch of different spawn points for where the extra 2 minute time item will show up. Below, I can show you a few of the places I have found them in the past, but there are likely a few more than I’ve found, especially on the Avalon map. Reply in the comments below to let me know if you’ve found another spot! The maps are split in half to show you how the maps are typically mirrored. I have color icons in spots I’ve 100% seen a clam / clock father, and the greyed out ones are mirrored places you should look at on your trip around the map to find.
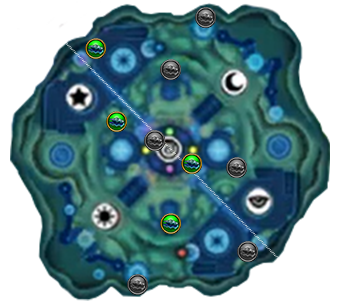
Up Against the Wall Near Star (Eye) Up By Spiral Down Under the Bridge By Star (Eye) Up Top Behind Health Goblet Between Sun and Eye (Moon and Star)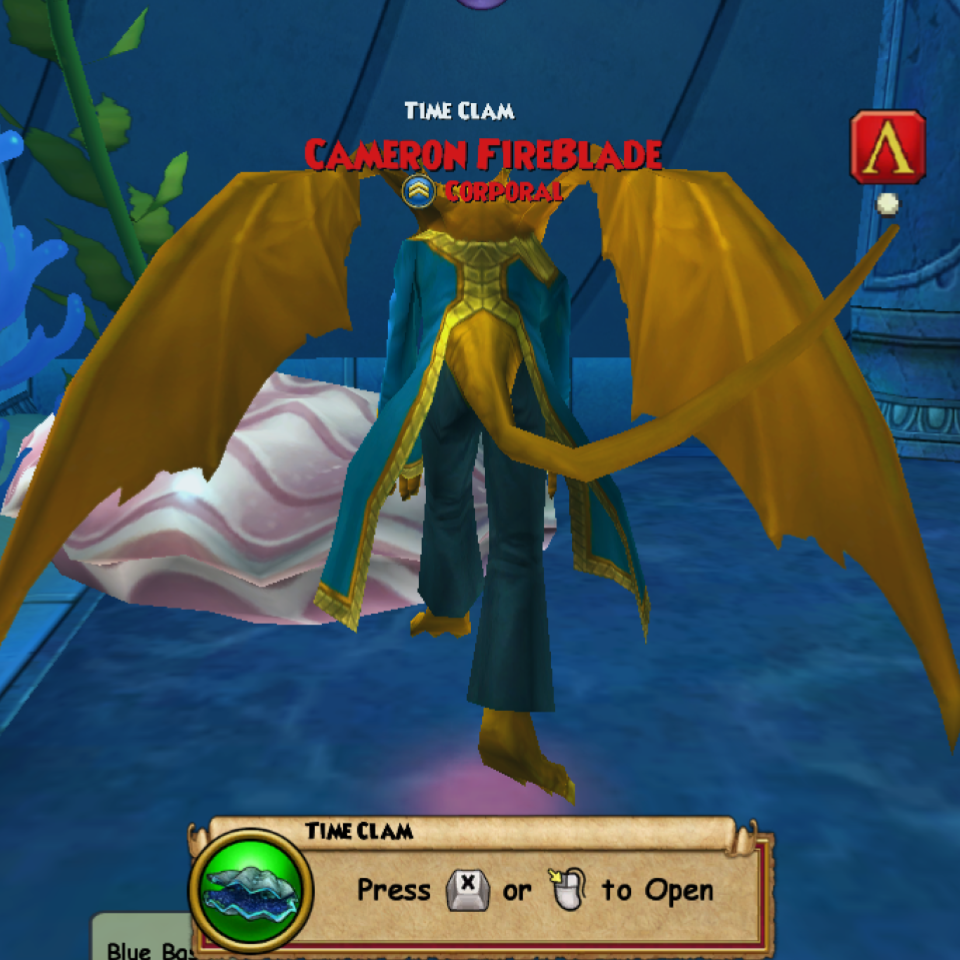

No screenshot, but I’ve also seen them behind the health goblets near the entry portals, and just behind the entry portals on the level above.
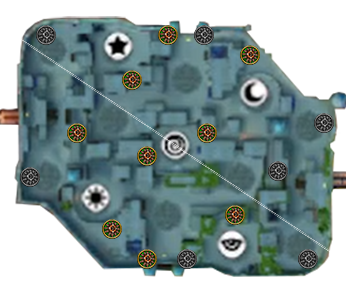
Up Behind Moon or Sun Top of the Map (Bottom) to the Left of the Yellow Teleporter In the Small Opening to the Left or Right of Spiral Up the Stairs Straight Out of the Red (Blue) Teleporter
On the Bottom of the Map (Top) to the Right of the Yellow Teleporter Up By Star or Eye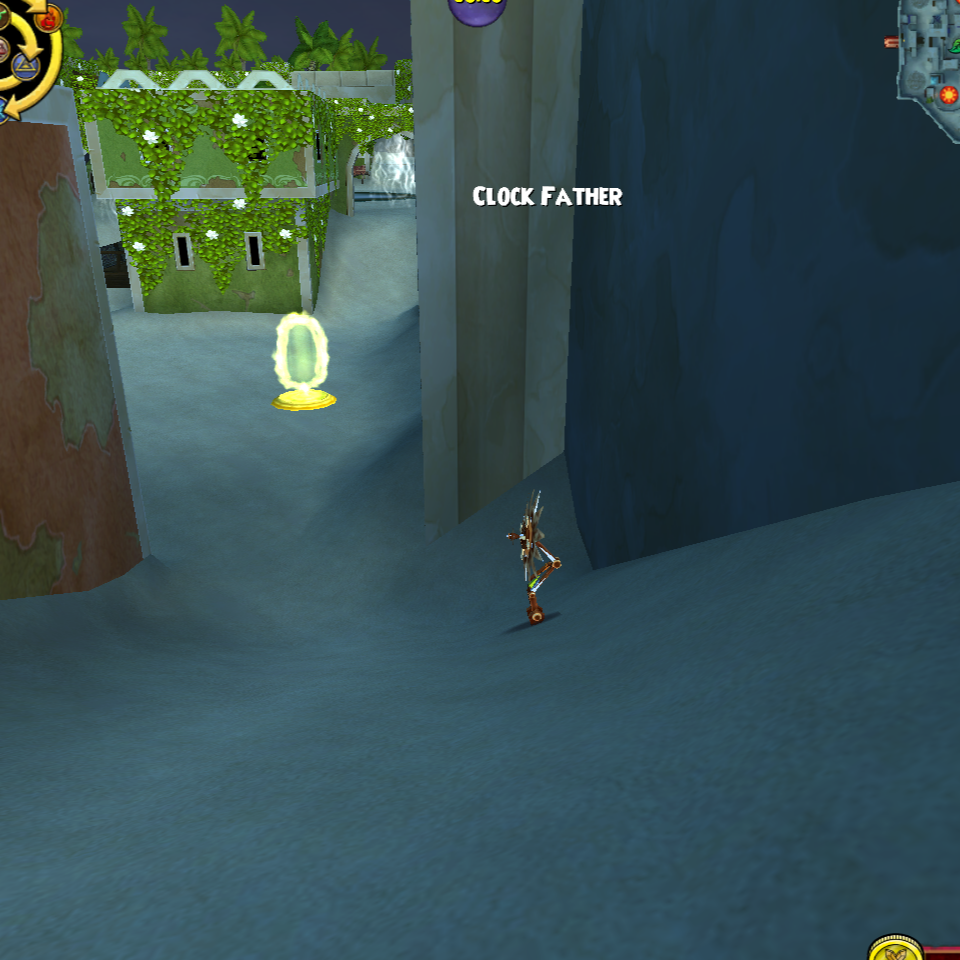
No screenshot, but I’ve definitely seen the clock around the outer two circles by the red and blue portals.
By the L Shaped Bricks Down By Sun (Moon) In the Corner By the Outer Unused Circle on the Right (Left) In the Spiral Gates at the Top (Bottom) By the Lower Gate Entry of Eye (Star)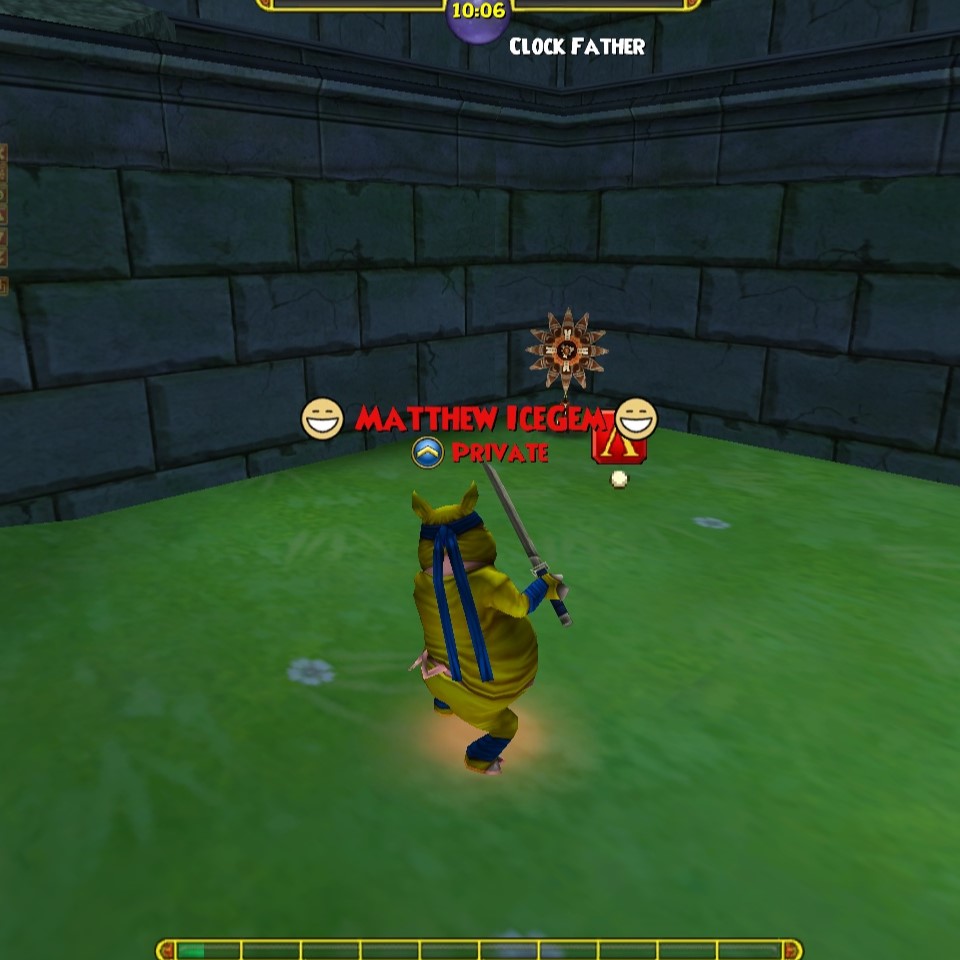
Down in a Cranny Below Moon (Sun) In Between Two Pillars Below Sun (Moon)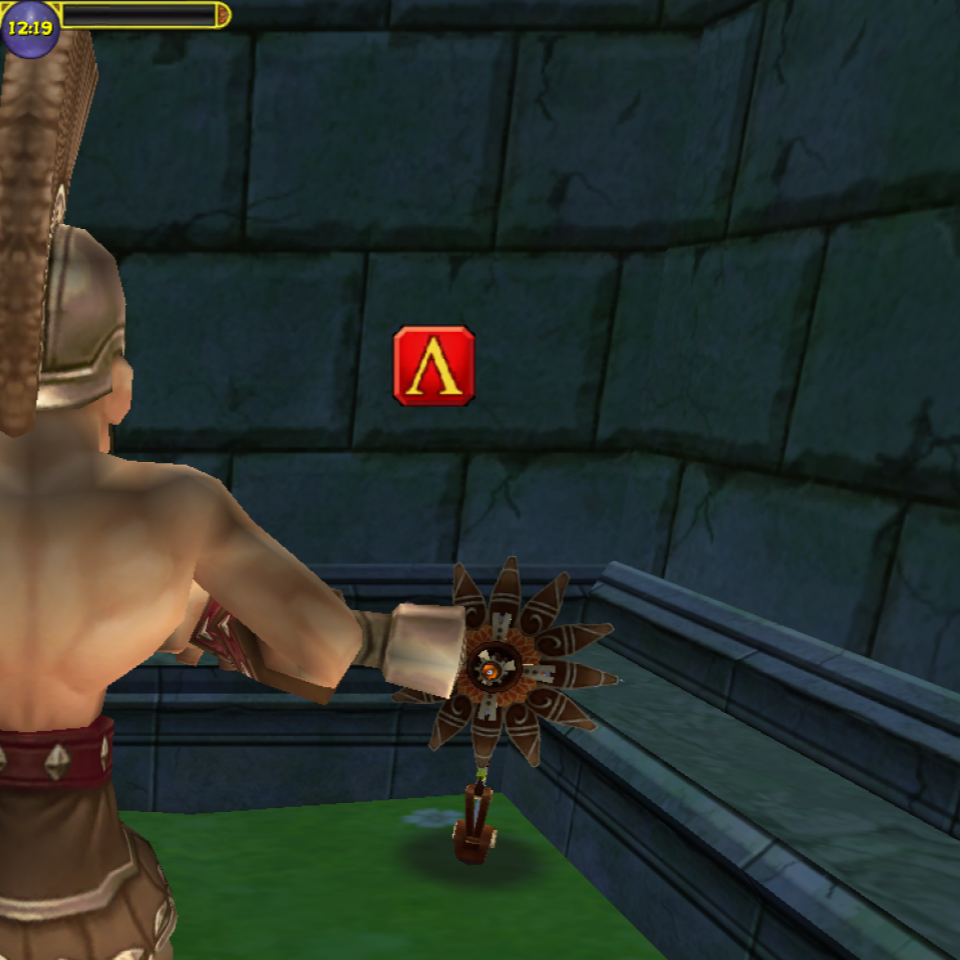
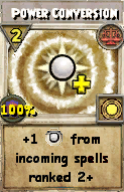
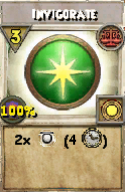
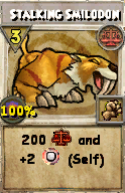
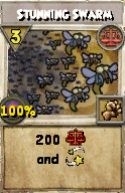
#6 Enemy Spells
Each enemy is a tiny bit different in between waves. I have come up with this list going over over 50 hours of footage, but due to the nature of RNG I know there’s certain aspects I’ve missed. If you see something on here that you think is inaccurate or needs to be added / filled in, please leave a comment below. Also, if you have footage to support your new information, that would be greatly appreciated.
In the sections below I represent the spells as “seen.” Many spells have been seen used in Waves 1 and 3, but it could be assumed that they can also use that spell in wave 2. It’s also possible that if I only witnessed a spell being cast in wave 3, then maybe a previous wave’s version could also cast it. Be careful!


Click on the school symbols above to jump to different school sections below.
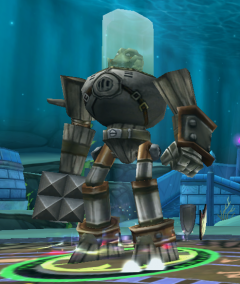
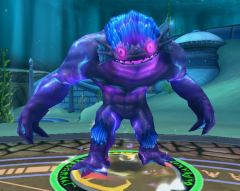
Beastmoon Monster Mayhem
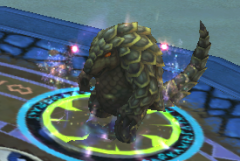
Balance Enemies
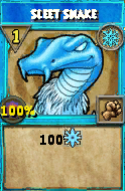
Eel
Wave 1: Tension Eel (2 pips / 350 health)
Wave 2: Harmony Eel (2 pips / 375 health)
Wave 3: Stasis Eel (3 pips / 400 health)
Waves Seen: 1, 2, and 3
Waves Seen: 1, 2, and 3
Waves Seen: 1 and 3
Waves Seen: 2
Waves Seen: 2 and 3
Waves Seen: 3
Bot
Wave 1: Paragonmaton (1 pip / 675 health)
Wave 2: Responsi-Bot (2 pips / 750 health)
Wave 3: Scrutinizer (2 pips / 825 health)

Waves Seen: 1, 2, and 3
Waves Seen: 1, 2, and 3
Waves Seen: 1, 2, and 3

Waves Seen: 1, 2, and 3
Waves Seen: 2 and 3
Waves Seen: 3
Condition Unknown

Waves Seen: 3
Spawn
Wave 1: Stout Spawn (1 pip / 1550 health)
Wave 2: Scruple Spawn (2 pips / 1700 health)
Wave 3: Nexus Spawn (3 pips / 1850 health)
Waves Seen: 1, 2, and 3
Waves Seen: 1 and 3
Waves Seen: 1, 2, and 3
Waves Seen: 1 and 2
Waves Seen: 2 and 3
Waves Seen: 2 and 3
Waves Seen: 3
Beastmoon Monster Mayhem
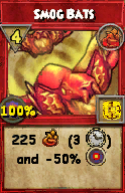
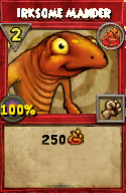
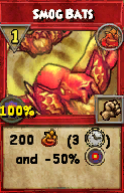
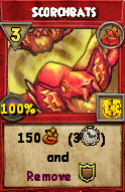
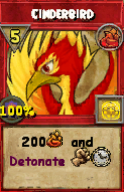
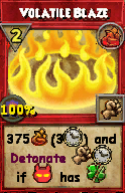
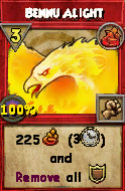
Fire Enemies
Flying Fish / Pyreborn Fox

Wave 1: Charred Flying Fish / Pyreborn Conscript (2 pips / 300 health)
Wave 2: Seared Flying Fish / Pyreborn Infantry (3 pips / 325 health)
Wave 3: Smoked Flying Fish / Pyreborn Knight (3 pips / 350 health)
Waves Seen: 1, 2, and 3
Waves Seen: 1, 2, and 3
Waves Seen: 1, 2, and 3
Waves Seen: 2
Condition Unknown

Waves Seen: 3
Condition Unknown
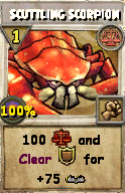
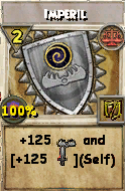
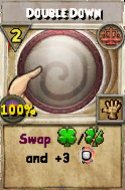
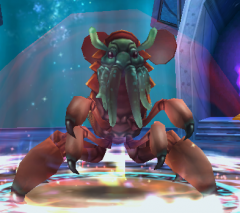
Crab
Wave 1: Steamed Crab (2 pips / 525 health)
Wave 2: Fried Crab (3 pips / 600 health)
Wave 3: Boiled Crab (3 pips / 675 health)
Waves Seen: 1, 2, and 3
Waves Seen: 1, 2, and 3
Waves Seen: 1, 2, and 3
Waves Seen: 1, 2, and 3
Waves Seen: 2 and 3
Waves Seen: 3
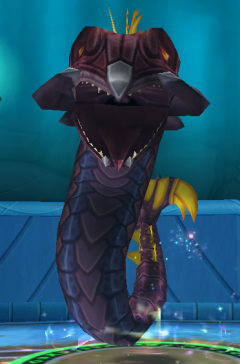
Kalamar
Wave 1: Hach’acha (2 pips / 1250 health)
Wave 2: Pye’rho (3 pips / 1400 health)
Wave 3: Ar’sohn (3 pips / 1550 health)
Waves Seen: 1, 2, and 3
Waves Seen: 1, 2, and 3

Waves Seen: 1 and 3
Condition Unconfirmed
Waves Seen: 1, 2, and 3

Waves Seen: 3
Condition Unconfirmed
Beastmoon Monster Mayhem
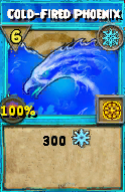
Ice Enemies
Angler / Arctic Reindeer
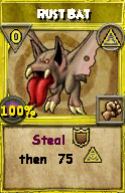
Wave 1: Arctic Angler / Arctic Axeman (1 pip / 375 health)
Wave 2: Chilly Fishman / Arctic Soldier (1 pip / 400 health)
Wave 3: Frosty Trawler / Arctic Warrior (2 pips / 425 health)
Waves Seen: 1, 2, and 3
Waves Seen: 1 and 3
Condition Unknown

Waves Seen: 1 and 3
Waves Seen: 2 and 3
Waves Seen: 3
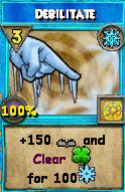
Spriggan
Wave 1: Ice Spriggan (1 pip / 750 health)
Wave 2: Glacier Spriggan (2 pips / 825 health)
Wave 3: Ice Floe Spriggan (2 pips / 900 health)
Waves Seen: 1
Waves Seen: 1, 2, and 3
Waves Seen: 1, 2, and 3

Waves Seen: 1, 2, and 3
Waves Seen: 1, 2, and 3
Waves Seen: 1, 2, and 3
Waves Seen: 3
Condition Unconfirmed
Waves Seen: 3
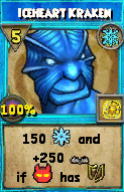
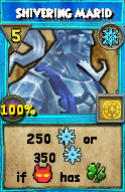
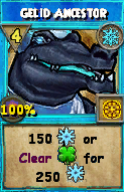
Ice Kraken / Ice Golem

Wave 1: Ice Kraken Warrior / Hail Golem (1 pip / 1700 health)
Wave 2: Ice Kraken Gladiator / Ice Devil (2 pips / 1850 health)
Wave 3: Ice Kraken Retiarius (3 pips / 2000 health)
Waves Seen: 1
Waves Seen: 1
Waves Seen: 1
Waves Seen: 2 and 3
Waves Seen: 2
Condition Unknown
Waves Seen: 2 and 3
Waves Seen: 2 and 3
Waves Seen: 3
Waves Seen: 3
Condition Unknown
Beastmoon Monster Mayhem
Storm Enemies
Squid / Pantera

Wave 1: Temptest Squid / Thunderfeline (2 pips / 300 health)
Wave 2: Squall Squid / Tempestcat (3 pips / 325 health)
Wave 3: Lightning Squid / Purrrfect Storm (3 pips / 350 health)
Waves Seen: 1, 2, and 3
Waves Seen: 1 and 3
Waves Seen: 1, 2, and 3
Waves Seen: 1, 2, and 3
Lagoony / Seraph

Wave 1: Monsoon Lagoony / Stratus Seraph (2 pips / 525 health)
Wave 2: Electrical Storm Lagoony / Monsoon Seraph (3 pips / 600 health)
Wave 3: Thunderous Lagoony / Whirlwind Seraph (3 pips / 675 health)
Waves Seen: 1, 2, and 3
Waves Seen: 1, 2, and 3

Waves Seen: 1, 2, and 3
Waves Seen: 2 and 3
Single Target Clanker Spell
Waves Seen: 1
Pips, Damage, and Condition Unknown
Triton / Ogre


Wave 1: Khnum Rainmaker / Windmaker (2 pips / 1250 health)
Wave 2: Marduk Thunderheart / Cloudburster (3 pips / 1400 health)
Wave 3: Aegaeon Squalleye / Tornadogre (3 pips / 1550 health)
Waves Seen: 1, 2, and 3
Waves Seen: 1

Waves Seen: 1, 2, and 3
Waves Seen: 1, 2, and 3
Beastmoon Monster Mayhem
Myth Enemies
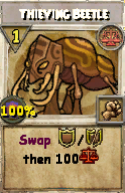
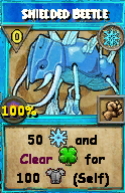
Beetle
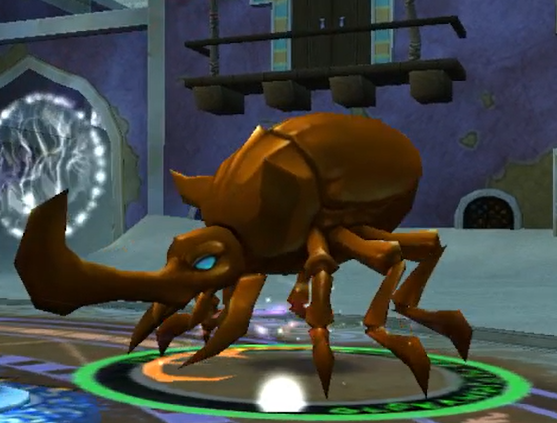
Wave 1: Dune Louse (1 pip / 350 health)
Wave 2: Sand Scarab (2 pips / 375 health)
Wave 3: Desert Beetle (2 pips / 400 health)
Waves Seen: 1, 2, and 3
Waves Seen: 1 and 3
Waves Seen: 2 and 3
Condition Unconfirmed
Waves Seen: 3
Condition Unconfirmed
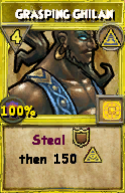
Trengil
Wave 1: Trengil Scrounger (1 pip / 675 health)
Wave 2: Trengil Gouger (2 pips / 750 health)
Wave 3: Trengil Burrower (2 pips / 825 health)
Waves Seen: 1, 2, and 3

Waves Seen: 1 and 3
Condition Unconfirmed
Waves Seen: 1, 2, and 3
Waves Seen: 1, 2, and 3
Python
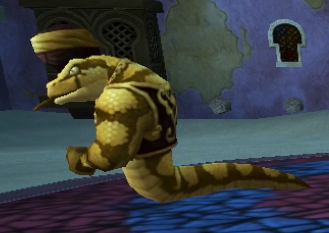
Wave 1: Jayzon Ma’boa (1 pip / 1550 health)
Wave 2: Boa Jaqs’on (2 pips / 1700 health)
Wave 3: Mohn’ti Python (3 pips / 1850 health)
Waves Seen: 1, 2, and 3
Condition Unconfirmed
Waves Seen: 1, 2, and 3
Waves Seen: 1 and 3
Condition Unconfirmed

Waves Seen: 2 and 3
Waves Seen: 3
Beastmoon Monster Mayhem
Life Enemies
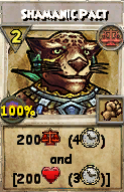
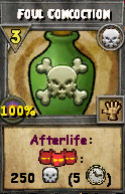
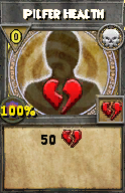
Mongu
Wave 1: Mongu Mercenary (2 pips / 325 health)
Wave 2: Mongu Slicer (3 pips / 350 health)
Wave 3: Mongu Gasher (3 pips / 375 health)
Waves Seen: 1, 2, and 3
Waves Seen: 1, 2, and 3
4-pip Afterlife on a teammate of some sort. Doesn’t revive or damage opponents.
Waves Seen: 2
Condition and Effect Unknown
Waves Seen: 2 and 3
Condition Unknown
Waves Seen: 3
Condition Unconfirmed
Elemental
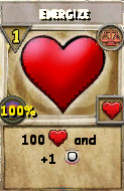
Wave 1: Muck Elemental (2 pips / 600 health)
Wave 2: Mire Elemental (3 pips / 675 health)
Wave 3: Silt Elemental (3 pips / 750 health)
Waves Seen: 1, 2, and 3
Note: This is bugged and shows 500 (4) for the heal, but it’s actually 100

Waves Seen: 1, 2, and 3
Condition Unconfirmed
Waves Seen: 1, 2, and 3
Waves Seen: 1, 2, and 3
Waves Seen: 3
Condition Unconfirmed
Genie
Wave 1: Hata Rayiys (2 pips / 1400 health)
Wave 2: Alhaya Shab (3 pips / 1550 health)
Wave 3: Sahi Akhdir (3 pips / 1700 health)
Waves Seen: 1, 2, and 3
Condition Unconfirmed

Waves Seen: 1, 2, and 3
Condition Unknown
Waves Seen: 2 and 3
Waves Seen: 3
Condition Unknown
Beastmoon Monster Mayhem
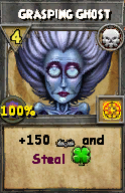
Death Enemies
Baboon
Wave 1: Baboon Guerilla (2 pips / 325 health)
Wave 2: Baboon Bandit (2 pips / 350 health)
Wave 3: Baboon Goon (3 pips / 375 health)
Waves Seen: 1, 2, and 3
Waves Seen: 2 and 3
Condition Unconfirmed
Waves Seen: 2 and 3
Condition Unconfirmed
Waves Seen: 3

Waves Seen: 3
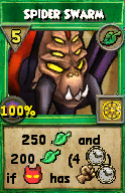
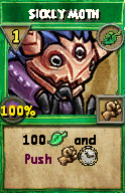
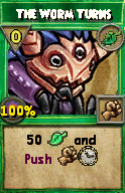
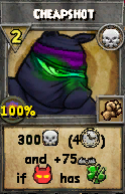
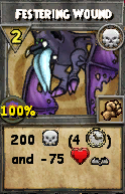
Ghulture
Wave 1: Desert Scavenger (2 pips / 600 health)
Wave 2: Dune Raider (2 pips / 675 health)
Wave 3: Canrion Craver (3 pips / 750 health)
Waves Seen: 1, 2, and 3
![]()
Waves Seen: 1 and 2
Waves Seen: 1
Condition Unconfirmed
Waves Seen: 1 and 2
Condition Unconfirmed
Waves Seen: 1 and 2
Waves Seen: 2 and 3
Condition Unconfirmed
Waves Seen: 3
Durvish
Wave 1: Swirling Durvish (2 pips / 1400 health)
Wave 2: Twirlging Durvish (2 pips / 1550 health)
Wave 3: Hurling Durvish (3 pips / 1700 health)

Waves Seen: 1, 2, and 3
Condition Unconfirmed
Waves Seen: 1, 2, and 3

Waves Seen: 2 and 3
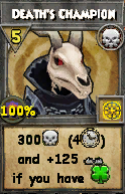
Waves Seen: 2
Condition Unconfirmed
Waves Seen: 3
Condition Unconfirmed
Waves Seen: 3