March 26, 2024 April 15, 2024
The Forbidden Library Gauntlet
What say you about reading a book or two? Just kidding! Or… am I? The Forbidden Library Gauntlet has just been shown off in the Spring 2024 test realm!
Obtaining the Gauntlet
 In the past, there have been two options for buying the gauntlet:
- Buying the gauntlet, along with 7,500 crowns, for $39 on the Wizard101 website
- Crafting! The recipe shown is given by Lloyd FallingWater in the Shopping District, and the reagents required for crafting the gauntlet are dropped from packs.
You can also use a gauntlet from a friend who has bought/crafted one.
Story
The Order of Archival Mysteries maintains a secret library in Aquila full of dangerous magic. Bodleian Harrow, The Great Bibliomancer, seeks to discover the code of the Unreadable Book and has found a way into the vault where the most powerful books are kept. However, what he does not know is that the book will absorb all his knowledge and being into “an amalgam of terrible power”! In order to open the gate into the vault and defeat the Bibliomancer, the Immortal statues must be presented with an Offering of their favorite book.
Make sure to keep track of what book you get from what room! Trust me, it’ll come in handy later on.
Progression
This gauntlet currently has three tiers of difficulty: levels 1-50, levels 51-100, and levels 101+. Within the new gauntlet there are always at least two fights and one puzzle, and then there are 4 rooms that can either randomly be a puzzle or a fight! Let’s explore the level 101+ tier…
Imogen NightGrove
Life Boss – 9,100 HP
1-3 Random Book Minion(s)
 “Time For Some Research!” – At the beginning of every three rounds starting with the first, Imogen will target a random wizard with a version of Arcane Deduction that applies a 4-round chromatic -20% incoming damage aura to herself based on the targeted wizard’s school.
“Restoring Rare Books Is Vital.” – If a Book minion is attacked, Imogen will cast Regenerate on it.
This fight is fairly simple, as this boss has only a few cheats! Feel free to blade, trap, feint, etc. as your only worry will be their regular spells.
Room I
The first room is located immediately on the left from the entrance of the instance.
Puzzle Variant
The Serpent Stacks
After walking into the room, you’ll notice a Scroll Container and a bunch of small scrolls flying around the area! Simply walk into them to pick them up, and you’ll notice a Runaway Scroll icon near where your quest arrow would be. Deposit these into the Scroll Container to fill its requirement. You will then be awarded your book!
Keep in mind that the movement of the Runaway Scrolls is server-sided, and you can therefore pick up scrolls that someone else is searching for. Additionally, you may have poor latency if either you or the game experiences connection issues.
Combat Variant
In the first room’s battle you will encounter four different book mobs! Each mob is a different school, and therefore has a different amount of health. However, HP seems to be higher than 4,000, but no higher than 7,000.

Room II
The second room is located on the left, further back in the instance.
Puzzle Variant
The Sequestered Sorting
Upon entry, you will be presented with 4 Book Columns. Take keen note of what pattern of colors is on what stack, and play as pet to go under the back wall to the next room. Determine which stack in the second room is unlike the first room, then exit pet mode and interact with the incorrect stack to get your Offering!
Combat Variant
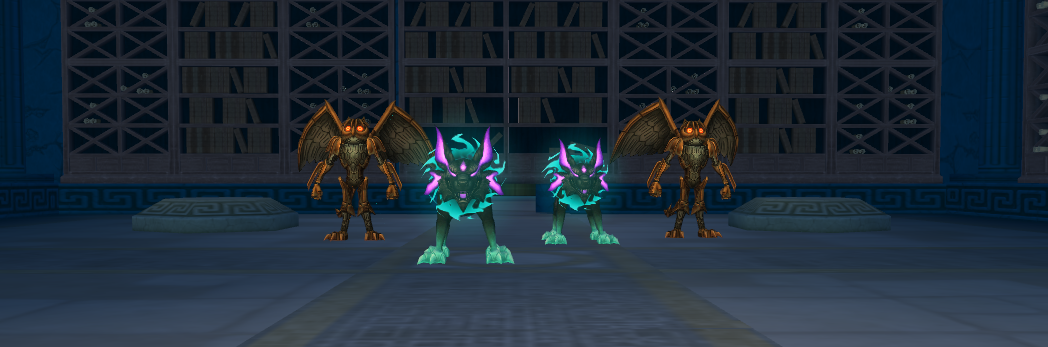
This room’s battle has two Seer Wolf Sentinel and two Ancient Archivist creatures to face regardless of your amount of allies. The wolves have 7,865 HP while the Archivists have 4,560 HP.
Room III
The third room is located immediately on the right from the entrance of the instance.
Puzzle Variant
The Accomplice Archives
This room is a bit tricky to grasp. You’ll notice 3 levers in the center of the room, and a small Pet Mode gap on the back wall to get into a second room with 2 levers. The large levers in the front room are usable by Wizards, while the smaller levers in the back room are only usable in Pet Mode.
To successfully complete the puzzle and get your book, you must activate the levers in alternating order between Wizard and Pet. Start with the lever on the far right, then go into pet mode to the small lever on the right in the back room. Come back to the first room and use the middle lever with your Wizard. Then, return to the back room and use the small lever on the left with your pet. Lastly, activate the final lever of the front room with your Wizard.
You have exactly 30 seconds to flick all these levers in order. That’s plenty of time to consistently get it solo (I was able to consistently solo it in 23 seconds), but make sure not to dawdle!
Combat Variant
The Combat Variant of this room will pit you against 4 Ancient Archivist mobs, no matter how many players you are with! They each have 4,560 HP.

Room IV
The fourth room is located on the right, further back in the instance.
Puzzle Variant
The Captured Chronicles
In this puzzle room will be four different Scroll Pedestals – each with a number on their base column. Use photomancy to take photos of these scroll pedestals in the order of their roman numeral number (1, 2, 3, 4) to claim your book and proceed!
Combat Variant
The Combat Variant of this room will pit you against 4 Seer Wolf Sentinel mobs, no matter how many players you are with! They each have 7,865 HP.

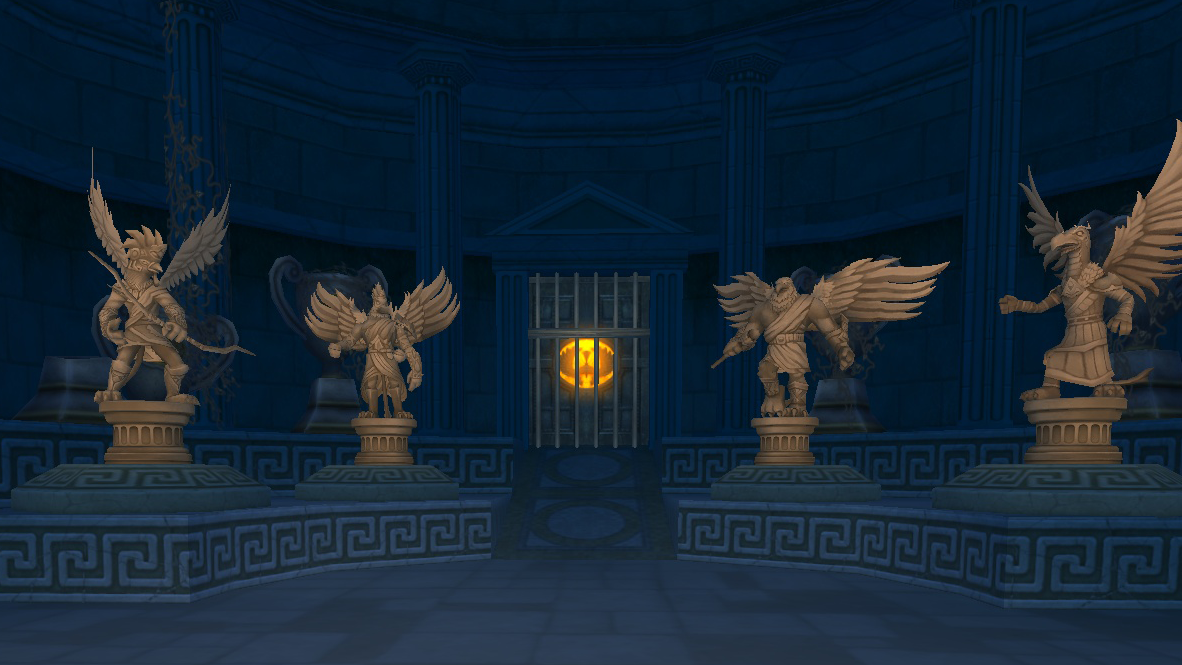
Main Puzzle
Once you have all four books, head to the vault entrance! It is now time to present your Offerings to the Immortals. Hopefully you remembered what order you did the puzzle rooms in, otherwise you might be in for a little bit of trial-and-error!
Each book will go to the Immortal that it is most thematically appropriate for, but hold that thought because there’s a caveat. You must present your offerings based on the order of the rooms you got the books from. For example, the book you received from Room I must be presented to the corresponding Immortal first, Room II’s book second, etc.
Even if you don’t quite remember what book was from what room, not to worry! As long as you know the order you completed the rooms, the books on the bottom of your screen appear from right-to-left in the order obtained. So if you did rooms in the order (II, I, III, IV), then your books will appear on the bottom, right to left, corresponding to their respective rooms.
Apollo – In the Shadow of the Eclipse
Poseidon – No More Fish in the Sea
Zeus – Catching Lightning in a Bottle
Hades – A Grave Matter in the Gloom
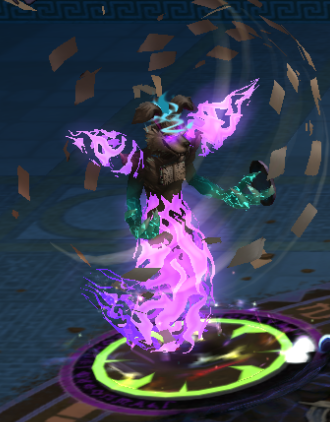
Main Boss Fight
After submitting the literary offerings to their respective Immortals, the vault will open and you will encounter none other than the bibliomancer Bodleian Harrow himself! While not very intimidating on his own, he holds the infamous Unreadable Book in his hands and will be consumed by its powers in the fight!
- Bodleian Harrow – Rank 23 Balance Boss, 8,900 HP
After his first form is defeated, he will transform into his Shadow form!
- Bodleian Harrow (Shadow) – Rank 23 Shadow Boss, 17,800 HP
- 1-3 Random Book Minion(s)
List of cheats:
Balance Form (Primary)


- “I’m Turning Over a New Page!” – If a Wizard casts a Trap, Bodleian Harrow will interrupt-cast a Shadow spell to clear all Traps on all allies.
- “I Read from the Restricted Section!” – Randomy, at the beginning of a Round, Bodleian Harrow will cast a random pre-audit or PvP-banned spell (Efreet, Loremaster, Shield Wall, etc).
- “At Last I Will Read the- Wait a Minute!” – After Bodleian Harrow’s Balance form is defeated, he will interrupt-cast a Shadow Spell that polymorphs himself into his Shadow form.
Shadow Form (Cheat)

- “Knowledge is Power!” – On the first Round after being polymorphed, or the Round after his minions are defeated, Bodleian Harrow will cast a Shadow spell that summons 2-3 random Book Minions.
- “Time for a Book Recall!” – When all of Bodleian Harrow’s minions are defeated, he will warn about re-summoning them.
- “Literacy dies in darkness!” – If a Wizard casts a Feint, Bodleian Harrow will cast a Shadow spell that removes a Trap from himself and applies a Shadow Trap to all enemies.

- At the end of each Round, Bodleian Harrow will randomly cast one of the following cheats:
- “Reading is a Great Restorative!” – At the end of a Round, Bodleian Harrow will cast a Shadow spell to sacrifice a Minion for 2,000 health.
- “You Will Serve the Master of Words!” – Bodleian Harrow’s “Flames of Doom” Minion will cast Beguile on a random Wizard.
- “Time for a Chilling Tale!” – Bodleian Harrow’s “Savage Stories” Minion will cast Blizzard.
- “In My Story, I’m the Hero, You’re the Villain.” – Bodleian Harrow’s “The Woeful Wastes” Minion will cast Link on a random Wizard.
- “Your Destruction is Written on Every Page!” – Bodleian Harrow’s “The Road to Ruin” Minion will cast Leafstorm.
- “Behold the Power of Dense Prose!” – Bodleian Harrow’s “Terrors of the Deep” Minion will cast Power Current on Bodleian.
- “No Weapon Can Defeat the Written Word!” – Bodleian Harrow’s “History of Horrors” Minion will cast Disarm on a random Wizard.
- “Your Knowledge is Mine!” – Bodleian Harrow’s “Malefic Mythology” Minion will cast Steal Pip on a random Wizard.
Fastest Strategy
While these cheats certainly provide an interesting plot-twist to a first time reader- er, I mean fighter, the boss is quite simple to farm! Since Spirit schools boost significantly on Bodleian’s first form, Myth will be your most effective hitter. For his Shadow form, you’ll want a Storm!
Calculations do NOT rely on critical and assume at least 250% damage on both the Myth and Storm hitter, and at least 32% pierce on the Storm hitter.
Remember that if you don’t have easy access to a pet or other gear piece for an itemcard blade, Bingo in Hope Springs (Wallaru) now offers crafting recipes for Tear-shaped itemcard jewels!
| Turn 1 | Turn 2 | Turn 3 | |
| Support 1 | Sharpened Spirit Blade on Myth Hitter | Sharpen Elemental Blade on Storm Hitter | TC Elemental Blade on Storm Hitter |
| Support 2 | Spirit Blade on Myth Hitter | TC or Itemcard Stormblade on Storm Hitter | TC Shatter on Bodleian Harrow |
| Storm Hitter | TC or Itemcard Mythblade on Myth Hitter | Frenzy | Sirens, Glowbug Squall, or Sound of Musicology (Epic) |
| Myth Hitter | Minotaur (Epic) on Bodleian Harrow | Elemental Blade on Storm Hitter | Pass |
Secret Boss

Hiding around the Forbidden Library you’ll find some secret book pedistals, waiting for their secrets to be unlocked! And I mean that literally – you must cast a Ritual cantrip (such as Magic Touch or Conjure Snowball) on this mystical lectern to unlock it.
However, there’s a catch! There are 4 of these pedistals and a time limit. If you fail to activate all 4 pedistals within the short ~5 seconds you have, you’ll have to retry! This means that in order to reach the secret boss, you need a full team of 4 players to inscribe these tomes with your cantrips simultaneously.
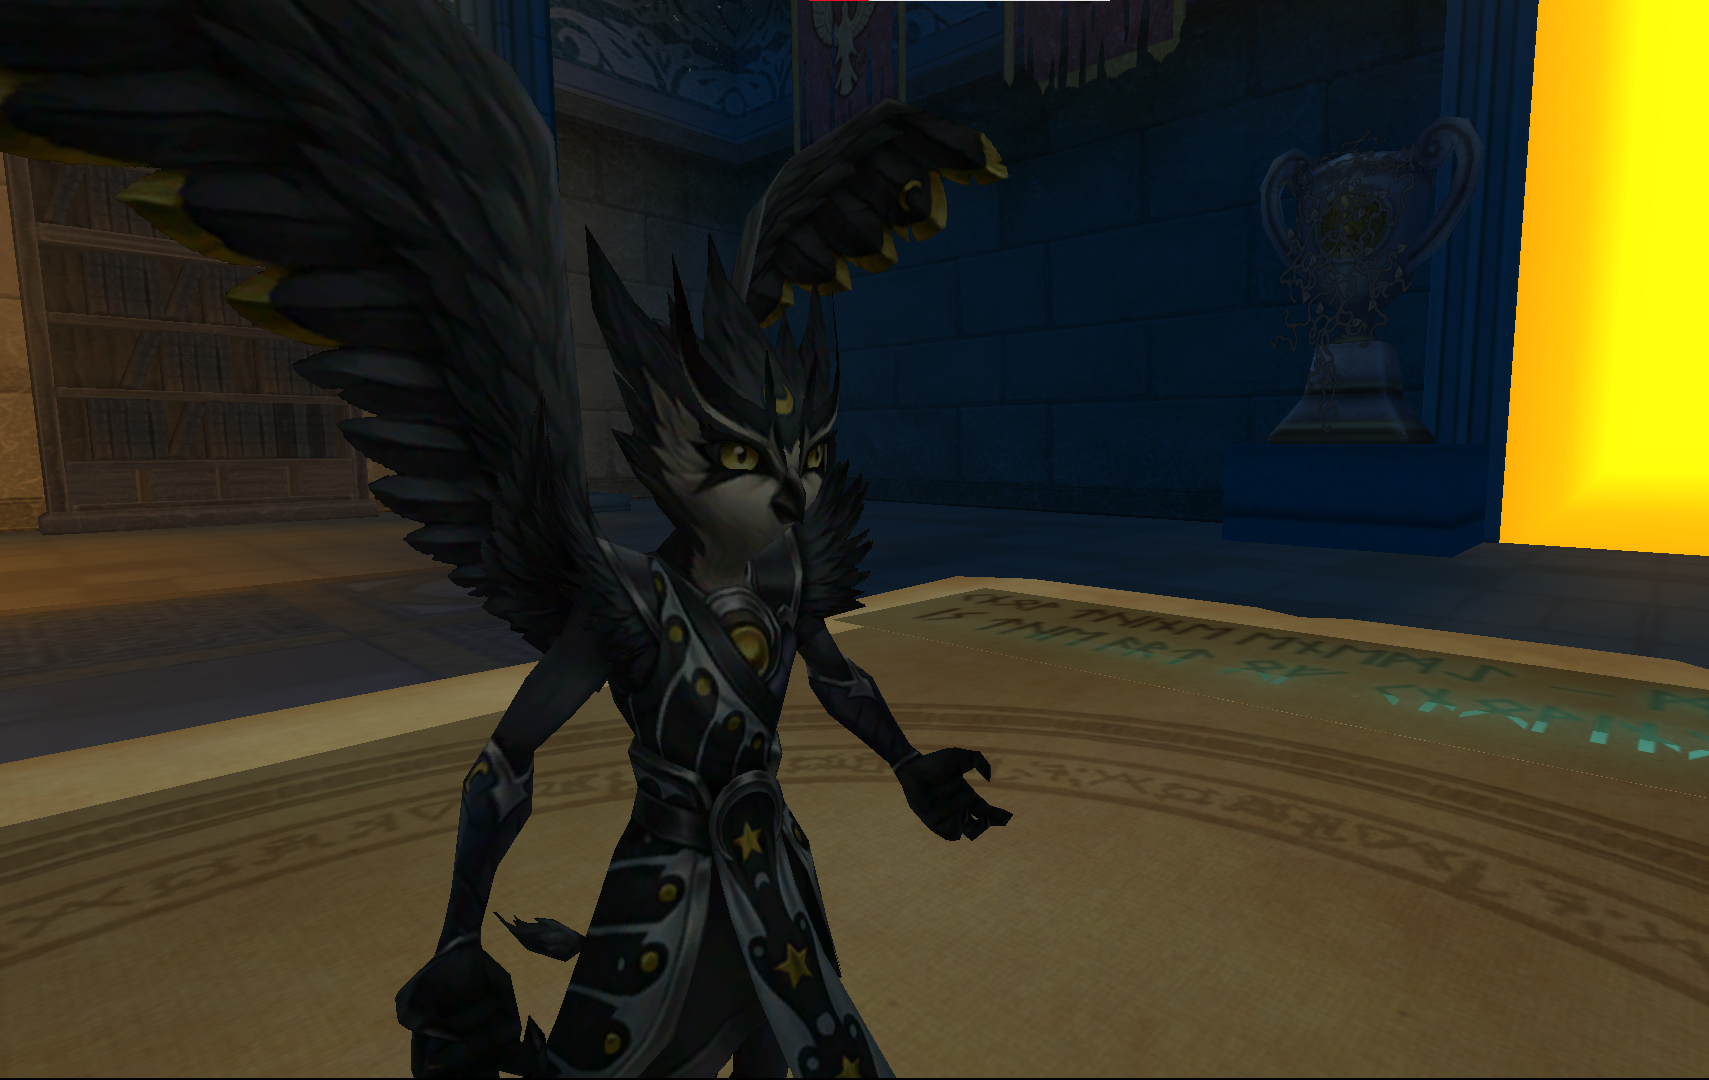
Once you have seen the “Secret Boss Unlocked!” notification, head to the Vault room where you fought Bodleian Harrow. You’ll see a monstrodome hiding in the back – this is the book in which Nyx Night Bringer was trapped! She is a Rank 23 Moon-Death Boss with a whopping 58,300 HP. Enter and you’ll find yourself inside her domain, with a miraculous background of the Library itself.
Cheats
If you’ve been paying attention, Nyx is the goddess of the Night and her cheats certainly illustrate that! There are some interesting mechanics in this fight; let’s put on our night-vision goggles so that we can take a look.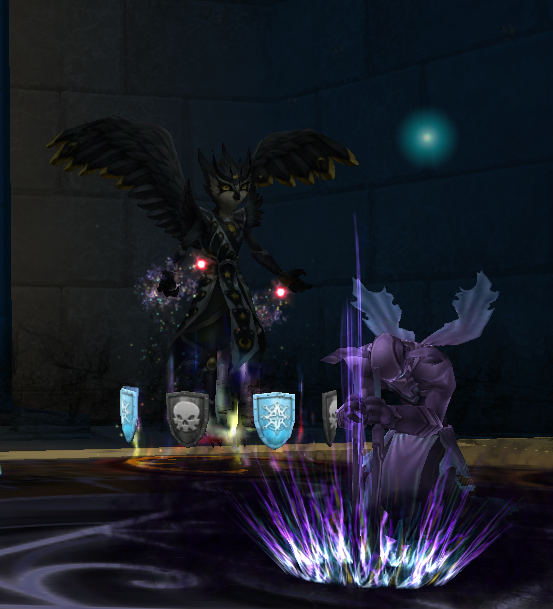
- “Nightfall is Inevitable” – At the beginning of the first Round, Nyx Night Bringer will cast a Moon version of Doom and Gloom that also removes all power pip chance.
- “Night Still Reigns Supreme” – If a Wizard attemps to replace Nyx’s Doom and Gloom, she will recast it.
- “The Cloak of Night Obscures All Sight” – At the end of the first Round, Nyx Night Bringer will cast a Star spell that applies a -50% outgoing accuracy “Darkness” aura to all Wizards.
- “The Moon and Stars Only Answer to Me!”
- If a Wizard casts a Moon or Star spell, Nyx will recast her Darkness aura on all Wizards.
- If a Wizard casts Empower, Nyx will interrupt-cast a Moon spell that heals her back to full health.
- “If Only Your Friends Could Find You in the Dark!” – If a Wizard casts a spell on themself, Nyx Night Bringer will warn the Wizard to target an Ally.
- If a Wizard casts a spell on an Ally, they will be given the “Torch” spell.
- “No! The Light!” – Casting the Torch spell will clear the Darkness aura on the target and replace it with a “Torchfire” aura that lasts 99 rounds.
- “The Worst Monsters Prowl at Night!” – At the end of a Round, Nyx Night Bringer may cast a random Shadow Creature Attack spell or a Natural Attack, that steals a pip, on a random Wizard.
Fastest strategy
Unless you feel confident in consistently powering through -50% accuracy with diminished pip gain, you’ll have to play by Nyx’s rules to get through the fight! While Supports can viably get accuracy, your Hitter will definitely need to be Torch’d.
For the most optimal strategy, all supports should try to get 50% universal accuracy. The simplest way to achieve this is with the Sidhe Staff, Athame (most for triangle), Amulet (Reaver for triangle), Ring (Wastelander for triangle), and Deck (most for triangle) all with a 7% universal accuracy jewel from the vendor in Conatus (Novus). You’ll then want a pet talent, gear piece, Crystal Unicorn, etc. to top you off at 50%. There are definitely other ways if you mix and match gearsets, but this is the simplest if you have the Wallaru Wastelander Pack items.
I’ve created two strategies, one that uses feint and one which does not. Most people would probably opt for feint, but sometimes it’s fun to try it without!
Feint Strategy:
The Storm Hitter will be most optimal in a feint strategy. Calculations are with 250% damage and 37% pierce, and one of the supports will need a Willcast that can target an Ally to get a Torch card!
| Turn 1 | Turn 2 | |
| Support 1 | Feint on Nyx Night Bringer + Any Willcast on an Ally | Torch on Storm Hitter |
| Support 2 | Itemcard Potent Feint on Nyx Night Bringer | TC Feint or Tear Jewel Balance Feint on Nyx Night Bringer |
| Support 3 | Pet Feint on Nyx Myth Bringer | Potent Feint on Nyx Night Bringer |
| Storm Hitter | Sharpened Stormblade on Self | Triton (Path A, Epic) on Nyx Night Bringer |
No Feint Strategy:
The Incindiate support will need to have Incindiate hat and at least 65% fire accuracy alongside the 50% universal. This can be achieved by running the above with two fire accuracy pins, as the Incindiate hat provides 5% accuracy itself.
A Myth hitter will get you through the fight fastest due to its affinity in countering weaknesses. In fact, you’ll be using the brand new Myth King Artorius spellement path! These calculations do NOT rely on critical and assume at least 220% damage and 46% pierce on your Myth hitter.
| Turn 1 | Turn 2 | Turn 3 | |
| Support 1 | Pet Sharpened Spiritblade on Myth Hitter | Torch on Myth Hitter | Itemcard Sharpened Spiritblade on Myth Hitter |
| Support 2 | Sharpened Spiritblade on Myth Hitter | Donate Power on Myth Hitter | Spiritblade on Myth Hitter |
| Myth Hitter | Sharpened Mythblade on Self | Mythblade on Self | King Artorius (Path B, Epic) on Nyx Night Bringer |
| Incindiate Support | Itemcard Mythblade on Myth Hitter | TC Mythblade on Myth Hitter | Incindiate |
Drops
While the Night Mire Gauntlet featured the first ever gauntlet pity system, the Forbidden Library Gauntlet takes it up a shelf. There is no badge requirement for crafting gear, and you are able to craft ALL pieces, not just accessories! The pity reagent is Unreadable Ink, which you will receive as a reward from the final boss.
Imogen NightGrove drops all accessories (Athame/Amulet/Ring/Deck) but quite infrequentlty. On the other hand, Bodleian Harrow drops the main pieces (Hat/Robe/Boots/Wand) at a pretty nice rate! I’ve received a main gear piece most of my runs. The gearset uses the same template as Night Mire (Defense 1 Offense 2 Utility 3); if you would like to take a look at the exact stats for this gear check out our Forbidden Library Gear Guide.
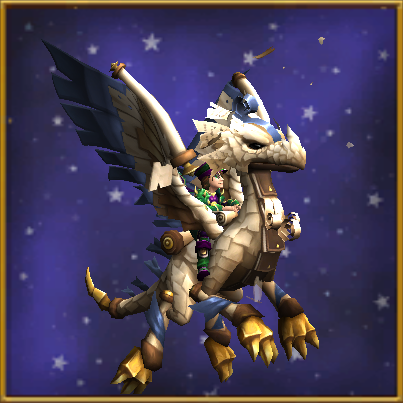
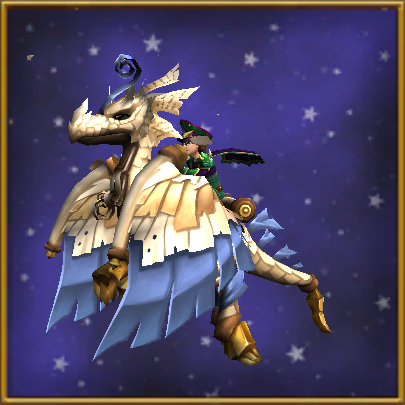
Nyx Night Bringer drops the permanent Bookwyrm mount from The Forbidden Library Hoard Pack! According to past trends, she may drop the pet from the pack as well. This mount is ridiculously cool – take a look!
Conclusion
I personally think this gauntlet is one of the best they’ve ever put out! The puzzles are a unique twist we’ve never seen before, and they managed to balance both those and the boss cheats in such a way that it’s fun to try but not tedious to farm. I look forward to getting this bundle once it releases on Live realm, and unlike dungeons in the past, am very excited to run this dungeon to farm for my level 170 upgraded Night Mire gear!
What do you think of The Forbidden Library Gauntlet? Are you excited to explore the secrets of literature? Let us know in the comments!