November 23, 2017 July 29, 2023
Beastman Fight Club Guide and Speed Run
With the Empyrea release, players who are seeking a greater challenge and excellent rewards will find it within a new side quest encounter called the Beastman Fight Club Gauntlet. Kingsisle considers it their hardest content to date and it certainly can provide a challenge that may cut into your sleep time!
This article provides you an overview of the dungeon and cheats. We also include a speed run strategy for a very well-coordinated team, as well as strategy advice that any team can use.
- Overview
- Cheats
- Mykedee
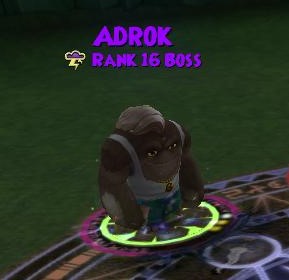
- Adrok
- Yowck
- General Strategy (Non-Speed Run)
- Mykedee and Adrok
- Final Fight
- Speed Run Strategy
- Mykedee and Adrok
- Final Fight
 A. Overview
To get the quest, after you’ve completed the story-line quest “Crusher? We Barely Knew Her!”, you can talk to Yowck in the middle of Aeriel Jungle. He will give you the quest “Fight For Your Right,” which takes you to a “Beastman Fight Club” cave in Aerial Shore.
The dungeon includes three fights:
- Mykedee only
- Adrok only
- Final fight: Mykedee, Adrok and Yowck together
B. Cheats
1. Mykedee Cheats
Mykedee is a Death boss with 24,780 health. His cheats include:
2. Adrok Cheats
Adrok is a Storm boss with 22,140 health and 75% storm resist. His cheats include:
3. Yowck Cheats
Yowck is a Ice/Balance boss with 29,210 health. His cheats include:
C. General Strategy (Non-Speed Run)
1. Mykedee and Adrok General Strategy
 It’s important that all wizards join the fight together since the “late” cheats are pretty severe. We have all wizards get close to the battle circle (but not in it!) and agree on one wizard saying “ready”, then “set” then “go.” All support Wizards should run in right away when they hear “go”, while the hitter pauses for a moment and jumps in a bit later so they can be last. As Pork says, “We must work together!” — otherwise you can sabotage your team.
Note that Adrok is currently pulling the first wizard that arrives into the battle as soon as his dialogue starts. We suggest that wizard flee and come back when this happens. If they need health or mana quickly, you can get it in Aeriel Shore (or if it’s empty we’ve found Caravan in Mirage a good place to quickly get health and mana).
As for the rest of the battle, we suggest trap stacking. If at least one wizard has Feint and Potent Trap trained, one wizard has an item trap (the Jewel of the Feint is available in the bazaar), and one wizard has a Feint Treasure card, you can easily stack 4, along with other traps (e.g., school traps of the hitter, elemental/spirit trap TC, etc.) and blades from the hitter.
2. Final Fight General Strategy
For the final fight, we suggest having one hitter and three support wizards.
We also suggest approaching the fight in two “phases”:
- In the first phase, your objective is to defeat Yowck.
- In the second phase, your objective is to survive and finish the fight.
We’ll go over the phases in a moment. First, let’s review the following key strategies for the final fight:
Phase One
For the first “phase” of the battle, we suggest focusing on taking out Yowck, since you can stack traps on him and the fight becomes much easier without him:
- Support Wizards
- Be sure to cast fire, myth, or life traps on Adrok every round. Alternatively, if your hitter is storm, you can cast a Windstorm
- Get stun blocks on the Wizards that are casting traps on Adrok as soon as possible
- Stack a regular feint, potent feint and TC feint on Yowck before the hit (if a Wizard has an item feint or a pet feint, these can be a good idea too)
- Make sure they always have a Virulent Plague on them to reduce their damage
- Use Storm Dispels on Adrok if he can cast Bugs or Sirens
- Consider casting Sanctuary early in the battle to boost your healing
- On the hit round:
- If Yowck has several shields, consider casting Shatter
- When your hitter is Storm, it’s good to cast a Storm Prism on Adrok on the hit round if possible (although our main focus initially is taking out Yowck)
- If you get bored, sing the lyrics of “Paul Revere” in honor of the Beastie Boys during that phase
- Hitter
- Stack 0-pip blades
- If you need more pierce, consider casting an infallible before you hit
- Ideally hit round 3-6 (ideally high damage AoE, like Bugs or Sirens)
Phase Two
Once Yowck is defeated:
- Support wizards can freely feint Mykedee and Adrok (be sure to feint or trap Adrok every turn).
- If health starts to get low, your healers can cast a large heal (Satyr or Rebirth).
- Continue to use Storm Dispels and Virulent Plague to limit their damage.
- The hitter should blade up and hit again in a few rounds.
- You can Storm Prism Adrok at any time (either the hitter or a support wizard).
Once you are done with the fight, be sure to collect your official Brass Monkey!
D. Speed Run Strategy
1. Mykedee and Adrok Speed Run
Both the Mykede and Adrok fights can be done in two rounds with Feint stacking (similar to our Baba Yaga farming guide). This also avoids both of their cheats.
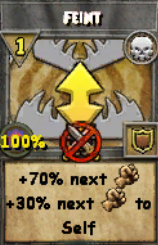 We suggest coordinating with your team to have the support wizards cast most/all of the following stacking feints:
-
- Trained Feint
- Potent Trained Feint
- Treasure Card Feint
- Item Feint
- Item Potent Feint (Brendan DreamingCity sells it)
- Pet Feint
The hitter should cast a sharp blade on round 1 and hit on round 2 , we use a storm and cast either Triton or Rehab Lady (editor: that’s Rusalka’s Wrath).
If your team has sufficient damage from only 5 feints, we suggest having one wizard with high outgoing healing boost cast Satyr or Unicorn on the hit round to keep everyone’s health topped-off.
 2. Final Fight Speed Run
For the final fights, we suggest the following strategy. It’s only four rounds, has a little extra damage in case you get a weakness or small shield, and includes some turns for dispels/cleanse/pierce/shatter, which give it a good success rate. The only requirement is that the hitter is storm and has decent damage and, most importantly, pierce. Our calculations used 120%+ damage and 36 pierce (full Darkmoor set plus 3 jewels)
We highly recommend “shopping for first” in this battle (i.e., if you’re not first, flee and come back — you may want to mark there!). When we’re first, this strategy works well around 90% of the time. When we’re second, the success rate is lower due to them sometimes mucking things up (e.g., Bugs, Beguile, Enfeeble from the Beet, Kevin-esque Frost Giant, etc.).
Many thanks to Stephanie Dawnheart and Aursiniuria for the Dark Pact idea in this speed run. They also came up with a neat 3 round strategy a team with balance and two fires — you can see it on her Youtube channel.
| Wizard#1 | Wizard#2 | Wizard#3 | Wizard#4 (“Hitter”) |
| Sharp Elemental Blade on Hitter | Item or Potent Windstorm | Item Sharp Elemental Blade on Hitter | Sharp Storm Blade on Self |
| Storm/Death/Ice Dispel or Pierce (1) | TC or Regular Windstorm | TC Darkwind | Item or Pet Storm Blade on Self |
| Death Dispel on Mykedee | TC Elemental Blade on Hitter | Storm/Death/Ice Dispel or Pierce (2) | TC Dark Pact on Self |
| Item or Sharp Bladestorm (3) | Shatter, Pierce or Cleanse (4) | Indemnity Feint on Adrok | Epic Bugs or Sirens |
Be sure to have a pip deck. Many of the spells cost two pips, so you’re going to need it!
The interesting part about this speed run is that it’s important for the support wizards to pay attention to their pips and the spells they cast and select your spell accordingly. These comments refer to the numbers in the table:
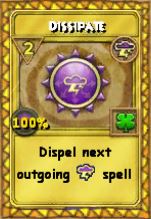 Decision #1: First Dispel/Pierce (Wizard#1)
Our top priority is to stop a Bugs, Storm Lord or Sirens from Adrok. So if he has 7+ pips, or 5 pips and a shadow pip, cast a storm dispel on him.
Second priority is Yowck: if he has 7+ pips (Frost Giant) or 5 pips and a shadow pip (Abominable Weaver). If so, cast an ice dispel on him.
Third priority is if they cast a storm shield or Abominable Weaver earlier, pierce it off.
Lastly, if Mykedee has a 5+ pips and a shadow pip (Winged Sorrow), you can cast a death dispel on him.
 Decision #2: Second Dispel/Pierce (Wizard#3)
Use the same priorities as the first dispel/pierce.
Again if you are second (or if Adrok can cast Bugs), you may want to cast the dispel a round earlier (and cast Darkwind on the third round).
Also note that this storm dispel should come after the blade cast by Wizard 2 — otherwise Adrok will use the dispel when Mykedee fizzles. So the order matters!
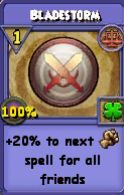 Decision #3: Balanceblade (Wizard#1)
If you’ve got a balance wizard, they should be Wizard #1 and cast a sharp bladestorm here.
If not, you can buy the “House of Plague Greenstone” (level 82) amulet in the bazaar , which will give you bladestorm as an item card.
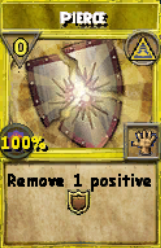 Decision #4: Shatter, Pierce or Cleanse (Wizard#2)
If they have a shield, we suggest casting shatter (if one of them has multiple shields) or pierce. If several of them have shields, we suggest focusing on Adrok.
Alternatively, if your hitter has a weakness, you can cast a Cleanse Charm on them.
Additional Cards
Although it doesn’t happen often, in case one of them survives:
- Your hitter should carry an additional tempest or two, preferably in the side deck, pre-enchanted of course!
- Your support wizards may want to carry an additional feint (one with regular, one with potent and one TC)
If you come up with any other strategies that work well or any corrections for the cheats, please let us know in the comments!
