October 5, 2020 October 15, 2022
Raise Barricade – Skill Spotlight
In a meta that primarily supports Melee characters overwhelming the other team in a handful of turns, slowing down the match becomes a tricky rope to balance on. One mistake in verifying range, checking vision or updating buffs creates an opening for the opponent to rush towards your units. In matches that don’t feature a Peter Quint cutting down a Pirate by turn 3, what should be among the first priorities in either pushing for an offensive position, or solidifying a defensive area? Raise Barricade provides the groundwork for going on the offensive.
In this article, one of the premier tools of a defensive pirate, Raise Barricade, will be broken down. Various mechanics and interactions of the skill, both offensive and defensive, will also be offered. By the end of the article, an aspiring builder should have the knowledge to properly place their Barricades to their maximum potential.
The Basics of Raise Barricade
The skill offers a straightforward explanation of its features.
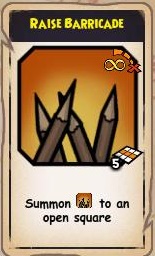
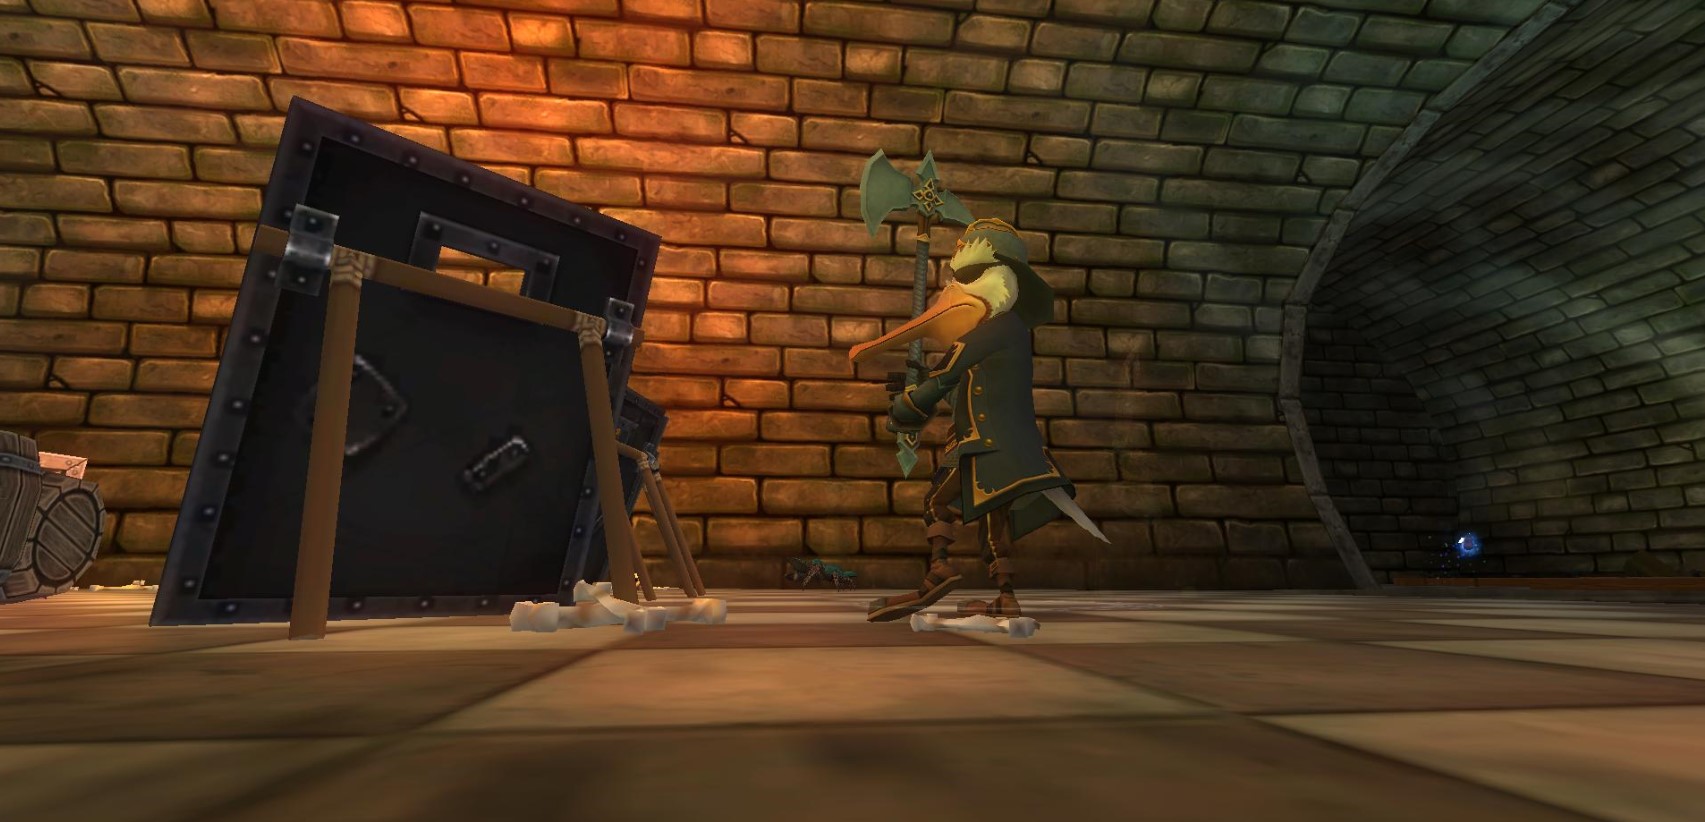
Succinct and yet the card offers no useful information. Even the image on the card misleads since the barricades are only wooden in the first and second tiers of the card. At level 70, metal walls replace the wooden barricades.
Placement
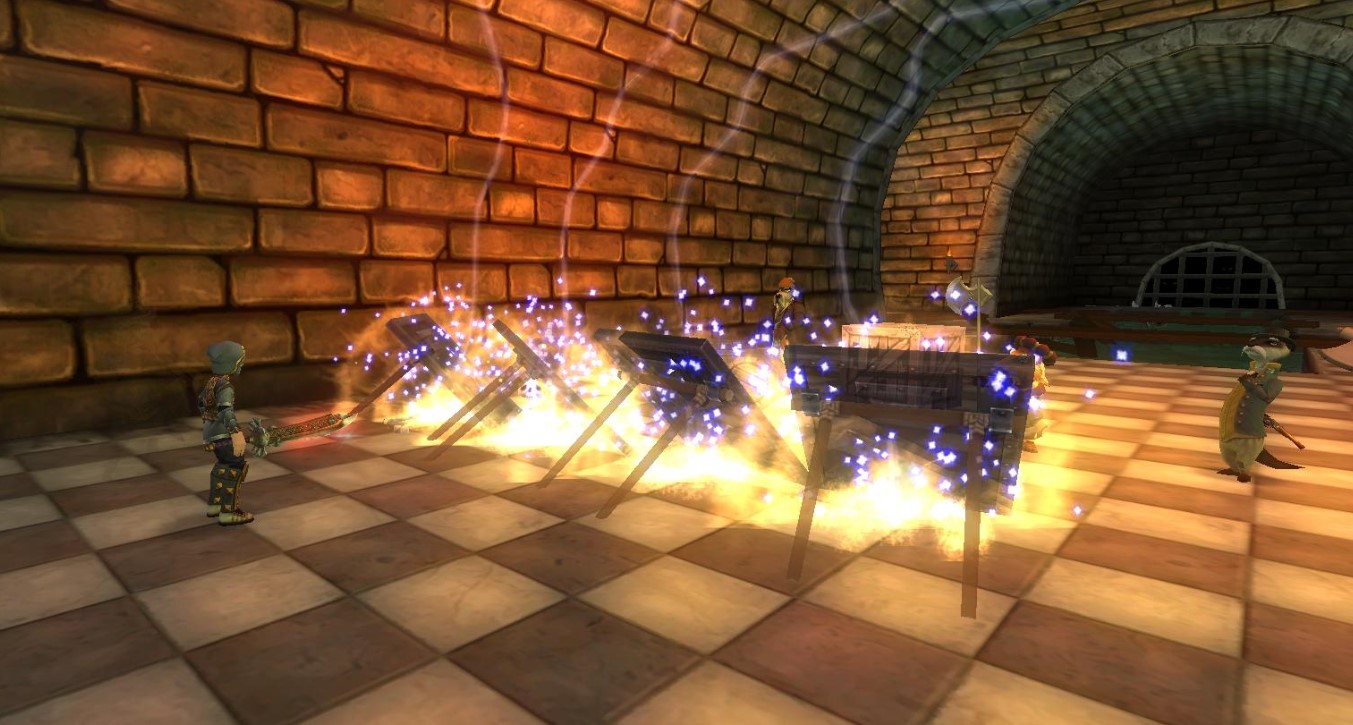
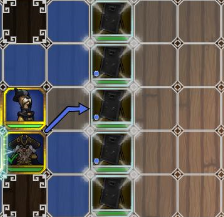
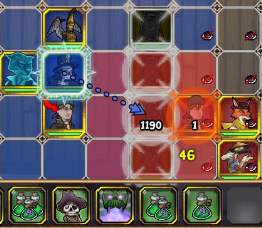
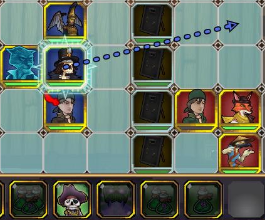
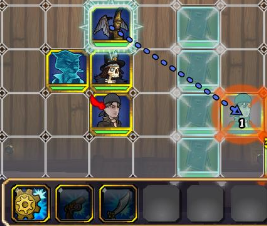
The ability summons a line of 5 barricades centered on the position of its placement. Vision and obstacles do not prevent the center barricade placement; however, obstacles reduce the number of barricades placed. The center barricade can be placed in eight directions centered on the pirate: North, East, South, and West as well as NE, SE, SW, NW. Examples of this range are shown below.
Positioning
The two directions available for placement, cardinal (N,E,S,W) and inter-cardinal (NE,SE,SW,NW), also determine whether the barricades are placed in a line parallel to your pirate or placed in a line diagonally to your pirate. Both variations block movement, vision or a combination of both.
Durability
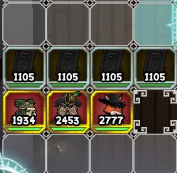
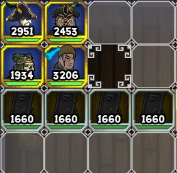
The durability of a barricade depends on the spell power of the user. A pirate with the minimum mojo talents constructs a barricade around the low 1200 hp range while a pirate with the max mojo talents constructs a barricade around the high 1300 hp range. Old Scratch’s Mojo Buffs further increase the skill durability up to roughly 3000 depending on the level of buff used.

General Interactions with Raise Barricade
- Relentless/Burst Fire/ Mojo Echo can trigger off of basic attacks to the barricade. If you critically attack a barricade, Bladestorm/Double Tap/Mojo Rising will not trigger. A BS/DT/MR from a different target will not randomly shift to attacking a barricade.
- Buffs cannot target barricades that have already been placed. This includes Gallant Defense protection and Stat Buffs, (just in case you wanted to know if you could give your barricade 50 agility.
- Ratbeard’s Clear the Deck, and other knockback abilities, can push barricades away.
AOE Interactions
AOE Attacks can target Barricades, but there are many different interactions. Some general rules:
Movement-Based AOEs
Movement based “Square AOE’s”, like Ratbeard’s Clear the Deck or Goronado’s Gorilla Warfare, cannot attack through Barricades since the attack is centered on the attacking unit
Targeted AOEs
Targeted “Square AOE’s”, like Musketeer Bombs, Swashbuckler Hurl Knives or Witchdoctor Jobu’s Kiss, can attack 1 square through Barricades since the center of the attack can target a barricade. This includes Old Scratch’s basic attack so be careful!
Cone and Line AOEs
“Cone AOE’s”, like Bonnie’s Scatterblast, and “Line AOE’s” like Uncanny Shot and Ocuborus, cannot attack through the barricade if the attack has to travel through a barricade as the first square. The targeting of these attacks requires an open square / enemy unit to activate properly. As long as the unit is 1 square away from the barricade, they can use the move. The attack will travel through the barricade for its full duration unimpeded.

Miscellaneous Interactions
Minions
Vision does not affect minion summons.
Surge of Technomancy
Surge of Technomancy breaks all conceivable vision rules. It targets any unit regardless of positioning of the casting unit and the target unit. Only the range matters for Surge of Technomancy.
Disclaimer:
Due to the massive amount of attacks in the game, unaccounted for niche cases may exist. If you find a unique scenario that isn’t listed here, comment down below and I will add it to the article.
Strategies involving Raise Barricade
Here are some potential ways to use Raise Barricade.
Cornering
If you’ve even dabbled in a bit of pvp before, the word “cornering” should conjure familiar imagery. By positioning your units with a square formation in a corner, barricades placed perpendicular with the wall create a fortress. The enemy is given fewer squares to attack and a sturdy unit like Ratbeard protects any openings.
Against Black Fog, a Barricade cornering strategy combined with a Contessa under Gallant Defense nullifies many of the advantages of a Black Fog Charge. Units cannot Jump or Fly over Barricades. The resulting configuration limits the squares that the swashbuckler can place a unit to attack.
Is Cornering too Strong?
At first glance, this strategy appears completely over-centralizing to the meta; all defensive players would seemingly benefit from hiding in the corner and forcing the enemy to approach them through their most heavily defended location. While I won’t discount the strategy entirely, relying on this strategy limits growth as a player.
A Musketeer, for example, severely reduces their range of offense by hiding in the corner. Instead of applying constant pressure to the enemy with the threat of bombs and AOE’s, the Musketeer surrenders the entire flow of battle in order to restrict how the enemy approaches. An experienced player will take advantage of the Musketeer’s immobility. In this instance, a Buccaneer could edge their units up the map and then bait out the enemy buffs over time. Once they whittle down a few specific Barricades, the Buccaneer can make their attack as they choose.
Cowering in the corner, as it should be called, is a “noob trap” in most instances. It allows the user to get a foot in the door against the oppression of a quick defeat from a Highland Charge or Black Fog Rush. Beyond this, any competent enemy will exploit the restrictions of a corner strategy to take full control of the battle.
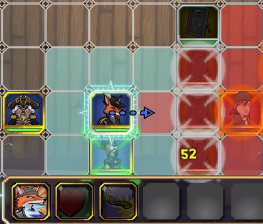
Vision Blocking
With the introduction of Old Scratch Mojo Buffs, a Mojo Boosted Mournsong, Mojo Storm, or Musketeer Bomb Attack inflicts massive damage from a great distance. While you are attempting to get close, a Commander Emmett will slow your team down and the enemy will get a few free turns to poke at you without much chance of response. Instead of inching up the battlefield fully exposed, a barricade wall can provide a safe position to move into while you wait out their traps and buffs.
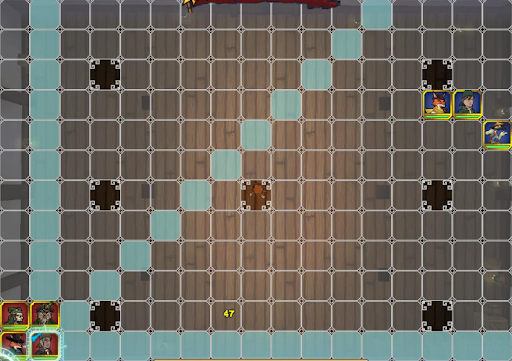
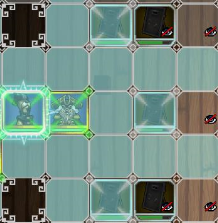
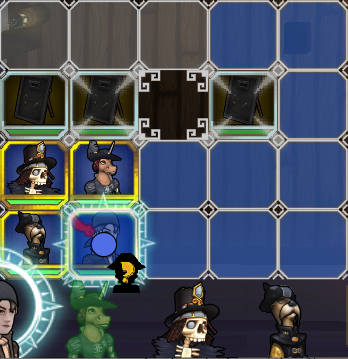
Vision in Pirate101 is one of the most misunderstood aspects of the game (among many others). A full guide of the Sparring Chamber vision was compiled by Matthew here; however, the vision offered from the pillars is hardly adequate protection. Barricades, on the other hand, block off entire halves of the Sparring Chamber. A few examples will be shown below.
A single barricade line put up at midfield blocks pretty much every every vision hole. Unless they choose to move up to threaten your barricade fortress, you can basically decide when to make your move, especially if you have 2X movement companions like Nausicaa or Goronado.
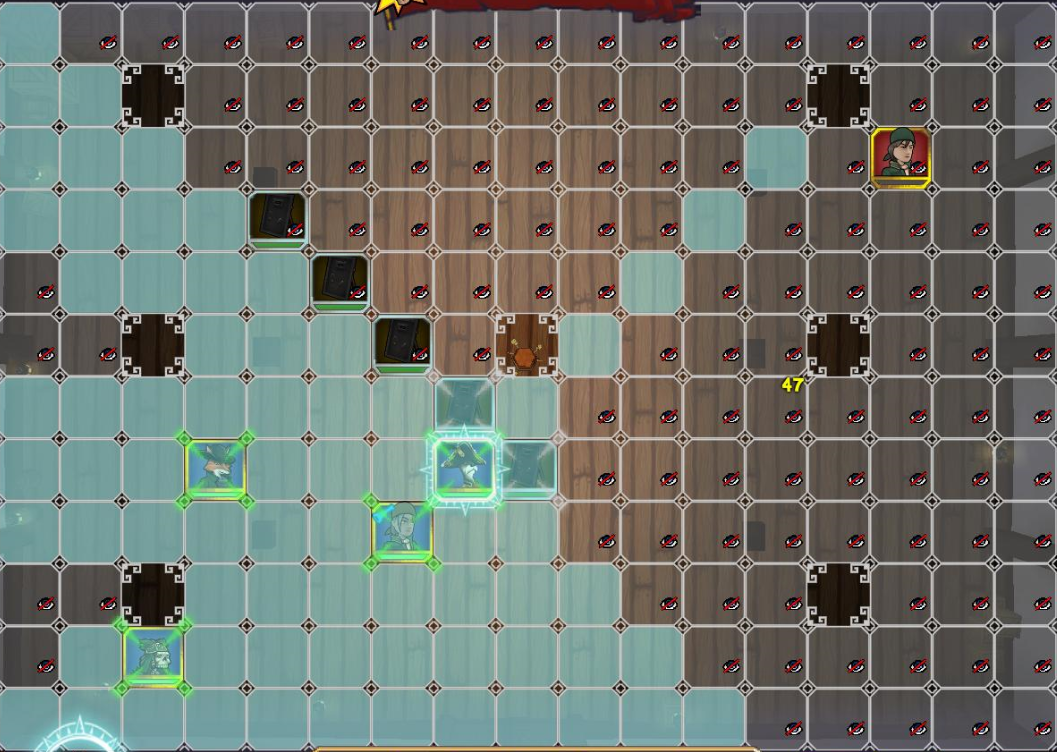
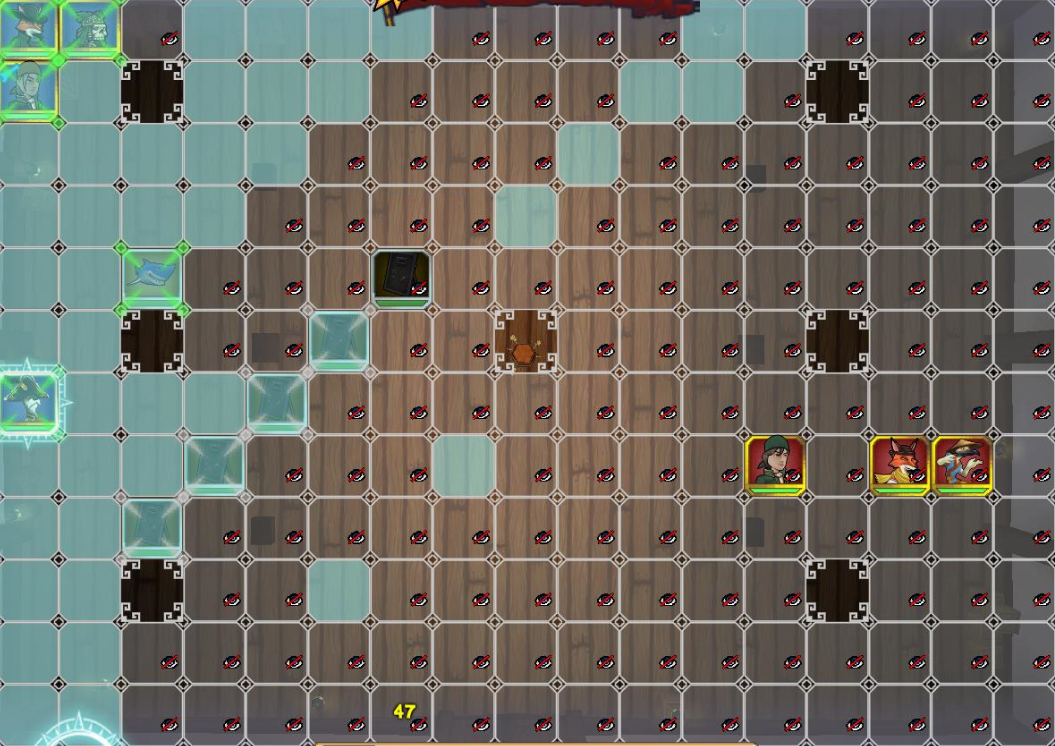
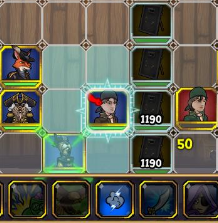
As you can see from the last image, there are a few random pockets of vision that are pretty much inexplicable at this moment. Barricades do not guarantee complete immunity from ranged attacks if the enemy gets close to you!
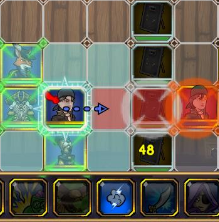
Movement Around Obstacles
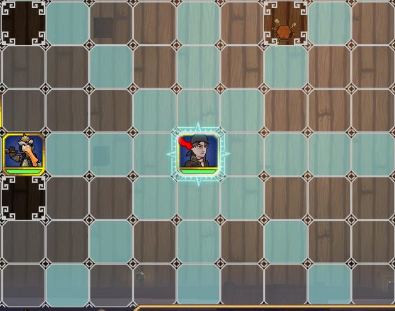
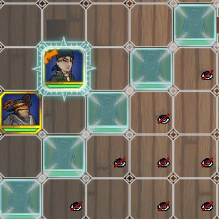
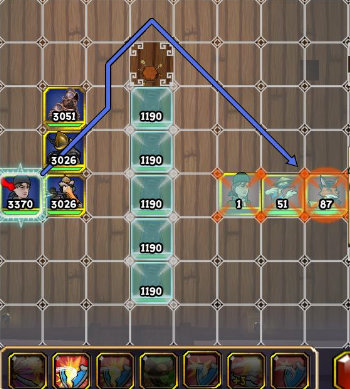
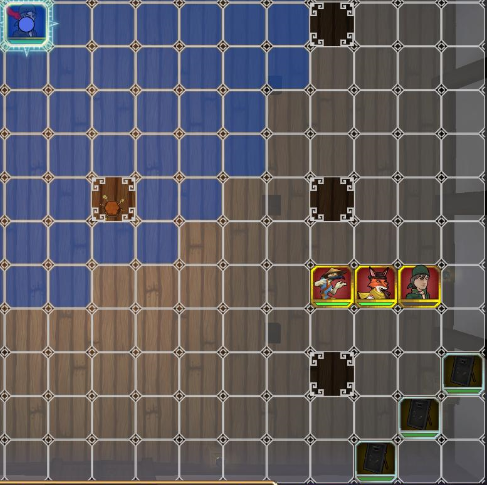
This strategy has more niche uses than the previous two, but it still has the potential to completely swing battles. The barricades placed below mainly serve to block the enemy’s vision; however, your movement also becomes unpredictable from behind them. Instead of having 1 direct line to reaching the enemy, the barricades allow for 2 or more unique lines to the enemy. They would need to prepare for all instances with their Hold the Line companion or their traps, but it becomes much more likely that a mistake is made in an unfamiliar movement situation like this.
In the example below, a HTL unit would normally prevent a single unit directly in front of it from reaching the vulnerable units behind. Now the Buccaneer can reach the backline without having to run a unit through the HTL first! There are many unique scenarios created by barricades, especially when gaps form, so your successes may vary.
Interrupting the Enemy
The final strategy simply involves blocking the enemy’s preferred positioning by dropping a barricade in their face. Trying to corner? Drop a diagonal barricade in their preferred corner to make them uncomfortable and delay their strategy.
Approaching you head on? Drop a barricade to slow them down a turn.
Should you get Raise Barricade?
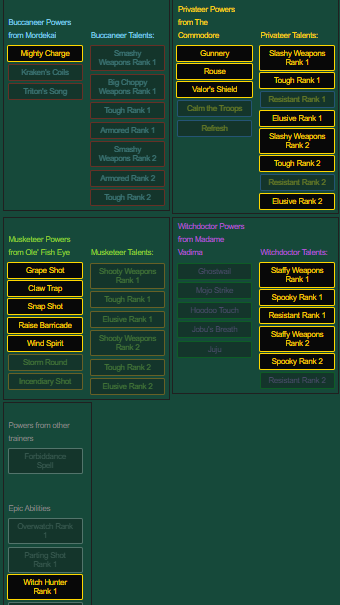
Raise Barricade requires 5 Practice Points for all non-Musketeer classes. This section will discuss whether the classes can afford to give up those 5 points without creating large problems for their game plans. If you want to check your own practice point usage, be sure to use the Final Bastion Practice Point Calculator.
Swashbucklers
A Swashbuckler cannot easily acquire Barricades without creating massive deficiencies in their gameplay. You are either giving up Witch Hunter and Spooky damage boosts, giving up Mighty Charge and Rouse+Valor Shield, or giving up Relentless and Choppy Weapons. This may be the only viable build. Use the Practice Point Calculator to see what you’d have to give up.
Swashbucklers can still benefit from vision blocking to stop AOE slows or early game poke; however, their damage or durability throughout the game will drop immensely. Maybe they can survive without Relentless, but even that severely limits them unless they have at least Relentless on their pet. In short, do not get Barricades without considering the possible limitations imposed on your pirate.
Conclusion
Pirate101 players do not properly utilize the massive potential of Barricades. With the current state of the game, the ability is very difficult to safely fit into a non-Musketeer player’s arsenal. If players had even just one or two more practice points available, the meta would change completely with Barricade-focused strategies. Until we reach that point, Barricade will remain a good defensive option, but an option with large drawbacks to its usage.