December 22, 2017 December 5, 2018
Pirate101 PvP Analysis:
“Holding the Line”
This is my second post in a series where I review duels I’ve completed on my channel. Refer to time stamps of the raw video posted alongside my comments in order to find the moment I am talking about.
This video comes from a Pirate101 Central No Rules tournament set vs Ruthless Bruno Maxwell’s Buccaneer. The context of this set involves a tied series (1-1) of Buccaneer vs Buccaneer. The first match was won decisively by my character. The second saw Bruno gain a resource advantage and I lost early after making many greedy/risky plays in an attempt to regain control of the match. You can watch these matches on my channel here and here.
My gear choices for this match were


Before I begin, I need to show my rational for my weapon choice of the Haywire Armada Greatsword. It is common for Buccaneers to use the Minotaur’s Axe, and the Dragon Axe of Doom. Both weapons deal physical damage and have additional epics that complement the Buccaneer’s tools. The haywire weapon has equivalent base damage in comparison to the weapons but it deals magic damage instead. A Buccaneer’s standard build averages 100 armor. This results in physical weapons losing around 100 damage every single attack. From a class reliant on chaining, 100 less hp taken from every single attack adds up very quickly. A magic damage weapon bypasses all physical armor and thus deals most of its normal damage.
The other beneficial aspect comes from the Haywire Strikes provided by the weapon. Referring to Ravino’s guide on Haywire powers, Haywire weapons have damage rolls from 1x to up to 5x extra damage. These cards have the capability to deal damage equivalent or greater than an Assassin’s Strike card. Additional guaranteed attacks are always welcome in a matchup that can come down to basic attacks in the end if resources are not managed properly.
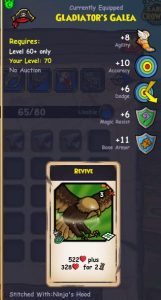
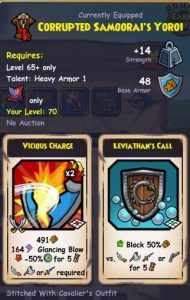
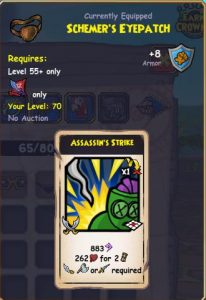
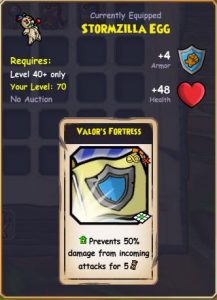
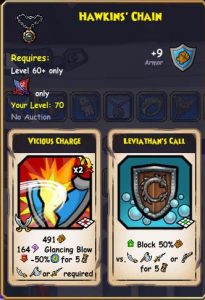
The rest of my gear is standard for the matchup. The goal is to receive as many resources (heals and shields) without compromising my guaranteed attack count. Moo Manchu Tower gear accomplishes this goal the best with the robe and charm providing 2 armors and 2 Vicious Charge. Switching out the Valor Fortress out for a Revive and then the ring for the Tower ring (providing a Critical Strike card and another Leviathans call) would be another good setup for this match.
(1:00) I had Barricade and the accompanying cards trained due to Swashbuckler worries at the time. Barricade doesn’t see much use in this match-up. The snap trap I placed would have been more effective if I had placed it in the bottom right corner. This would hinder his ability to move to the corner.
(4:00) I have a perfect setup for an aggressive start to this duel. The first mistake I made was through shielding a few turns too early. I was in no threat of being charged early by him thus I could have waited a few more turns to start shielding.
(7:10) This would have been a better position to apply my first shield. Since I’ve already applied 2 shields, he knows I am locked into being the aggressor at this point. If he doesn’t choose to start shielding, I would get a free turn to target his pirate, or deal large damage to his companions without any threat of reciprocation. It is too dangerous for him to have zero shields up with both my Pete and Pirate in range of his pirate.
(12:00) Since I have 2 25% (Valor Shield and Triton) and 1 50% shield up, I can safely charge into his Hold The Line 3 (HTL) without much danger. Since he only has 1 25% shield up, any attacks directed towards him will deal good damage. The positioning of my companions prevents his companions from reaching unless they use their 2x movement attacks.
(16:55) Positioning myself in this way allows my Peter Quint to reach his Peter without hitting the HTL of either the pirate or Barnabus. The goal was to finish his Peter, but that did not go my way in this instance as my Peter fails and is subsequently focused down by his team.
(20:00) I am still accuracy reduced so I need to use an attack card to finish Peter. Either one does the job; however, I value the late game potential of the haywire strike over the utility an accuracy reduce can bring. Positioning my companions in a line prevents him from reaching them without going through HTL.
(21:30) His usage of his shark’s fury was not prudent as I have little incentive to charge in with the active armor disparity. I am now even more content with sitting back and waiting for all his buffs to deplete before using my own or forcing an attack.
(23:20) My Triton’s coils was used in preparation of my 5 turn hide. I would not be forced to use some of my turns of the hide to activate the strength buff. It’s common to go into hide and spend every turn buffing with the final turn being used to attack. If the enemy moves out of my range the last turn, the hide would go to waste in that scenario. Putting buffs up before the hide allows for some turns to be spent with movement to prevent being predictable.
(25:00) Walk in Darkness is applied. All of my movement of the pirate and companions prevents him from sneaking an attack in on the companions.
(29:30) Barnabus is the largest threat remaining since his HTL allows Bruno’s pirate to be safer without armors up. Eliminating or severely weakening him was the primary goal of the hide attack since it was unlikely for an opportunity on his pirate to be presented. As long as I wasn’t stunned after the first attack, this was a positive situation for me.
(31:00) His Wu Tang is open to attack. It would have been better if I also brought Temujin in to attack. Regardless of the HTL dodge reduce being present, he would likely hit my companions with his attacks.
(36:55) With all companions finished, I can now wait out his buffs with my HTL.
(38:55) He makes a calculated charge. Even though HTL reduces him, I cannot safely use my Reckless Frenzy as I am still reduced by accuracy. I take the opportunity to chip with my Haywire and Wu Tang. I retreat the following turn after the HTL reduce expires.
(42:30) I can safely wait out his Triton’s Coils as I am not expending any of my buffs by waiting.
(46:20) I prep to charge into him if he chooses to not hide or armor the next turn. He chooses to hide whereupon I retreat.
(48:50) Although I am defenseless, I am not worried about losing in this position since I am at a high health and he can only reach me with a 2x movement attack card.
(50:00) Now that I am low enough, I must match his armors or else risk an Assassin’s Strike.
(52:15) Charging here puts him in an interesting predicament. His armor expires on his turn so attacking my dodge reduced pirate is a large risk if he can’t finish my pirate. I have an Assassin’s Strike ready should he make that choice. Instead, he armors which is the safer move.
(56:10) Despite having no buffs vs his armor and strength buff, my high HP and accuracy reduce on his pirate dissuades him from attacking.
(59:00) With buffs depleted, I prepare to attack in 3 turns with the strength buff, hide and armor combination. Since he is in the corner, he cannot escape my reach unless he runs the moment I put my strength buff up. As he chose not to run, the duel ends here.
That’s it for the review of this duel. I end by finishing this set 2-1 and moved on to face Wolfy in the finals. I will likely review one of the duels of that set in my next post as it is a very good display of Buccaneer vs Swashbuckler. Thanks for reading.