October 28, 2022 October 29, 2022
Solving Wizard101
Beastmoon Puzzles
My idea with this article is to make Beastmoon “puzzles” similar to chess puzzles. These puzzles should double as interesting exercises for Beastmoon players and ways to teach some basic and advanced Beastmoon combat ideas. Even for non-Beastmoon players, considering these puzzles could allow you to think more creatively about PvE, PvP, Deckathalon, or any Wizard101 battle system.
Note: Some of this content will be outdated, as the article was written in late 2021/early 2022
How will these Beastmoon Puzzles work?
 If you’re unfamiliar with chess puzzles, the idea is to find a continuing move that either gives one side significant advantage or outright wins the game. The premise is the same in these Beastmoon puzzles: I’ll give you a battle situation, a set of cards to choose from (and sometimes the ability to direct a teammate), and your job is to find a winning move for your team and most optimal continuation for both sides. Unless otherwise indicated, it should be assumed that you can draw any card you need enough rounds into any theoretical continuation, and that your partner and opponents will be able to do the same (i.e., no considering deck fails, though you should try to work with your starting hand early on). It should also be assumed unless otherwise indicated that all players are max tier on their respective beast form. Each puzzle in this set is derived from a real situation I found myself in during a Beastmoon Hunt match.
Unlike in chess where you can respond to opposing moves on reaction, some situations in Beastmoon are unreactable (i.e., optimal moves are based on prediction). While this adds a certain depth to the relative strength of certain positions, it also can make an objective “best move” unclear. I’m going to provide what I consider the optimal move in each puzzle as well as an explanation, but not every situation will be completely black and white (though some will be).
The following section is meant for those who want to brush up on Beastmoon battle strategy and concepts:
Targeting
Targeting refers to which player is going to be targeted with damage spells. Generally in Beastmoon, defeating opponents one at a time is the most surefire way to win; even a single round of having more players alive on your team than your opponent’s can set your team up for a winning endgame. Picking which target to take down first comes down to the relative pip levels, offensive threat, and position (see below) of the opposing players.
Resource Management
When you take down an opposing player, you want to do so while using the least resources (I.e., pips). This typically equates to minimizing overkill (aka extra damage on top of what is needed to defeat an opponent). This is critical because using fewer resources to defeat one opponent means you have more left over to defeat the other opponents, giving your team stronger endgame chances.
Position
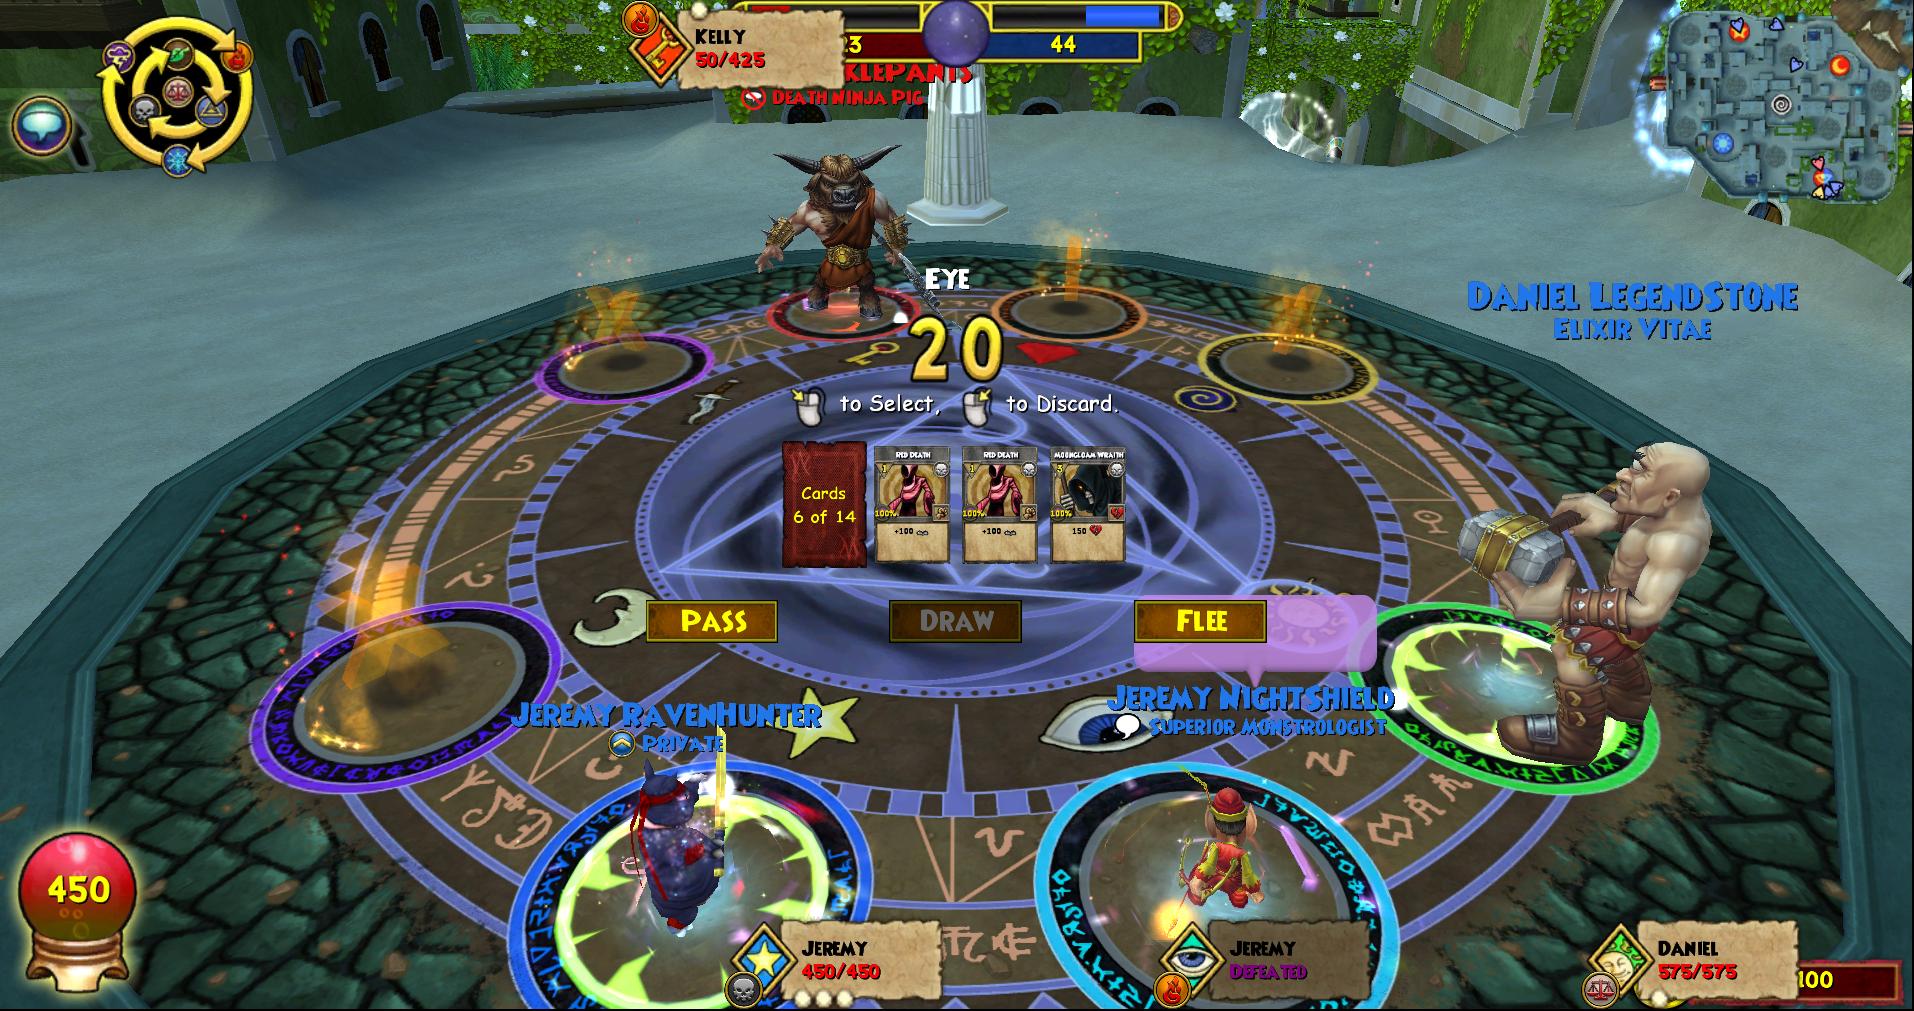
As anyone who has played Beastmoon knows, the turn system uses a snake format. I’ll describe it briefly here:
- Within each round, teams alternate casting order; referencing the battle circle image above (if the circle were filled), the order would be
- Sun (Balance Cyclops; Blue 1)
- Dagger (Open; Red 1)
- Eye (Fire Elf; Blue 2)
- Key (Fire Minotaur; Red 2)
- Star (Death Pig; Blue 3)
- Ruby (Open; Red 3)
- Moon (Open; Blue 4)
- Spiral (Open; Red 4)
- Next round, the teams alternate order; in the scenario described above, the Red team would go first the following turn (i.e., Red 1, Blue 1, Red 2, etc.)
This turn order results in a few things. First, the first position on each team is the most powerful position because it will never act later than second overall in a given turn. This is incredibly important in the early game of a battle since it can dictate who to target and how many actions (see below) each player will get. Second, being ahead of an opposing play in position (ex: first position red vs 2nd position blue) means you will always move before them on any given turn (I call this being “in position” if you move first, or “out of position” if you move second). This is incredibly important in the endgame as going first is a huge advantage in any battle. Finally, being in the same position as an opponent means you will each act twice before the other gets to act. This is crucial in the mid and endgames. Notably, this double action trading in an endgame 1v1 can lead to certain forms being unable to counter hanging effects (ex: death rat uses Ambush and then attacks before a Myth drake can remove the trap). Also notably is that this “double turn” scenario blocks chain stuns in a 1v1, which can make it unfavorable for some forms (ex: Storm Wolf might prefer being out of position to being equal position in an endgame 1v1).
Actions
Because of the snake turn system, player actions and team turns are not equivalent: turns refer to how many times a player selects a card, while an action is how many times they are able to cast a spell. The distinction is crucial: understanding when you need to counter or attack an opponent and when you are free to wait is essential to both these puzzles and Beastmoon as a whole. For example, defeating an opponent on round 1 after they get 1 action is much different than defeating an opponent on round 1 when they get 0 actions, and can be the difference between setting your team up for a winning or losing endgame.
Hanging Effect Conversion
When I say this, I’m referring to converting hanging effects into damage. Hanging effects (in Beastmoon (i.e., blades, traps, shields, weaknesses, DoTs, and HoTs) can be thought of as unused manipulatable damage. Hanging effects are conceptually weaker than plain damage because of their manipulability, and therefore can have slightly more power or library utility than equivalently valued damage or heal spells (ex: Storm Krok’s Twin Blades has 250 damage points worth of value while its 2-pip attacks have 200 damage points worth of value; Death Pig has a 100 damage value trap for 1 pip while lacking a 1 pip attack). Converting your hanging effects to damage to optimize your offensive output and punishing opponents for over-extending with their hanging effects is essential both in Beastmoon battles and in the puzzles below.
A common phrase I’ll use relating to hanging effect conversion is “effective health.” This is fairly straightforward and relates to defensive hanging effects. For example, if I have 200 health, a -75 shield on myself, and a -25 weakness on my opponent, I would have 300 effective health.
Now, enjoy the following puzzles!
Beastmoon Puzzle 1
Early Game Balance Cyclops 2v2
The scenario is as follows, with you playing as a tier 5 Balance Cyclops on the Blue team:
|
|
Here’s your starting hand:
 |
 |
|
 |
 |
Additionally, your teammate Fire Minotaur is open to spell suggestions. To remind you of the Fire Minotaur’s abilities, here are some options you might suggest:
 |
 |
 |
How do you continue in this scenario?
My Solution
| Balance Cyclops (you) |
Target: Fire Minotaur |
| Fire Minotaur (teammate) |
Target: Life Minotaur |
The first thing to notice is that this is an early-game scenario. You have a healer and an extremely high damage form paired together on the opposing side, both of which could seem like first-priority targets. So, the first thing to decide: who do you target?
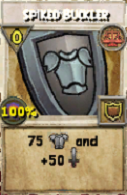
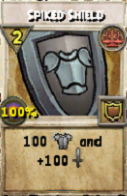
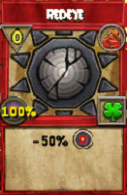
In this sort of situation, you need to knock out the source of offense, in this case the Storm Elf. Even if the Storm Elf can be revived, this forces the Life Minotaur to spend its resources (actions and pips) healing rather than being an offensive threat to your team. Additionally, the Storm Elf is in the second position, meaning Red will need to play around Blue‘s ability to defeat the revived Storm Elf before it has an action. The Storm Elf being in second position and Red Team going first also implies that Blue can hold the Storm Elf to one action if they can defeat it by Turn 2; this is exactly the plan when using Spiked Buckler and Redeye.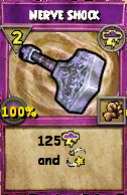
If you question the targeting here, consider what happens if you target the Life Minotaur: you could theoretically defeat it with two attacks from the Fire Minotaur (with some help from Spiked Buckler), but you run into some problems. Namely, Storm Elf can use Nerve Shock on the Fire Minotaur turn 1, preventing it from attacking and putting it in range of being defeated by the Red before it gets two actions. I’ll omit showing every individual defensive continuation, but suffice it to say that they all result in a similar endgame (note that if you leverage Tide of Battle for an early kill on the Life Minotaur, you give Storm Elf free reign to chain stun in an endgame 1v1). If you need some convincing, see the following losing continuation:
| Action 1 | Action 2 | Action 3 | Action 4 | Results (how next round begins) | |
| Turn 1 | 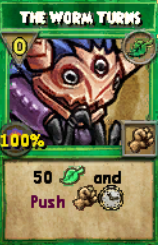 Target: Fire Minotaur Target: Fire Minotaur |
|
|
|
|
| Turn 2 | Target: Fire Minotaur |
Target: Fire Minotaur |
Target: Life Minotaur |
 Target: Life Minotaur Target: Life Minotaur |
|
| Turn 3 |  Target: Fire Minotaur Target: Fire Minotaur |
Target: Balance Cyclops |
Target: Balance Cyclops |
X
(defeated) |
|
| Turn 4 | X
(stunned) |
Target: Balance Cyclops |
X
(defeated) |
 Target: Balance Cyclops Target: Balance Cyclops |
|
| Turn 5 | Target: Balance Cyclops |
 Target: Storm Elf Target: Storm Elf |
X
(defeated) |
X
(defeated) |
|
| Turn 6 | Target: Balance Cyclops |
 Target: Storm Elf Target: Storm Elf |
X
(defeated) |
X
(revived) |
|
| Turn 7 | Target: Storm Elf |
X
(pass) |
 Target: Balance Cyclops Target: Balance Cyclops |
X
(defeated) |
|
| Turn 8 | Target: Storm Elf |
X
(pass) |
X
(defeated) |
X
(defeated) |
|
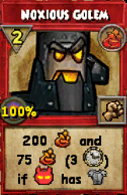
This is all to say, then, that you need to defeat the Storm Elf without allowing the Life Minotaur to revive it on the same turn, thus saving its pips and actions. The most natural way to accomplish this is to set up your teammate Fire Minotaur to one-hit-KO the opposing Storm Elf. The only efficient way to do this is to start with Spiked Buckler followed by Spiked Shield the next turn, both targeting the Fire Minotaur. The Fire Minotaur, then, should not attack; this is necessary to save enough blades to OHKO the elf at 325 health via Noxious Golem (or Blazing Construct). The Fire Minotaur, then, should use Redeye on the Life Minotaur (as the Storm Elf would be un-counterably defeated by the time he could trigger the mantle). With perfect play from your opponent, this turns into a relatively equal endgame. The difference between this continuation and the above is that a fizzle makes this endgame winningMy idea of the optimal continuation for both sides is below:
| Action 1 | Action 2 | Action 3 | Action 4 | Results (how next round begins) | |
| Turn 1 | Target: Fire Minotaur |
|
|
|
|
| Turn 2 | Target: Fire Minotaur |
Target: Fire Minotaur (50%) |
Target: Storm Elf |
X
(defeated) |
|
| Turn 3 (no fizzle) | Target: Fire Minotaur |
Target: Balance Cyclops |
X
(defeated) |
X
(defeated) |
|
| Turn 3 (fizzle) | Target: Storm Elf |
Target: Balance Cyclops |
X
(revived) |
Target: Storm Elf |
|
NOTES ON THE ABOVE SEQUENCE
| Cell | Comments | Spells Referenced |
| Turn 1, Action 3 | If Storm Elf opts for nerve shock, this doesn’t work. The stun only prevents the use Redeye, which is useful only to prevent the 50 damage from Turn 2, Action 2. Since Red is losing 125 damage to guarantee 50, this is a significant net loss that prevents Fire Minotaur from ever being defeated on Turn 3, Action 1 | |
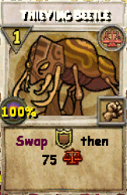
| Turn 2, Action 1 | If Balance Cyclops opts for Thieving Beetle into Storm Elf, this is slightly worse than Spiked Shield. Life Minotaur can instead attempt Radiant Boon to heal Storm Elf on Turn 2 Action 2. If this fizzles, the endgame is identical to if Spiked Shield is used; however, if Radiant Boon is successful, Storm Elf defeats Fire Minotaur and forces Balance Cyclops to Thieving Beetle again to defeat Storm Elf. That endgame is more clearly losing. Therefore, Thieving Beetle is equal to Spiked Buckler if fizzles, but worse if not. In the case where Radiant Boon is not used, the endgame using Thieving Beetle is at best equal to that using Spiked Shield. |
|
| Turn 3 (fizzle), Action 1 | There’s really no good move here for Red (it takes at least 3 attacks to take out Fire Minotaur, and Storm Elf dies immediately after revival) and many combinations win for Blue (Fire Minotaur uses Noxious Golem into Life Minotaur + Balance Cyclops uses Spiked Buckler followed by Colossal Scorpion to kill Storm Elf is another idea). | 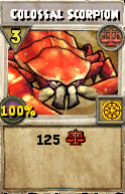 |
Beastmoon Puzzle 2
Mid Game Myth Draconian 2v2
The scenario is as follows, with you playing as a tier 5 Myth Draconian on the Blue team:
|
|
Here’s your starting hand:
 |
 |
 |
 |
 |
Your teammate Storm Elf has chosen to use Nerve Shock on the opposing Death Pig. You could potentially instruct them to use a different spell:
|
 |
 |
Additional information:
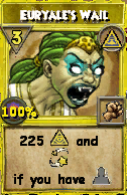
- Myth Draconian (you) has 3 copies of Euryale’s Wail remaining in its deck (including the copy in-hand)
- Balance Cyclops can (and is likely to) carry the maximum of 5 copies of Spiked Buckler; 1 copy has been used, meaning 4 remain
How do you continue in this scenario?
My Solution
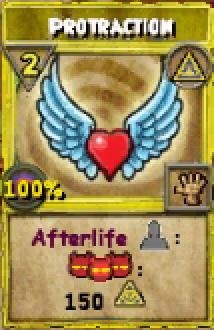
| Myth Draconian (you) |
Target: Mythic Construct |
| Storm Elf (teammate) |
Target: Death Pig |
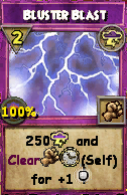
My choice here might be unexpected. Protraction is a fairly situational and very uncommon spell. Many of you might be wondering why I didn’t choose the obvious Euryale’s Wail + Bluster Blast. The simple reason is that this sets up an endgame that is equal at best against the Balance Cyclops since it can (and is likely to) defeat the Storm Elf immediately. This endgame is much more likely to be losing due to deck confinement (if, for example, you discarded any copies at all of Butcher Bat or Sly Mountebank, you’re probably easily losing in that endgame). That endgame comes about as follows (note that I’m considering the worst possible minion rng):
| Action 1 | Action 2 | Action 3 | Action 4 | Results (how next round begins) | |
| Turn 1 | Target: Death Pig |
|
X (defeated) |
Target: Myth Draconian (stunned; not cast) |
|
| Turn 2 | Target: Death Pig |
Target: Death Pig |
X (stunned) |
X
(defeated) |
|
| Turn 3 | Target: Death Pig |
Target: Balance Cyclops |
X
(defeated) |
X
(defeated) |
|
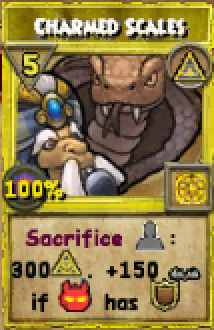
So, then, what happens when you play my solution? The idea is to threaten Protraction into Charmed Scales for a huge blast of AoE damage that gains power against shields. The idea, of course, is to sacrifice the minion to deal huge AoE damage, which then triggers the minion’s afterlife to deal even more AoE damage and use up any traps created by Charmed Scales. If Balance Cyclops immediately defeats Storm Elf with Curse-Eater as discussed before, Charmed Scales on the next turn unstoppably defeats Death Pig and leaves Balance Cyclops with at most 125 health. My solution, however, loses to one specific play from the Balance Cyclops, but it’s incredibly unintuitive and loses instantly to the obvious Euryale’s Wail + Bluster Blast play detailed above (and therefore unlikely to be played by the Balance Cyclops). I think the odds of losing in the endgame detailed above are much higher than the odds of my solution to this puzzle being countered, hence my choice.
First, I’ll show the two most likely and most effective continuations after Protraction + Nerve Shock (again assuming worst minion rng). Here’s where Balance Cyclops uses Curse-Eater:
| Action 1 | Action 2 | Action 3 | Action 4 | Results (how next round begins) | |
| Turn 1 | Target: Mythic Construct |
|
X (defeated) |
Target: Myth Draconian |
|
| Turn 2 | Target: Balance Cyclops |
Target: Mythic Construct |
X (defeated) |
X
(defeated) |
|
| Turn 3 | Target: Balance Cyclops |
Target: Balance Cyclops |
X
(defeated) |
X
(defeated) |
|
And here’s the continuation where Balance Cyclops uses Colossal Scorpion to prevent Charmed Scales:
| Action 1 | Action 2 | Action 3 | Action 4 | Results (how next round begins) | |
| Turn 1 | Target: Mythic Construct |
Target: AoE |
Target: Death Pig |
Target: Storm Elf (stunned; not cast) |
|
| Turn 2 | Target: Storm Elf |
Target: Death Pig |
X
(defeated) |
Target: Balance Cyclops |
|
| Turn 3 | Target: Balance Cyclops |
Target: Storm Elf (stunned; not cast) |
Target: Balance Cyclops |
X
(defeated) |
|
Now, I did mention one move that beats Protraction + Nerve Shock, and that’s if Red chooses to target you, the Myth Draconian, 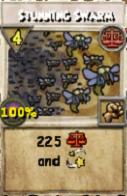 instead of the out of position Storm Elf. In general, a Myth Draconian will not be targeted over a Storm Elf, especially when it’s possible to defeat the Storm Elf before it has an action. In this case, though, it would work because you as the Myth Draconian are not immediately making efficient use of the pips you’ve held on to.
It’s worth noting that generally targeting you doesn’t work. The Balance Cyclops specifically needs to stun you with Stunning Swarm. If without a stun, Red has no way to prevent Myth Draconian from pulling the trigger on Charmed Scales the following round. It should be clear that this play from Red would be an incredibly uncomfortable prediction.
See below:
| Action 1 | Action 2 | Action 3 | Action 4 | Results (how next round begins) | |
| Turn 1 | Target: Mythic Construct |
Target: Myth Draconian |
Target: Death Pig |
Target: Myth Draconian (stunned; not cast) |
|
| Turn 2 | Target: Death Pig |
Target: Mythic Construct (stunned; not cast) |
Target: Myth Draconian |
Target: Death Pig |
|
What do you think? Would you take the essentially guaranteed victory against the most logical opposing moves at the cost of being potentially countered by an objectively losing move from your opponent?
Beastmoon Puzzle 3
Late Game Balance Wolf 1v1
The scenario is as follows, with you playing as a tier 5 Balance Wolf on the Blue team:
|
|
Unfortunately, these are your last five cards:
 |
 |
 |
|
 |
How do you continue in this scenario?
My Solution
| Balance Wolf (you) |
Target: Fire Colossus |
Simply using Stalking Smilodon twice in this situation would easily win. Unfortunately, you only have 1 copy remaining of Stalking Smilodon, so you need to look for other answers.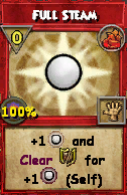
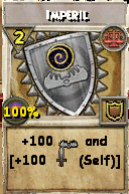
As it turns out, Imperil is also guaranteed win unless you opponent revives their teammate with a Beastmoon Blessing on the first round (though without your opponent knowing you only have one Stalking Smilodon, they’d likely save a Beastmoon Blessing for future battles). Imperil initially looks like a counter-intuitive move: Fire Colossus can benefit from removing traps via Full Steam with you being unable to use it because you’re out of position. This means that using Imperil means spending 2 pips for 100 damage when you can get the same damage for 1 pip, while also giving your opponent 2 free pips to fuel their attack; that seems like it would immediately lose you the game. So why is it the only move that wins in this situation?
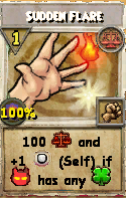
 To understand this, you need to understand each player’s kill solution. The Fire Colossus needs exactly 3 actions to defeat the Balance Wolf here (namely, Fire and Smoke + Conflagration + Flame Burst deals 525 damage immediately after the third action, or Conflagration + Flame Burst + Flame Burst deals 550); noticing that the Fire Colossus can deal enough damage in 3 actions to get the win despite only having 3 pips is key to understanding my choice here. Similarly, against proper defensive play (i.e., trap removal), Balance Wolf needs exactly 3 actions to defeat the Fire Colossus given the remaining cards (most efficiently, Sudden Flare/Imperil + Sudden Flare + Stalking Smilodon deals at least 400 damage). Since Fire Colossus is in position, it will always have 3 actions before Balance Wolf has 3 actions.
Despite these facts, it’s a guaranteed win for Blue. This is because using Imperil immediately threatens to defeat the Fire Colossus in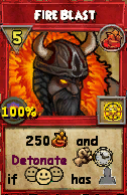 2 actions, faster than the Fire Colossus can respond. The Fire Colossus is forced to use an action to remove Imperil’s trap, or else Balance Wolf wins immediately via Stalking Smilodon. Because the Fire Colossus has to use an action defensively, it still needs 2 more offensive actions to claim victory while the Balance Wolf now only needs 1. Critical is that the extra 2 pips gained from Fire Colossus‘s Full Steam can only be translated to 50 more damage via Fire Blast. While some forms easily translate extra pips into more damage (Storm Krok being the quintessential example of this), Fire Colossus does not. Therefore, the extra pips do not speed up Fire Colossus‘s kill solution in this situation, making Imperil safe.
This use of Imperil is a classic example of what is know in chess as a zwischenzug (a German word meaning “intermediate move”). The idea is that instead of immediately playing the expected continuing move in a position, a player instead first plays an “in between” move that creates an immediate threat that their opponent must respond to. Only after the threat is neutralized by their opponent does the player continue with their plan, typically in a stronger position than before the zwischenzug.
In this case, though simply attacking is the expected idea for the Balance Wolf against a trap-removing form, casting Imperil immediately threatened to defeat the Fire Colossus, forcing the threat to be addressed and giving a tempo back to the Balance Wolf. This tempo is all that’s needed to get the win.
See what happens without the zwischenzug below:
| Action 1 | Action 2 | Results (how next round begins) | |
| Turn 1 | 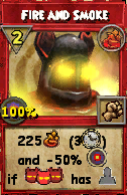
Target: Balance Wolf |
Target: Fire Colossus |
|
| Turn 2 | 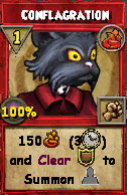
Target: Balance Wolf |
Target: Fire Colossus |
|
| Turn 3 |
Target: Balance Wolf
|
X
(defeated) |
|
Now see the winning combination for Blue below:
| Action 1 | Action 2 | Results (how next round begins) | |
| Turn 1 |
Target: Balance Wolf |
Target: Fire Colossus |
|
| Turn 2 |
Target: Fire Colossus |
Target: Fire Colossus |
|
| Turn 3 |
Target: AoE
|
Target: Fire Colossus |
|
Beastmoon Puzzle 4
Late Game Death Pig 1v1
The scenario is as follows, with you playing as a tier 5 Death Pig on the Blue team:
|
|
This is your hand:
 |
 |
|
 |
 |
How do you continue in this scenario?
My Solution
| Death Pig (you) |
Target: Myth Rat |
This scenario isn’t nearly as grim as it looks if you play the correct move, despite you playing a 1v1 against bad matchup out of position. This is winning endgame if your opponent plays logically and doesn’t have a Beastmoon Blessing of their own. However, it is a fairly complex endgame and requires extremely precise play. Let’s break this down:
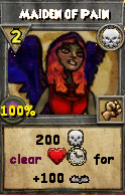
First, it’s essential to notice that you can’t brute force this offensively. At your current health levels, it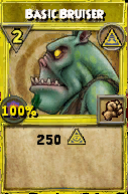 will take the Myth Rat exactly two actions to defeat you, while it will take you two actions to defeat it. Unlike Puzzle 3, there’s no offensive tricks you can pull here; technically, you only need 1 action to defeat the Myth Rat, but because the DoT on the Myth Rat is slightly too slow, you need to wait 2 turns (therefore allowing Myth Rat 2 actions). If you try to out-damage the Myth Rat, you’re going to lose because you won’t get enough actions in time. The immediate Maiden of Pain, therefore, is off the table; it loses to any two-attack combination, or even pass + Basic Bruiser.
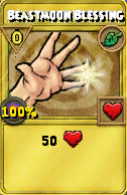
The next thing that needs to be considered is what happens when you heal your teammate immediately via Beastmoon Blessing. If you go this route, you are defeated before you get a second action while your teammate is defeated while only getting one action (and only one pip to spend on said action). See below (note that in this puzzle, Disarming Spirit can be replaced with any of the Myth Rat’s three 1 pip, 125 damage attacks):
| Action 1 | Action 2 | Action 3 | Action 4 | Results (how next round begins) | |
| Turn 1 | 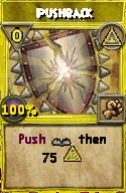
Target: Death Pig |
X (defeated) |
X (defeated) |
Target: Myth Rat |
|
| Turn 2 | 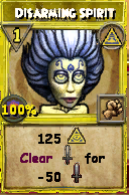
Target: Myth Rat |
Target: Death Pig |
X (defeated) |
X (defeated) |
|
| Turn 3 |
Target: Myth Rat
|
X (defeated) |
X (defeated) |
X (defeated) |
|
Though we can see from the above that Beastmoon Blessing loses, understanding the above continuation is essential to understanding the winning move in this puzzle. Beastmoon Blessing only loses if used immediately because your opponent is able to both defeat you before you have an action and defeat your partner Myth Rat before they have 2 actions. If Myth Rat fails to prevent you the Death Pig from having an action after the revival, you win via Maiden of Pain (since the revival turn gave the active DoT on Myth Rat time to deal damage); if Myth Rat fails to prevent Myth Rat from having two actions after the revival, you win via several combinations of two attacks (for example, Disarming Spirit x2).
Notice that with the turn order given in this puzzle, the action sequence after Beastmoon Blessing is used is as follows:
- TURN 1: Myth Rat; Myth Rat; Death Pig
- TURN 2: Myth Rat; Myth Rat; Death Pig
The key is that if Myth Rat defeats Death Pig immediately (which is forced), Myth Rat gets a second free action to win before Myth Rat can react. If the turn order were swapped, though, this would not be the case. This is what you need to notice in this puzzle. See the action sequence if the turn order is reversed:
- TURN 1: Myth Rat; Myth Rat; Death Pig
- TURN 2: Myth Rat; Myth Rat; Death Pig
Here, when Myth Rat defeats Death Pig immediately as is forced, Myth Rat then gets two consecutive actions. This extra tempo is enough for the win. You therefore need to manipulate the turn order via buying yourself an extra round to survive.
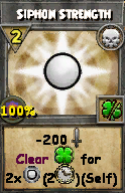
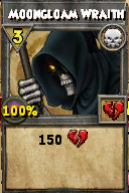
Since pip cost makes no difference here (you can Blessing + Maiden of Pain starting at even 1 pip), the two options you have to accomplish this are Siphon Strength and Moongloam Wraith, both of which can be used as defensive tools here since we’ve established that no attack (including Moongloam Wraith) will accelerate your offense enough to make a difference. The problem with Moongloam Wraith is that it doesn’t heal you enough to push you out of range of the Myth Rat. With their optimal damage output combination of Pushback + Basic Bruiser dealing 375 damage to you, you’d need 400 effective health to guarantee survival until you can revive your teammate; Moongloom Wraith gives you only 375 effective health. Pushback would knock you to 100 health, with Moongloam Wraith healing you to 275, which is of course still in range of a Basic Bruiser (which deals 275 to you since it’s a Myth attack).
In this situation, the difference between Siphon Strength and Moongloam Wraith as defensive tool is exactly 50 health; if Myth Rat uses Basic Bruiser with the weakness on, Siphon Strength adds 200 to your effective health where Moongloam Wraith adds only 150. This means that either Myth Rat removes the weakness with a weak attack (which allows you to survive to use Beastmoon Blessing), or your effective health using Siphon Strength is 425, just enough to survive. Since survival until Myth Rat can be revived with the winning action sequence due up is all that was needed, Siphon Strength is winning.
See the winning continuation below (note that the specific attacks used by Myth Rat are largely irrelevant):
| Action 1 | Action 2 | Action 3 | Action 4 | Results (how next round begins) | |
| Turn 1 |
Target: Death Pig |
X (defeated) |
X (defeated) |
Target: Myth Rat |
|
| Turn 2 |
X (defeated)
|
Target: Death Pig |
Target: Myth Rat |
X (defeated) |
|
| Turn 3 |
Target: Death Pig
|
Target: Myth Rat |
X (defeated) |
X (defeated) |
|
| Turn 4 | Target: Myth Rat |
X (defeated) |
X (defeated) |
X (defeated) |
|
Three unlikely moves from Myth Rat can slightly complicate this plan, which I’ll list here:
Turn 1 Simple Minion: Using Siphon Strength, winning this endgame is based on minion luck from you opponent. This isn’t a great spot to be in for you, but isn’t great for your opponent either. However, this move would be objectively imprecise from your opponent because it loses to the simple Moongloam Wraith + Red Death (which would be activated by the existing DoT); by wasting an action without dealing damage, your opponent allows Moongloam Wraith to be a sufficient defensive tool to survive an extra round and a sufficient offensive tool to continue an optimal attack. Because of this, Myth Rat can’t logically play Simple Minion here unless they predict that you have and are planning to use Beastmoon Blessing rather than a continuation with trained Death Pig spells (which is to say they should never be using Simple Minion).
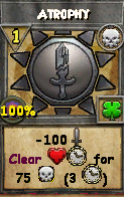
Turn 1 Beastmoon Boon: Using Siphon Strength, you can’t theoretically win here. The best you can do is exploit imprecise play from you opponent via Siphon Strength + Atrophy + Maiden of Pain, which wins against any continuation except Beastmoon Boon + Basic Bruiser + Basic Bruiser. However, this move would be objectively imprecise from your opponent because for the same reason as the above: it loses to the simple Moongloam Wraith + Red Death. Because of this, Myth Rat can’t logically play Beastmoon Boon here either.
Turn 1 Beastmoon Blessing on Storm Wolf: There’s no getting around this move for Blue regardless of what you play. If Myth Rat has and uses a Beastmoon Blessing to revive their partner, you lose this endgame. Because it requires a battle card from your opponent and you lose here no matter what you play, it’s best not to consider this.
Beastmoon Puzzle 5
Early Game Ice Elf 3v3
The scenario is as follows, with you playing as a tier 5 Ice Elf on the Blue team:
|
|
Here is your hand:
 |
 |
 |
 |
|
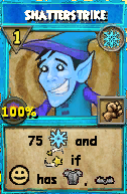
Note that you’d be able to draw for Shatterstrike next turn if needed:
Your teammates are asking you what the best plan is. Here are the options they might consider given their pips:
Storm Krok:
 |
 |
 |
 |
Balance Wolf:
|
|
How do you and your team continue in this scenario?
My Solution
| Ice Elf (you) |
Target: Death Pig |
| Storm Krok |
Target: Death Pig |
| Balance Wolf |
Target: Storm Elf |
The first consideration in this situation is obvious: can you as the Ice Elf safely and effectively use Debilitate? It can be winning, but it’s a bit risky for my taste.
Debilitate is clearly winning if the opposing Myth Draconian chooses to attack (since your teammates can defeat the Death Pig and Storm Elf before they get an action). However, what happens if Myth Draconian doesn’t attack? As it turns out, Debilitate isn’t so great for you if the opponent plays optimally. At best it’s essentially a 50/50 guessing game: a good Myth Draconian is going to consider Debilitate and is very likely to remove one of the traps before it can be used on turn 1. If one of the traps does in fact get removed, your team essentially needs to guess the target of the trap removal and attack both of the other targets to ensure the other two traps are used (since Myth Draconian can remove a second trap the following turn). Your odds are better than 1 in 3 here, though, because you can make some assumptions regarding the likelihood of certain trap removal targets: Myth Draconian might be less likely to remove a the trap from itself because it is the only one of your 3 opponents who cannot be defeated turn 1 with the Debilitate trap; similarly, Myth Draconian might be more likely to remove the trap from Death Pig because the trap removal retains utility due to the existing trap. Without going too far down the rabbit hole of continuations here, I’d say the continuation following Debilitate is about 50/50 against optimal play, and I think we can do better than that.
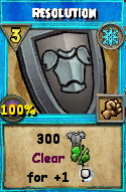
Resolution and Ominous Ward are interesting, but deal with similar 50/50 targeting decisions and are generally a bit slower than you want to play against these forms. Resolution into the Storm Krok + Blistering Bolt followed by Energetic Golem is an interesting idea, but even this gets complicated (Death Pig can use Siphon Strength, Moongloam Wraith, etc.). One of the shielding options could certainly win, but I’d rather be sure attacking fails before reverting to defense. 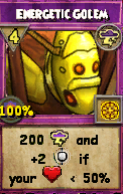
The next option to consider, then, is taking down one of your opponents. Since your team goes first, you can take down either the Death Pig or the Storm Elf before they get an action. I choose to take down the Death Pig for two reasons: first, you guarantee the existing trap will not be removed and give a tempo to the Myth Draconian; second, you only need to use two of your team’s actions to take down the Death Pig while the Storm Elf would require all three of your team members actions to defeat it. Any slow move from Myth Draconian here loses; even a single turn of a 3v2 should be enough for Blue to push for the win. Note that this means if Myth Draconian plays a move that would set up a 50/50 against Debilitate, my solution here is winning. The only option left to explore is if the Myth Draconian attacks (which is immediately an uncomfortable move to make considering the danger posed by Debilitate).
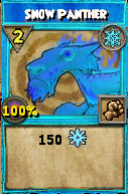
The only two options for Red are for the Myth Draconian and Storm Elf to either double target (and defeat) the Ice Elf, or to double target (and defeat) the Storm Krok. Taking down the Storm Krok isn’t great: it requires the Myth Draconian to spend 3 pips on Euryale’s Wail (else Ice Elf can defend it the next round and put you in a losing 3v1) while the Storm Elf is in range of both Snow Panther + Snow Panther (beating Nerve Shock into the Balance Wolf) and Snow Panther + Sudden Flare (beating Bluster Blast into the Ice Elf as it allows the Ice Elf an action to defend itself).
The last option, then, is to take down you, the Ice Elf. In this case, Myth Draconian needs to use a 2 pip attack to save resources to push for advantage while Storm Elf uses Bluster Blast; if not, you can’t kill Storm Krok fast enough. Note that this is another incredibly uncomfortable and unlikely move; Euryale’s Wail must be used in case Blue triple attacks and defeats Storm Elf because Maiden of Pain would only deal 200 damage to the Ice Elf where 250 is needed if Myth Draconian used a 2 pip (150 damage) attack. It’s worth noting that this is the second incredibly uncomfortable move Red must make in this continuation that allows them to not immediately lose. This is to say that in practice, Red is very unlikely to play optimally here.
As you’ll see below, even optimal play from Red causes what is at worst an even 1v1 endgame between Myth Draconian and Balance Wolf. It probably theoretically favors Red slightly, but I’d say it’s more comfortable for Balance Wolf. The endgame here for Myth Draconian forces reliance on minion luck and stuns from Euryale’s Wail, while Balance Wolf‘s kill solution is far simpler (Lousy Thief + Lousy Thief + Stalking Smilodon + Stalking Smilodon). See the continuation below (noting that Red‘s turn 1 is optimal but incredibly uncomfortable/unlikely for them to play):
Abbreviations:
- T1, T2, etc.: Turn 1, Turn 2, etc.
- A1, A2, etc.: Action 1, Action 2, etc.
- TG: Target
- IE, SK, BW: Ice Elf, Storm Krok, Balance Wolf
- MD, DP, SE: Myth Draconian, Death Pig, Storm Elf
| A1 | A2 | A3 | A4 | A5 | A6 | Result | |
| T1 | T:DP |
T:IE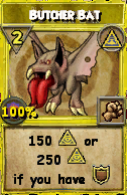 |
T:DP |
X (defeated) |
T:SE |
T:IE |
|
| T2 | T:MD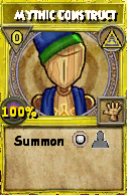 |
X (defeated) |
X (defeated) |
T:SE |
T:SK |
T:SE |
|
|
X (defeated) |
T:SK |
X (defeated) |
X (defeated) |
T:SE |
X (defeated) |
|
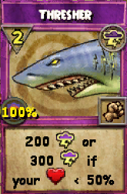
There’s no mistaking that this endgame is losing for Balance Wolf; all Myth Draconian has to do is use Euryale’s Wail twice and any 2-pip attack once. With a minion already active, the pips needed for this will be gained quickly, and the stuns will take away valuable actions needed to reach your own kill solution. However, this is the only winning continuation for Red and it requires multiple uncomfortable predictions (namely, 1. Debilitate isn’t coming, and 2. Death Pig is the immediate target rather than Storm Elf). Therefore, I tend to prefer Snow Panther + Thresher + Lousy Thief on turn 1. Notably, this endgame is at least as good for Blue as any of the 6 endgames that come from guessing wrong in the debilitate 50/50 (and it’s slightly better in many of those endgames). I’m plenty comfortable having the table above as the only (slightly) losing scenario rather than risking an even worse endgame with Debilitate or a defensive play. Do you agree?
Click on the above yellow tabs to display more info!
So, those are my puzzles. As an end note, I want to mention that while I may relate these puzzles to chess, their solutions are often more akin to poker strategy because of the predictive requirements. In poker, modern theory dictates that you should choose when and how to bet according to game theory in order to be as un-exploitable as possible. Essentially, the idea is that players should mix up betting strategies to be less predictable to their opponents, and that the optimal rates at which you should make certain bets is dictated by a field of mathematics known as game theory. Game theory also makes a lot of sense when applied to Beastmoon: if a situation requires predicting your opponent’s move to secure a win, there is an optimal rate at which you should be making certain moves each time you’re put in the same (or a sufficiently similar) position.
While there are many reasons I think it would not be worthwhile to explore using game theory in Beastmoon (the most obvious being that very few if any players are playing optimally as a team in Beastmoon, meaning “exploitative play” is more effective than “game theory optimal” play), I think considering its applications in this context is enlightening. Of course, potential applications of game theory don’t erase the parallels to chess. Instead, it adds to the depth of these puzzles.
I hope you found these interesting and learned a bit more about Beastmoon strategy. I hope to make some more of these puzzles eventually.
Let me know what you think!
Not familiar with the Beastmoon Hunt Event?
Check out our beginner guides!
Getting Started in 15 minutes!
Beastmoon Hunt Strategy
How to Get Upgrades and Rewards
Getting Started in 15 minutes!
Beastmoon Hunt Strategy
How to Get Upgrades and Rewards