January 14, 2022
Pirate101’s Arc 2 Concept
The Queen’s Gambit
by IcarusRising#0280
The Queen’s Gambit is a story created by IcarusRising#0280 that details a full storyline concept of Pirate101’s Arc 2. This was all set in motion when the Final Bastion team hosted a Community Spotlight concept. This contest required users to come up with the story for the next Wizard101 or Pirate101 Arc. IcarusRising’s story is about Pirate101’s second arc and it is fully detailed below, but be warned it is quite long. However, you are surely in for a treat as the story is so in depth and entertaining that you’ll wish that you are actually playing through the game!
Without further ado, let’s introduce IcarusRising!
Hey everyone, my name is Icarus, but if you’ve seen me in-game then you’ll know me as either Joseph Rubythorn (Ice wizard) or Fearless Joseph Galway (Buccaneer). I’m as active as I can be on both Wizard101 and Pirate101 with my main goal on either game being to collect the strongest available gear at any given time. I’m sort of big on enjoying a good story so I’ve spent a few weeks out of my summer researching real life history and pirate’s pre-existing story in order to craft what I feel would do the game a bit of justice in terms of wrapping up the El Dorado story arc while setting up an interesting future. In any case, I hope you all enjoy and that it doesn’t sound too much like fanfiction.
IcarusRising#0280
The Queen’s Gambit Prologue
We open this new chapter with the beginning of a continuation of the events that occurred over the course of the previous arc. While many players did not particularly enjoy what Valencia 2 brought to the story, I feel that it might be best to have no shame in what transpired there from a narrative perspective. Therefore, the main goal should be to put the story back on track with the original narrative, reaching El Dorado by level 100. Furthermore, this extension of the previous story should serve to wrap up and include many lost plots from the previous parts of the game. For example, what became of Kane’s original hand and eye that were mentioned in a side quest in Aquila? It should also include the involvement of important characters with mentions that still have yet to appear in the story itself.
Polaris
With that said, Polaris begins after a slight time jump (at least two months to half a year or more in in-game time) as I feel that this would not only present a more relatable setting for returning players, but it would also allow the spiral as a whole to change and develop where necessary. I am sure that older voice actors may not be able to return, so, the period that I like to call “the upheaval” wouldn’t need much on-screen exposition. We can simply hop right back to our rigging and wheels in order to accept a brand new quest from our favorite man-with-a-plan, Captain Avery.
You see, at this point in time, Avery has found himself in quite the predicament. Polaris, one of the four former superpowers of the spiral, has found itself caught in the middle of yet another dreadful civil war, and while its allies, both new and old, have all done their best to aid its current–and self-appointed–emperor, Napoleguin, they can ultimately do little to help due to the aftermath of the war with the armada. However, Avery seems to find himself with his hands relatively tied, not for lack of resources, but more for a predicament as to how he can actually use them. What he has heard is that Marleybone, in their anger toward Napoleguin’s past actions, has refused to send aid and is going so far as to threaten to add tariffs to trade exports flowing out of their world to the worlds that do choose to continue to assist this “menace.” Yet, Avery, as the de facto leader of the pirate republic of Skull Island who is currently allied with both worlds, must help in order to avoid offending such a personality as Napoleguin.
So what can Avery do?
So, with his bottom line in mind, Avery has come up with as crafty a plan as ever. He will send you, the hero of Marleybone and one of the captains of Her Majesty’s Royal Navy, along with Count Medvedov, the Polarian Ambassador currently stationed in Zeke’s party barge, as a guide in order to represent Skull Island in Napoleguin’s personal war to avoid any offense on either side. With our new quest underway, we sail back to Calabria skyway seeking Steed, now the leader of the returning mercantile houses, in Valencia City to ask him to arrange travel papers and point us in the direction of a white windstone in order to undertake our voyage to the skyways of Polaris through the stormgate in Valencia. Steed mentions that the papers won’t be an issue, but he warns us that an attempt to take hold of a white windstone will only further offend the Valencian crown. After the loss of most of their military might with the fall of Kane, the royalty of Valencia still clings to what little power they have left, keeping the stone in their treasury. In order to avoid an outright heist and attract unnecessary attention to himself, Steed sends us to Da Finchi, Gazpaccio’s former apprentice turned inner circle resistance member, who has also resurfaced in Valencia City and decides to join our crew in order to help us more discreetly steal the windstone. As the spiral’s new leading mind in the field of clockworks, he will become an important resource later in Gazpaccio’s absence as the armada’s shadow still looms.
After raiding the Valencian royal treasury and obtaining our quarry, we sail back to Valencia City to procure our travel papers from Steed, at which point he wishes us luck and sends us on our way. Upon entering a surprisingly quiet yet guarded skyway when compared to that of wartime Marleybone, Medvedov points us in the direction of Napoleguin’s throne room so that we might notify him of our arrival. However, we soon discover that instead of choosing to wage war from afar, Napoleguin, the general at heart that he is, has decided to get as close to the battlefield as possible. He is currently residing in a camp near the new border that separates his loyal subjects from those that have revolted. After leaving Medvedov behind in the city, reaching Napoleguin, and notifying him of our presence in Polaris, he reprimands us for our absence, claiming that Catbeard must have become a bad influence on us in all the time that we’ve spent with him. This less than heartwarming reunion is soon interrupted by an ambush where we finally meet the leader of the opposition, Ivan the Terrible (while still a bear, not to be confused with Ivan the Great who is an entirely separate character from Wizard101). Ivan soon reveals to us just how cold-hearted and cruel he can be through a chilling display of power. After being temporarily defeated by us while defending Napoleguin, he laughs deeply and claims that while we may prove to be a worthy opponent, he was merely holding back. He then uses the striking golden gauntlet on his right hand to absorb the life of his nearby soldiers who had rushed to his aid in order to restore himself back to health, and he reassures us that while we may have won this battle, we will not win this war.

Sufficiently terrified, Napoleguin, his soldiers, ourselves and our crew decide to make a strategic retreat back to the relative safety of the city. Once there, Napoleguin tasks us with discovering the secret of Ivan’s righteous right hand and how it gives him such unmatched power. This takes us on a fairly extensive journey through and around Polaris where we begin to learn more about how this war started. Apparently, it began as a war of expansion on Napoleguin’s side as he began to clench his metaphorical iron fist around the world, believing that too much had changed in Polaris upon his return. While some of the natural species of Polaris believe it is his manifest destiny to rule all of Polaris, others believe that he will only bring ruin and shame to the world as he once did before. After becoming entangled in this political web, we obtain other class-specific companions, such as bears, penguins and walruses, who decide to follow us during our attempts at setting the war straight.

Upon running a recon mission of Ivan’s inland encampment, Catbeard pulls us to the side claiming that he recognizes where the bear’s gauntlet is from. He tells us that while he didn’t manage to put the pieces together when fleeing for his life earlier, he now has the clarity of mind to understand that the gauntlet is strikingly similar to one of Kane’s original hands when he was the golden giant that was dismantled after boarding Marco Pollo’s ship. How such a powerful artifact wound up in Ivan’s hands is beyond him as Marco Pollo had originally tasked Gazpaccio with the disposal of Kane’s original pieces. He does, however, inform us that the power of the hand can be beaten by not allowing the wielder to close their fist. With this knowledge, we form a plan with Napoleguin to fake an assault on Ivan’s camp while our very own Gracie Conrad, along with Da Finchi, devise a plan to temporarily disable the golden hand. Through our best efforts, Ivan is promptly defeated, but before we can remove the gauntlet from Ivan’s hand, Queen and her own personal armada guards suddenly make themselves known. She taunts us, asking us why it looks as though we’ve seen a ghost and explains that, while she was the one that had found and given the hand to Ivan in the first place, there is still so much that we have yet to understand about her plans. Using our shock against us, she snatches the hand away from a defeated Ivan and disappears in a cloud of smoke, leaving the remainder of her loyal clockworks to thwart us from giving chase.
Grizzleheim
After our recovery from our encounter with Queen, we decide that it is our duty to track her down and discover what exactly it is that she’s up to. Our dilemma begins when we have little to no idea where she might be headed next, so, we begin this next chapter by delivering Ivan to Napoleguin. Upon this delivery, Napoleguin claims that both he and his country owe us their freedom, humbling himself enough not only to recognize this but to also ask us what prize he might award us with. To everyone’s surprise, we offer to take Ivan onto our crew to avoid a public execution that would only enrage his remaining supporters, and we advise Napoleguin to establish a council of representatives in Polaris so that the people will feel that their voices are being heard.
After a period of questioning Ivan on the specifics of Queen’s current plan, he tells us that the only thing that she had instructed him to do was to use the hand in order to recharge it after its years of dormancy. However, he confirms that he is more than happy to accompany us in tracking her down as he is keen on exacting his revenge for her betrayal. Upon returning the Count to the party barge and informing Avery of what had happened in Polaris, he tells us that the best place to start looking for someone is where you last saw them. So, it is at this point in the story that we return to the machine in order to retrace our steps. While it appears to have been thoroughly ransacked in the time that we have spent away, through a bit of searching and help from Da Finchi, we discover what appears to be Kane’s personal planning room. Despite the fact that it had been relatively hidden and thoroughly boobytrapped, the room appears to have been left a mess, and we determine that the armada’s pieces of the map are missing. This can only mean that Queen is currently on the run with them as Catbeard goes so far as to explain to us that the map itself was enchanted to only allow its creator the capability to destroy it.

This ropes us back into our journey for the pieces of the map and the next holder of a map piece on our list is none other than the final living member of Marco Pollo’s crew, Erika the Red. We use the white windstone to enter the skyways of Grizzleheim after of course receiving written permission from Napoleguin, who claims that it’s the least he can do in return for our help in securing his rule. Once there though we discover that Erika has just recently passed away, and upon Catbeard’s request, we attend her nordic funeral ceremony. Thinking all is lost and that we will simply have to wait for Queen to make her next move, we begin to leave, but upon reaching the docks, we are stopped by a mysterious character who claims to know where Erika’s piece was hidden.
On to Grizzleheim!
Thus, our journey through Grizzleheim with the aforementioned figure commences, however, this is only the beginning. The mystery bird claims that his name is Utgard and informs us that in order to reach Erika, we needed to seek an audience with the Allfather, Odin. He tells us that the only way to do this is by besting the invincible immortal, Baldur, in a trial by combat. He reassures us that this can be done by retrieving a dagger made purely of mistletoe. After having defeated Baldur with the mistletoe dagger, Utgard reveals himself to be the immortal of mischief, Loki. He then reveals to us that he was successful in using us to further his plans for Grizzleheim’s reckoning as Baldur was actually Odin’s son. After this revelation, the illusion of the immortal of mischief promptly disappears, telling us to say hello to the old bird for him just before Odin himself descends to inspect the scene of his fallen son. He mourns the fact that he was too late to arrive after he was warned of Baldur’s impending doom, but as the immortal of wisdom in Grizzleheim, he demands that since we played our part in helping Loki to start this war we must now do our part to prevent it.
Odin informs us of those that pose the greatest threat to Grizzleheim (a few of which are Loki’s children) such as Fenrir, Jormungandr, Nidhogg, the frost and fire giants, and the dark elves and demands our service in order to defeat them before they can strike too many blows. He also sends one of his valkyries with us to join our crew in order to ensure we do not neglect his request, but we end up running in circles as Loki and those who follow him continue to outsmart us at every turn. One in particular–known as Hela, Loki’s only daughter–does a particularly good job at this and successfully gets us involved with characters from classic myths and historical events who we potentially recruit like Beowulf in order to distract us from our main goal.

The story from the time we meet Hela becomes more of a chase which leads us to first defeat Fenrir on foot and Jormungandr with our ship. As we continue to chase Hela and deal with the other threats to the world, we learn of Hela’s true intentions. Her father, Loki, has spent much of his time trapped; chained to a rock by the Asgardians in a hidden cave while an acidic poison is allowed to drip onto his body, but because he is part immortal, the acid can scar him but not kill him. This encourages him to send his illusions out into Grizzleheim in order to manipulate people to do his bidding as this remote form of magic cannot physically alter things in the real world, but since he is also incapable of telling anyone where he is, Hela makes it her priority to find and free him. However, she does this not out of pity but because she wants to prove that she is better than her brothers in order to rule Grizzleheim at his side. This inevitably leads us to finally confront her in Loki’s cave, but we are too late. She frees her father who, rather than anoint her as his heir, calls her a failure for not only leading us to him but also for her disobedience in not delivering the army of the dead that she had been tasked with obtaining for him. He flees in order to regain his strength, leaving his daughter behind to be at our mercy. This causes the young crow to turn on us in a fit of powerful rage. After having defeated the immortal of death, she pleads with us to spare her so that she might take revenge on her father. We accept but take caution and do not fully let her into our crew, believing that she must prove herself before we can trust her.
From that point in the story, she tells us where Loki is headed and what his plans are for Grizzleheim. He wishes to take the poison that was given to him and apply it to the immortal Mirmir at the top of Yggdrasil, the world tree, at the center of Grizzleheim so that all the nine realms in this world would feel the pain he felt while he was in the cave. Being that we have no other choice but to trust her, we allow Hela to lead us to the tree. This becomes a dungeon where we must climb the tree, facing Loki’s pet dragon, Nidhogg, at the bottom along with more of his followers on the path leading to the top. Once there, we confront Loki himself, and Hela proves her intentions by helping us defeat him. It is at this point that she tells us that, while she may never be the ruler that she wanted to be, she is done trying to prove herself to her father and accepts a spot in our crew (mostly to avoid any of Odin’s potential punishments).

After finally having saved Grizzleheim from Ragnarok, Odin appears and offers to take us to Erika whose warrior soul now resides in Valhalla. Upon finally speaking with Erika, she informs us that she had hidden the map piece in her shield that now hangs on one of the walls in her old home, and she warns us that we will likely run into her son, Leif Erikason, who–despite being a fierce warrior–can be calmed by showing him our photo of his mother’s old crew and explaining that our mother, Jenny, is the woman on the right of the picture. So, we confront Leif in Erika’s lodge and inform him of who we are and why we are there. After hearing this, Leif deduces that we must be after the remnants of the Armada as well as the map and claims that, while he inherited his mother’s knack for tracking, she had already been keeping tabs on the Armada’s movements. He tells us that, before her passing, she had pinpointed that Gazpaccio had hid the final piece of the golden giant that had attacked them in the world as shifting as the sands that surround it, Krokotopia. He offers us his service so that the children of two legends might go forward and make legends of their own.
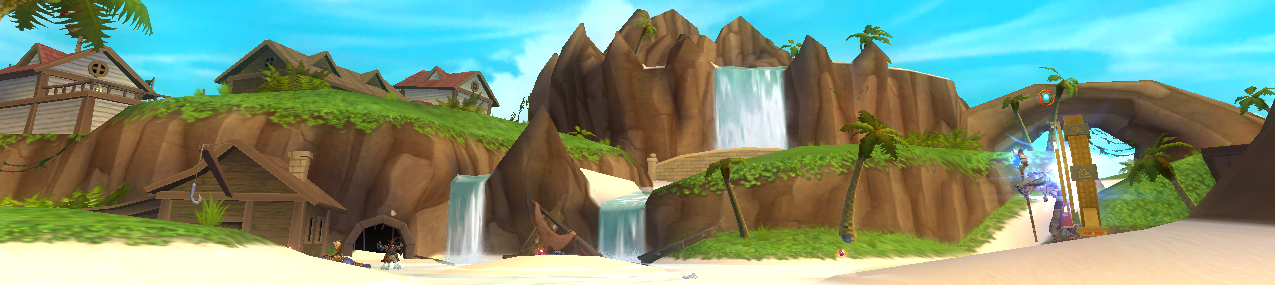
Krokotopia
This world actually comes as a surprise to me, as I had trouble justifying it over something that might have potentially been more relevant to the story such as Darkmoor (which is theorized to be where our parents piece of the map is). However, I found after much thought that Krokotopia is the only world in which Kane’s eye can still make any thematic sense. So, I decided that a solution to this predicament would be that our parents had previously passed their map piece off to Gazpaccio who kept it until it was stolen by Kane. This is how Kane initially formed his plan to reach El Dorado and where he began to remember the golden construct that he once was. I recognize this as a mild retcon because Cao Tzu notes when we meet him that three pieces of the map remain to be found but I am willing to assume that our parents hid their map piece so efficiently that no one even knew it was with Gazpaccio. As such, this map piece is simply among the armada’s pieces.

Anyway, this world is going to have a setting entirely in contrast to the version we saw in Wizard101, similar to Mooshu. Being that we are pirates, I figured that it would make much more sense if we entered through the Krokotopian stormgate from Aquila and found ourselves in the Spiral’s version of the ancient egyptian Nile, which is simply bustling with life. However, in order to get there we must first do a favor for the current emperor of Aquila. After interrupting his audience with none other than Cleowpatra, he tasks us to deal with Pan, the Aquilan immortal of the wilderness, who has gathered a handful of other lesser immortals and followers to put a stop to the Aquilan’s expansion into the wilds. Upon passing this test and seeing that both our crew and he might benefit from the circumstance we find ourselves in, the emperor offers us a deal to give us the windstone to Krokotopia so long as we agree to smuggle the aspiring pharaohess, Cleowpatra, into Krokotopia to mary the current pharaoh, Ramses. Once there, Ramses requests our help in solving his skirmish with the Hippites, a land in which the Hippos have repeatedly offended their ram king, in order to retake their city, Kadesh. After having done this, we return to the Krokotopian palace and attend the banquet Ramses has thrown in honor of the victory we have won him. However, the situation escalates quite quickly when the pharaoh is informed that the library of Aquilus has caught fire. During the chaos in the royal banquet hall, Ramses is promptly poisoned and falls to the floor, dead. Coincidentally enough, the fire and the assassination are blamed on us, but Cleowpatra encourages us to take Ramses’ body and flee into the desert to find a way to ressurect him while she stays to smooth things over with the locals before they detain us for our wouldbe crimes.
An old…friend?
During this segment of our journey we stumble across a traveling caravan where we reconnect with Phule whose outfit looks notably different–except for the mask of course–as a consequence of his newfound nomadic life. He warns us about Queen’s presence here and how much she has done to stir up trouble in the world as he gives us proper information on what she actually is. He tells us that while Kane would never admit to it, our former nemesis had always felt that an important piece of him was missing, but he had no idea how to compensate for it. Therefore, the armada elites were all built to be extensions of himself and his emotions that he knew were missing. At least, this was his goal until he stumbled across the mysterious purple crystals in the gold monkey valley. Through Bishop’s research, he discovered that these crystals served as a makeshift gateway between both the physical and spiritual worlds, and after a bit of trial and error, he made a clockwork with one of these crystals as its core which essentially gave it the one thing he had never had: a soul. Phule concludes that this crucial element to Queen’s design allows her to draw life from the souls of the dead, in effect making her virtually undying so long as the crystal is not destroyed and allowing her an autonomy that grew beyond Kane’s directives (which is also why the machine disobeys Kane’s direct orders in Valencia 2 as it too used these crystals as a power source before forcing us to destroy it). Phule informs us that, while we will have no luck bringing the dead body of a king back to life in the middle of the desert, we might have more luck solving this predicament by tracking down the Krokotopian immortal of knowledge, Thoth, who resides in an oasis not far from here.

Once we reach our new destination, we discover that Thoth’s residence is his library which is stationed underneath the waters of the oasis. After a short dungeon leading down into the depths of the waters and out into the expanse of the underground library, we bring Ramses’ body to Thoth who informs us that, even though he has the power to mummify and preserve the body, it will not be enough to restore his soul. In order to restore Ramses’ soul to his body, we must meet the sun where it sets in the horizon and follow Ra’s sun-boat into the land of Night where we will discover the means to bring the fallen king back from the dead. Upon this grave undertaking, we reach the mountain range of the setting sun in which, according to Thoth, Ra’s boat and crew take his own deceased body through the land of Night in order to restore him to life for each new day. So, we catch up with the aforementioned vessel before it sails into the Krokotopian underworld and negotiate with Isis, Horus, Set, and the Night Sisters to allow us to accompany them on their journey so that we might also raise a fallen king from the dead. The Krokotopian immortals allow us to take part but warn us that Apophis, the great snake, routinely attempts to devour their ship nearly every night and should anything go wrong, the fate of Krokotopia will be in our hands.
The first two realms of this land pass by relatively smoothly, both Ra and Ramses lay side by side in their mummified states. However, upon reaching the third realm of the dead where Osiris judges the souls of those that pass through his realm, he informs us that the soul of Ramses had long since passed through to the other lands. So, we continue on, fighting and defeating any being that might attempt to halt the progress of the boat. Eventually, we reach the land of the dead where the souls of mortals reside. It is here that we finally manage to rescue Ramses’ soul and return it to his body, but first we are forced to wrestle it from Anubis, the Krokotopian immortal of the dead, who was in the process of leading it to its destination.

Unfortunately, our goal is not completed by simply retrieving the soul. We must now wait for Ra to be resurrected so that he might breathe life back into the fallen pharaoh’s body. So, the final stretch of the journey is where Khepri, the immortal scarab, is destined to merge with Ra to create the rising sun. However, this is also where Apophis continuously attacks the boat. This time though, Apophis attacks preemptively and manages to rock the boat just as Khepri is about to merge with Ra so that he instead merges with Ramses. While his wrappings are partially burned away, Ramses is indeed brought back to life and subsequently begins to be infused with the power of the sun, but this proves to be disastrous as Ra is the only one strong enough to prevent Apophis from swallowing the sun-boat and then Krokotopia itself. Unfortunately, the scarab’s power must regenerate while the sun-boat brings day to the land below it which makes the current situation even more dire. Recognizing the imminent danger, Horus, Set, and Isis launch a coordinated attack at the enormous snake and manage to stall it from swallowing their boat while the Night sisters frantically attempt to figure out how to separate Khepri from Ramses who is struggling to gain his bearings in his rejuvenated state. While this is going on, the fight spills out into the Krokotopian skies, causing an eclipse. Finally Ramses manages to forcefully sever the scarab from his chest, leaving a burn mark in the shape of a scarab but allowing the remainder of its power to enter into Ra. Upon his reawakening, Ra quickly adapts to the chaos and joins in the fight, commanding us to leave before he turns up the heat in order to burn away the shadows.
After disembarking, we end up taking Ramses, still partially wrapped in cloth, a blackened scar in the shape of a scarab on his chest, and now able to wield an inner fire from his hands, onto our crew as he claims that his life is now indebted to us. With the eclipse still overhead, we go to return to Krokotopia’s capital city, Memphis, in order to check in on Cleowpatra to ensure she has handled the mob in the city. We discover that she indeed has and has also succeeded in taking her spot on the throne of Krokotopia which is why we brought her here, but to our surprise and dismay, we enter into her chambers as she as in the process of offering Queen the golden eye that we had come here for. This eye had previously passed as the sacred eye of Horus because the Krokotopians did not realize that the eye and its power had belonged to the dismantled giant from El Dorado. Unfortunately, we fail to catch her here once again as Cleowpatra immediately calls her guards to dispel us from this world now that her facade has fallen away, but we do manage to snatch the Armada’s pieces of the map to El Dorado before Queen can use the power of the eclipse to weaken the enchantment on the map pieces in order to destroy them. If we had not succeeded in stopping this, it would have effectively removed our ability to follow her as her goal is to reach El Dorado before we can while also preventing us from doing so. In the process we allow Queen to get away again with Kane’s remaining pieces, but Phule himself, despite noting our inability to stop the Armada’s plans and scoffing at our desperate need for more help, concedes to finally pick a side and joins our crew as an invaluable source of insider knowledge so that we might actually have a better chance at saving the spiral that he has grown to love. Thus, we escape the capital and flee the world, on our way to Mooshu so that Cao Tzu can finally help us translate the completed map.
El Dorado
As our journey finally reaches its conclusion, we must now face the dreaded city of gold. We cross through the stormgate and are met with… a welcoming party. The city itself is by all means more impressive than the stories or the crude replicas of its structures hidden in the jungles of skull island ever give it credit for, but the giants are nothing like what we’ve been expecting them to be. This is actually a welcome relief to you and your crew, as there is absolutely no way anyone in your crew would have survived longer than Marco Pollo and his if they had indeed turned out to be hostile. One by the name of Able even welcomes you with equal parts surprise and caution. He explains to you that a fellow clockwork by the name of Queen had arrived before you and told them to destroy anyone who persists after her. Yet, he mentions that you bear a striking resemblance to an individual who had previously shown great kindness to he and his kin and had told them many stories of what exists beyond El Dorado. He concludes–to your relief–that he and his kin will not be aggressive when there is no threat on the condition that you do not take that which the giants were tasked to protect: the city’s gold.
Upon striking this agreement, he then offers to point you in Queen’s direction but warns you of the golden miasmas and monsters that lurk within the depths of the city of gold. Along the way, you finally meet the spirits of your parents, who have been waiting for you in El Dorado. Your parents reprimand you for coming here, but then give the exposition for what had happened in El Dorado, informing you of the secret of this world. El Dorado itself appears to be a naturally formed world, but it is actually entirely artificial. The golden giants are a predominantly peaceful race who allowed Marco Pollo and his crew to exist on their world on the condition that they do not take the city’s gold. Of course, the greed that corrupted the hearts of some of Pollo’s crew overtook them as they gazed upon the mountains of gold that seemed to naturally grow on the island, and they attempted to smuggle some of it back to the ship. This of course caused the giants to retaliate in force and resulted in the horrific story that Pollo and his crew returned with.
However, there is more to it than that. There exists in this world a relic left behind by its creators, and it has begun to grow increasingly more unpredictable. This relic is known to them as the philosopher’s stone, and it not only has the ability to transmute any natural material into gold, but also to create sentient lifeforms from the gold it transmutes. This explains why there are now golden monsters as well as golden giants on the island. The giants themselves are actually the original guardians of this relic and use their zealous guardianship of their world’s gold as a front in order to protect the secret of this technology.
The true Queen’s Gambit!
After hearing this, you resume chasing down Queen in order to prevent her from reaching this relic. Upon confronting her once again, you discover that her goal was never to reach El Dorado in order to potentially turn the power of the stone against the spiral at all. Rather, you discover that Kane himself had managed to send his brain directly to El Dorado in his final moments in the depths of the machine. As we know, Kane is smarter than us and had thoroughly prepared for any outcome no matter how small the chances were of it occurring. So, Queen’s objectives in the event of Kane’s defeat in Valencia were merely to find a way to destroy the armada’s map pieces and then reach El Dorado herself to insert Kane’s mind, hand, and eye into his refined original body so that he could become perfect once again.
Queen succeeds in resurrecting Kane in his new body, but this requires that she use all of her life force within the crystal inside her. Upon his reawakening, he taunts you, claiming that he was the Grand Design all along. He tells you that, while his brain had suffered a bit of amnesia and confusion upon its reawakening in his flawed body, he had slowly begun to remember what he was after Gazpaccio brought him back to life, and while you were chasing down a map that had blown to the wind, he had been transporting his original pieces directly to El Dorado so that he might reclaim his perfect form. As the other giants sense his presence in El Dorado, they begin to arrive. The one who we have come to know as Able openly defies Kane, seeing that he is merely a hollow version of the construct that he used to be after noticing that he is missing his heart. They begin to fight, but the fight is over almost as soon as it has begun as Kane’s ruthlessness and strength overpower Able’s relative pacifism. So, Kane defeats Able but does not kill him. Instead he tosses Able’s broken body toward us, and boasts that we mean nothing to him; the only thing that matters to him now is that he uses the stone at the heart of this world to convert everything within the spiral to gold, effectively ridding it of all of its impurities.
Before we can give chase, Able stops us with one last idea in mind to stop Kane: he offers us his own heart so that we might put it into Kane in order to get him to see the error of his ways. We find Kane and the stone, but we are forced to destroy the stone in order to distract Kane long enough for him to drop his guard so that we might place the heart into his chassis. Phule plays the classic court jester that he is in this plan by taunting Kane with his own line about how sons are meant to replace their fathers and how Kane used to always say that to Deacon. This plan of course ultimately succeeds and through Able’s sacrifice and Phule’s distraction, Kane finally regains his missing piece. He feels the sorrow and regret for everything that he had done, everyone he had hurt, and everything he had aimed to achieve in an attempt to purify the spiral of its own corruption.
In our final heart to heart with Kane, he reveals to us both an answer to the final mystery and a new path that we might tread. He informs us that the creators of the stone, and subsequently his original giant form, are the original celestians who have long since disappeared from the spiral, but he also tells us that El Dorado is not the only artificial world in the spiral. The celestians were known in their time for their ability to make impossible objects that are far advanced beyond anything the spiral has known even today, but before they disappeared, they successfully created entire worlds throughout the spiral that were eventually lost to time whose sole purpose was to guard the artifacts that they left behind. So, Kane’s final message to us is to locate these legendary worlds and destroy the artifacts located within each of them so that the spiral might never witness their capability for mass destruction. He knows from the wars he has seen in his time outside El Dorado that if any of the worlds in the spiral were to glean the information of these artifacts, they would surely turn on each other and a new war of the worlds would ensue. This “war of the worlds” arc as well as the explanation of what happened to the celestians is what I would like to see from Pirate101 going into the future as I believe that it would allow for the most dynamic storylines to come from worlds we have already seen. This would effectively keep these worlds relevant and call into question who we really want to stay allied with as we currently see ourselves partnered with what seems like every world in the spiral.
Honorable Mentions
- Polaris Part 2: I think a really good story arc would be to go over the historically accurate fall of Napoleon and how his final loss was to the Duke of Wales. However, I feel that this should come in as a part 2 of this world simply because it would fit better with making Marleybone and the Roman side of Aquila the next antagonists of the game. Furthermore, I believe it would be very cool to insert a Joan of Arc character in either part 1 or part 2 as she was one of the most notable figures in French history. Though this would place her in the wrong time period in regards to historical events, having her on your crew is something I would find fascinating.

- Darkmoor: the ultimate goal behind this world would have been to discover where our parents had hidden their piece of the map while we walked in the footsteps of the place they had been raised, and it would have involved characters such as Van Howlsing (Van Helsing) and Vlad Dracula the Impaler. I would’ve taken a bit of inspiration from Hugh Jackman’s Van Helsing movie and other common folklore surrounding Romania (the country that this world is based off of); however, in the end I thought it would make more sense for our parents to pass their piece of the map onto someone else in an attempt to protect their family from those who would seek it.
- Rajah: While I might be the only one who remembers this, one of the tigers from the isle of fetch in Marleybone mentions that they were friends with our parents. This is a plot point that I would personally hate to leave behind, and it came to mind when I was brainstorming different places that our parents may have left their piece of the map at, but I ultimately settled with them having left it in Gazpaccio’s hands as any one of these honorable mentions would have potentially pushed the content barrier of El Dorado ending as you reach level 100 past that point even though the war elephants here could be really cool.
- Albion: This world should come as no surprise to returning players as many should recognize it as the home world of fan favorite companion, Bonnie Anne. This world could take us deep into Irish/Scottish folklore as they too were rich in both history and mythos. I believe that this world could connect to Marleybone as well as possibly be connected to Avalon, and it could be where we get involved with age old characters from real world myths and legends such as Robin Hood, a thief after our own hearts.
- Carthage: Despite the fact that this place is actually a city rather than an entire country and not mentioned at all in the lore of the game, I found it quite interesting as I was researching the real life equivalents of the other worlds, and I decided that it was interesting enough to mention here. The entire idea of this place would be to set up another hubspace for our pirate like how Wizard101 graduates our wizard from Ravenwood to the Arcanum.
- Mirage: personally, I was not a big fan of this world in Wizard101, however, I think that it not only makes much more sense in Pirate101 not just for the mention of “a traveller” being there on their way to El Dorado in Wizard101’s Lemuria pre-quest, but also because it would allow for a larger amount of Prince of “Purrsia” and Dune references that Wizard101 unfortunately did not have that would really make the world pop.
- Monquista/Zafaria: A world that I have definitely always wanted to see more of is that of the homeland of the monkeys. So, I believe that adding a new skyway while also potentially teasing a stormgate to Zafaria so that we can meet other characters with concept art that have yet to make an appearance, such as a Monquistan bounty hunter (who I like to call Ulysses Paw after the Black Panther villain) that I recall being mentioned in a Swordroll blog about eight years ago, would be a welcome addition to our current venue of worlds.

- Atlantis/Sumer: As I predict that the story will move more toward finding more lost and forgotten worlds of the spiral in order to figure out what happened to the celestians and what to do with the artifacts they left behind. The two countries mentioned above have some of the greatest potential in relation to the subject matter, and really honestly should be an entire list of Mesopotamian societies that rose and fell over the years such as Eridu, Uruk, and Babylon.