The Tower of Moo Manchu comes to its high point on Floor 8, when your group takes on the Nefarious 5. If you somehow managed to resist some sweet glowing eyes and take down a very charming lady, the remainder of the dungeon is a breeze. Of course, after you know what’s coming.
On my very first run through the Tower with fellow Duelist Crazies Eric Stormbringer and Leah C, we hit floor 9. Just some Terracota warriors. If they’re anything like the ones from the Earth Guardian temple, this will be easy. Except that Eric neglected to tell they all come equip with a powerful Buccaneer charge ability. So as he and Leah hide beneath a Black Fog that I’m too far away to reach, I spend the next 3 minutes taking one Vicious Charge after another until my Musketeer’s head is spinning.
There’s plenty that could have been done differently. We could have stayed away from Hidden so that the Terror-cotta’s didn’t focus on just one person. Or I could have moved my Valor’s Armor/Leviathan’s Call to the front of my power list. But on our latest run, Eric came up with an even better, and more interesting idea.
Ratbeard.
Or more accurately, a Rat Pack.
Ratbeard?
PvP Pirates are already in the know that Ratbeard is one of the premiere companions for stopping rushes. And his epics choices have been geared towards that role from the beginning. He was one of the few companions in the early days to gain access to Hold the Line 2. Rat gives up Relentless for approaching epics like Repel Boarders and First Strike. And with his recent promotion in Marleybone, he gains a defensive buff and a knockback AoE. If you need to stop a charge, he’s your man rodent.
Eric’s idea was on the fly, and simple: What if we line up Ratbeards to stop the Charge?
Anyone that has run the tower enough will tell you, once you get past the barrage of Charges on turns 1-2, the rest of the fight is pretty easy. Our idea is form a line of Ratbeards to stop the charges with Hold the Line, and soak up the damage, while the other Pirates and companions sweep up.
The Supplies
Players
Four Pirates that Communicate
This strategy requires that all four players know what’s going on. And for inexperienced groups, that means communication.
Communication is key. This strategy can and does work with both established teams and random pickup groups, so long as everyone is on the same page. Once your group is experienced, silent runs are completely possible.
Companions
Four Ratbeards
But of course, Ratbeard is the anchor for this strategy. Also, each Ratbeard should have Hold the Line 2 or 3 for the strategy to work. Anything less and it leaves a gaping hole in the line. Editor Note: With the Summer ’15 Companion Epics Updated, Ratbeard can easily get HTL3. Giving him Repel 3 and Blade 2 would complement this strategy nicely
Four Bonnie Anne
This strategy may be called the Rat Pack, but the Lady Fox is just as important. Any Bonnie with Burst 2 or more is fine, and one with Overwatch is a big plus.
While Bonnie is the logical choice, she isn’t the only musketeer that will work. I’ve seen Zeena (bonus fire attack) and Chantal (bonus agility buff) also used effectively.
Etc.
Doubloons
During tests of the strategy, we found doubloons weren’t needed, but were always a good help.
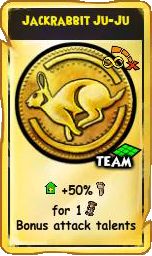
Jackrabbit Juju really allows for you to pump out damage on the offensive turn, and other protection Doubloons are also fine to use if you have them. Ratbeard has bulk, but a Shield Wall Doubloon never hurt anyone. Further down, we list a handful of doubloons that will also work fine.
Strategy: Stagger, Stop, then Sweep
stag·ger
/?stag?r/
2. An arrangement of things in a zigzag order or so that they are not in line.
One of the things we learned in the first playthrough was that placing the four Ratbeards in a straight vertical line did work, but it wasn’t the most effective tactic. We found that the Terror-cotta would walk through each other to avoid Hold the Line. We did stop most of the Terror-cottas, but a handful still made it through.
The conclusion we reached: staggering.
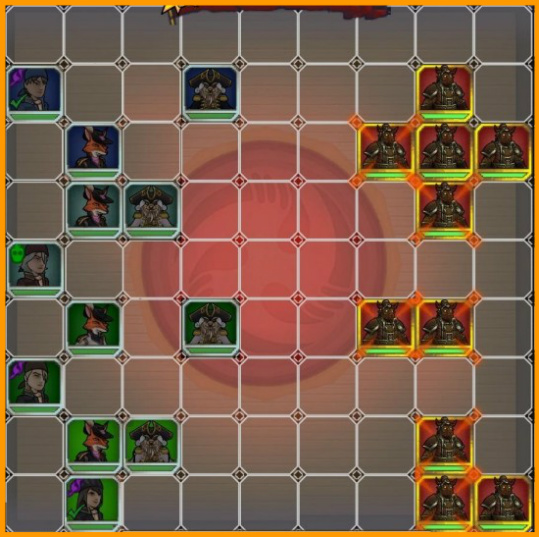
Staggering is simple, but requires a coordinated group. Basically, everyone needs to be on the same page and can communicate. Other than that, it’s not a difficult concept. To the right, we’ve snapped an image of a successful stagger that our team performed. Generally, as long as your Ratbeards’ Hold the Line fields do not overlap, your stagger should be successful.
Once you and your team are prepared to jump into battle, the fight should unfold like so:
Phase One is the most important phase of all, and begins on the very first turn. Terror-cotta warriors will be charging your party the moment you press that end turn button, so you need to move your units into position right now. (Note: Phase 1 will specifically describe just the first round).
Your platoon of Ratbeards should move up and form that staggered barricade. Hold the Line 2 will give you enough charges to stop almost all of the Terror-cotta. By moving into position, Ratbeard loses the chance to throw up a Triton’s Song, but you’ll find he actually doesn’t need to. We’ll explain why a little later.
Once your Rat Pack is positioned, you still have two more units: your Pirate and Bonnie/Musk Comp.
If your Pirate is far enough back from the Ratbeard line, he or she can spend the turn casting a buff if you have one. Otherwise, scoot them back a little. If you have any Musketeer Pirates with you, Bounding Overwatch is a great move.
Bonnie Anne should occupy the space between the backline and the Ratbeard frontline as pictured above. This lets her let loose with Overwatch as the Terror-cotta swarm in, and sets her up for Phase 2.
Finally, play your Doubloons this turn. Jackrabbit Juju is nice, but others work as well. We’ll detail our recommendations below.
Phase 2
Terror-cotta should have hit your Ratbeard wall like a truck at this point, and hopefully very few made it through. Ratbeard and Overwatch from Musketeers (Readied Spell from Witch if you played Jackrabbit Juju) should have softened some of them up.
I like to affectionately call this the Counterpunch phase, after Nick’s Level 95 Fire Guide, because it works the same way. Phase 1 absorbed the first punch. And now it’s time punch back.
Release your attacks. AoE like Bombs, Mojo Storms. Or even just high damage attacks. Your Ratbeards can use either their critical strike powers or Clear the Decks, which will push some of the Terror-cotta back. I would advise you to use Power Cards on this phase. Terror-cotta’s have very effective dodge for Buccaneer types, and their charge power halves accuracy.
But these factors are also why we recommend Bonnie over other Musks. All four Bonnies should unleash Scatterblast on this turn. Not only is it good multi-target damage, we’re also hacking at that dodge stat 4 times. This will allow any surviving Ratbeards or allies to still land hits after they run out of power cards.
Phase 3
The cleanup phase. The plan from here on out is pretty standard. Take down the remaining Terror-cotta how you see fit.
Once again, Bonnie is replaceable by any solid Musketeer, like Chantal or Zeena. One reason I really like sticking Bonnie in this role, though, is due to her Second Wind power. Upon defeat, Terror-cotta warriors explode and deal a few hundred points of damage to surrounding units. This damage can quickly rack up on top of their regular attacks. But bringing multiple Bonnie Anne means gaining access to multiple copies of her Second Wind healing card, which is great for teams that didn’t bring a Privateer Pirate along.
Either way, these warriors lose a lot of their steam after their charge power has been used, and this strategy specifically defends against that charge power. Shouldn’t give you any trouble from here on out.
Why It Works
The Rat Pack strategy works so well because of the Terror-cotta’s AI (Artificial Intelligence). On top of every other role the Musketeer companion has in this setup, it also functions as bait. Almost all the Terror-cotta will attempt to target the Musk, but Ratbeard’s Hold the Line prevents them from ever reaching it. Meaning few if any Ratbeards will take damage on the first round.
Finally, the best aspect of this strategy is that it is virtually FOOLPROOF. We’ve seen other approaches work better (such as the strategy with Captain Blood’s Flames), but they rely on having the right mix of pirates with the right gear, and getting the right powers and doubloons on the first turn.
The Rat Pack strategy uses some of these aspects, but (and here is the key) it does not depend on any of that. A Ratbeard with Hold the Line 2 and a good Musketeer companion are all your team needs to succeed. Everything else is just icing on the cake.
Useful Doubloons
Doubloons have been useful in many strategies since their release in the Spring. This guide does not break tradition. We recommend Jackrabbit Juju on the first turn if you have some to play. Other options are Agility buff, Crit boost, Accuracy, and Sluggish (to stop Terror-cotta Blade Storm if they critical), etc.; and all are reasonable on the first turn.
On later tests, we’ve found many people like to play summoning doubloons. Doubloons minions are perfectly fine for drawing off some of the Terror-cotta heat.
Quick Steps for Referencing
Turn 1
Positioning Reference Image
Each Player chooses Ratbeard (with Hold the Line 2) and Bonnie Anne (or another solid Musk) for their companions.
Move Ratbeards to the frontline. Space them and stagger them to form a wall to block the Terror-cotta charges.
Have your Pirate move back if in the way. Otherwise, spend the turn casting a buff on something. (Musketeers should cast Bounding Overwatch if able)
Move all four Bonnie Anne to the midline spaces.
(Optional, but recommended) Cast your doubloons. (Jackrabbit Juju is a personal favorite, if you have them).
*Terror-cotta Warriors swarm in*
Turn 2
Unleash your wrath. Use Power Cards (AoE attacks if you have them) to lay waste to the stone warriors.
Have all four Bonnie Anne use Scatterblast for AoE damage and dodge reduction.
Have Ratbeard hit with Critical power cards or Clear the Decks.
(Optional) Offensive Doubloons are fine on this turn.
*Terror-cotta Warriors flail and explode, as they didn’t expect you to be prepared*
Turn 3 – End
Fight them as you normally would.
With four Bonnie, you have four Second Wind. Make sure to keep everyone alive, especially since the enemies explode.
 PvP Pirates are already in the know that Ratbeard is one of the premiere companions for stopping rushes. And his epics choices have been geared towards that role from the beginning. He was one of the few companions in the early days to gain access to Hold the Line 2. Rat gives up Relentless for approaching epics like Repel Boarders and First Strike. And with his recent promotion in Marleybone, he gains a defensive buff and a knockback AoE. If you need to stop a charge, he’s your
 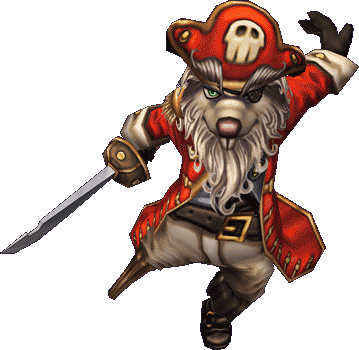 Eric’s idea was on the fly, and simple: What if we line up Ratbeards to stop the Charge?
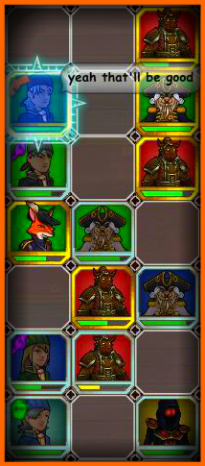
 The conclusion we reached: staggering.
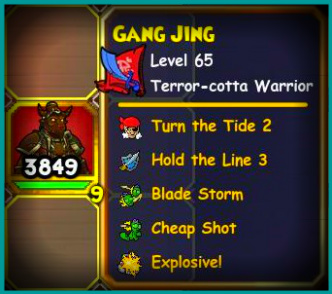 Phase One is the most important phase of all, and begins on the very first turn. Terror-cotta warriors will be charging your party the moment you press that end turn button, so you need to move your units into position right now. (Note: Phase 1 will specifically describe just the first round).
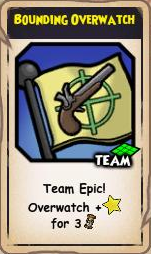 If your Pirate is far enough back from the Ratbeard line, he or she can spend the turn casting a buff if you have one. Otherwise, scoot them back a little. If you have any Musketeer Pirates with you, Bounding Overwatch is a great move.
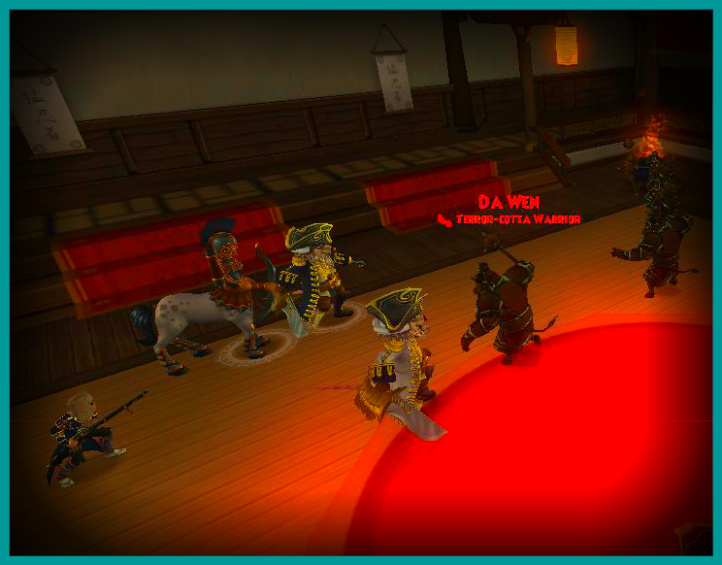 I like to affectionately call this the Counterpunch phase, after Nick’s Level 95 Fire Guide, because it works the same way. Phase 1 absorbed the first punch. And now it’s time punch back.
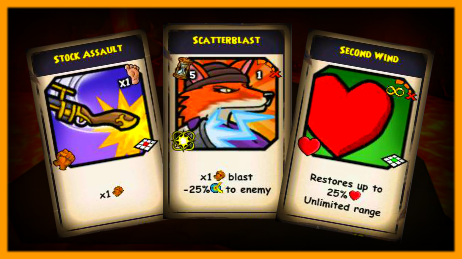 Either way, these warriors lose a lot of their steam after their charge power has been used, and this strategy specifically defends against that charge power. Shouldn’t give you any trouble from here on out.